Showing posts with label beginning sounds. Show all posts

Tuesday, November 1, 2011

C is for..

C is for cars!

Oh what fun today!  This odd-even number activity was a hit! 
I set up the stage by making a parking lot full of cars (to the left) with numbers 1-10 on them, gas pumps, and a ramp.  They drove a car out, used the pom poms to find out if that number was odd or even.  Then they went to the appropriate gas pump (glub, glub, glub) and then they sent them on their way down that ramp.  The little yellow slips of paper had the words odd and even and a set of dots with buddies on the even and a set of dots with buddies and one without a buddy on the odd.  I was certain to make the ramp go in the direction that the cars could go uninterrupted.  Loved hearing their descriptions of the cars and how far they went, etc.  Also, I loved that even though they couldn't always state the numeral name right off, they would sing the number formation verse that goes along with it!  Then at the end they drove the cars back into a parking space (1:1).  You could even have them put the cars in numerical order if you wanted.  I expect that I'll see a similar set up in blocks during the next few days.  Love how they take something and extend on it. 

Odd and Even
If you are an even number
You always have a pair
So if you look around
Your buddy will always be there.
But...
If you are an odd number
There's always a lonely one.
He looks around to find his buddy
But he's the only one.
Marg Wadsworth

We do odd and even at the calendar every day using the number of the date and craft sticks.  A child passes out the craft sticks to each child as they are counting and then we each count our set and find out if it is equal/more/less comparing each others and then we pair up the sticks to see if we have an "odd one out" or if they all have buddies.  They pick it up quickly!

Sensory: Shaving Cream
 
We read the book Things That Go by Richard Scarry, so we incorporated other vehicles besides cars today during sensory and art. 

Art: Painting With Vehicles
 This is always a fun, open-ended activity.  Can't see it with the end product but one child was actually making letters with the car tracks.  Cool!  Goes to prove that the process is more important than the end product.  Observe them while they work, you'll see alot!

Shape Matching
Pulled out a few of our highway shapes that we used a bit ago.  We worked together to put the shape labels on first, then they matched their shape car (www.childcareland.com) to the shape highway.  Also provided car counters so they could drive around the shape also.  Reminder, for those that may be interested, http://www.makinglearningfun.com/ also has highway letters and numbers as well.

Beginning Letter Sound Parking Lot
I loved hearing them "vroom" around and park in the right spot.  Now on these mats they had p, b, and d.  If you have a beginner---a child that hasn't explored these letters---consider making your own mat so these three letters are not together.  Better to introduce them all separately.  They fall in the category of "easily confused letters".  :-)  Also, this picture reminds me to remind you to go through the pictures first instead of assuming they know what each of the pictures are.  She was asking me what this picture was.  She thought it was a "van" but there wasn't a v on the mat.  It was actually a bus...but wasn't a school bus so she was confused. 

Number Matching Cards
www.childcareland.com (I'm pretty sure I got them there...I've had these for awhile)
When I made this set I laminated two sets each with the cars on one side and number on the other side.  That way they can match sets, either car set to car set or number to number or number to car set.  Today, I provided beads that they could put on each car.  This helps them remember which ones they counted already.

Anyway, that's some of what we did.  You can do so much with vehicles and the children really get into that type of thing! 

Wednesday, September 14, 2011

L is for...

L is for Leaf!
Today we enjoyed Leaf Man by Lois Ehlert.  During Journal Time, the children used paper leaves to create their own leaf character.  One child created a leaf lion and another created a leaf bird.  (The other children are really to young for "journal" so they just explore with the materials or are taking a nap at that time).

I frequently do a hands-on number chart with the children.  Doing these types of activities allow for reinforcement with number recognition, numerical order, concepts of first and last, odd/even, skip counting (for children ready for that), counting with meaning, 1:1 correspondence and whatever other basic concepts I am able to slip in...such as colors, like we did today. 

During group time we did a Mailbox activity from their Pumpkin/Leaves (preschool) theme "tub".  The children sorted whether the object started like leaf or ball.  Then for scissors today we did something similar on an individual basis.  I cut the leaf page in strips so it wouldn't be so overwhelming and they decided which pictures on that strip started with a /l/ sound and which did not.  They cut out the leaf that did and glued it onto the tree.   You could create something like this on your own very easily but I printed this activity from www.abctwiggles.com which is a sister site to www.kidssoup.com.  I find these sites have very easy to implement activities that are worthwhile to do.  It's one site I actually pay a membership to.  I haven't found another that is worth a membership fee yet.  Let know if you know of any great sites!  We are all busy and so why recreate the wheel if it's out there already?  :-) 
  
For art, we created marble painted leaves.  I'll share a finished product picture hopefully tomorrow as it's a two-day activity since we'll need to cut the leaves out once they are dry and then also find some sticks outside this afternoon to create it into a fall leaf mobile.  Stay tuned.  :-)  They love any type of marble painting.  Today they turned it into "popcorn" painting by bouncing the marbles up and down...thank goodness for high edges on the box!   Quite enjoyable to watch their excitement.  :-) 

Monday, August 15, 2011

We Like Kites

Kites are such a fun theme to do with the kids.  There are so many different things to do.  If it's a nice day/week...going outside and flying kites (even as simple as plastic grocery bags with a yarn string) is such a fun way to get the kids moving. 

I decided to have C. read the book for the other children today.  This can be a great benefit for the younger children because then they realize it's not that far away when they'll be reading too!  Anyway, my only issue was that C. tends to talk talk talk and it tends to interfere with the flow of the book for the other children.  So I don't have him read aloud too many times for the other kids.  :-)

 I chose this book as we've been introducing/reviewing the silent e and of course kite was a good example.  For our "moveable letters activity"...we seem to be moving beyond just moving alphabet manipulatives lately but this type of activity can be done with "adding e" manipulative...we used some silent e word cards that I came across. 
I chose a few to use, being sure to include a, i, o, and u vowels and that the words actually were common enough that the children would understand.  Great CVC sounding out practice initially and then adding the e to reinforce the long vowel sound.  These would be relatively easy to make on your own with your own words and font, if you desired.

For a bit of movement today, one of the children asked if we could do the parachute again.  Together, before the final child arrived, we put alphabet kites up on the wall in alphabetical order. FYI: I often encourage the children to start near the end of their sequence to figure out the next letter instead of all the way at the beginning.  By the end of preschool/beginning of Kindergarten they should be able to do this and it's a time saver!  I do the same with counting.  Start at 10 to get to 15 instead of starting at 1 each time. 
 So we got the parachute out and I placed on several kite bows that had pictures on them.  This printable came from www.makinglearningfun.com.  They tried to keep them on the parachute as long as they could.  Then I instructed them to choose a certain amount of bows from the floor.  (We did 3 bows a piece at first-I had created bundles of bows to make the activity go smoothly).  Then they told me what letter the picture/word started with and placed it on the corresponding kite string.  After they got the idea we did two bundles and they picked six a piece.  Had a little fun with the tape.  :-)

For our numeral formation activity, we did the Kite Graphing Book found at www.confessionsofahomeschooler.blogspot.com.  I actually purchased the Letter of the Week "curriculum" from her as it took so long to download the items individually and she has some very nice printables to share.  Just want to take a moment to reiterate that one must be careful of the term "curriculum".  Many of the printable available should be labeled as curriculum support vs. leading people to believe that it's an actual curriculum.  My opinion, of course!  Her Letter of the Week Curriculum is really just the printables she used for her lesson planning for the specific letter they were focusing on. 
 I provided pointers because it makes counting a little more interesting and the bows were small enough that the pointers made it easier to count also.  I encouraged the children to x out the boxes...mainly to save time but also because the two younger ones needed practice forming x's.  That's not an easy letter to write...though it looks easy.  That crossing midline and backwards diagonal.

Art:  We talked about the different kites we have seen and the fact that not all are diamonds.  So, they made a kite collage, including white oil pastel clouds and washed with blue water color. 
 

Scissor/Word Family Activity. 
I printed a set for each child and on cardstock with the hope that they'll read and sort the cards at home for further practice.  However, you may wish to make one set and laminate.  You can do something similar as we did with the parachute.  Or you can hide the bows around the room.  Or put a paperclip on the bow and create a dowel/magnet "fishing" pole.  If you were planning on making/laminating one set, I would suggest you take the time to cut the bows out as well.  It would be more appealing to the eyes.  However, I knew that my students wouldn't have the time or the interest in cutting out all those bows!  So rectangles it was.  FYI:  on the website, they have many word families available for this activity.

Phonological Awareness: Beginning, middle, ending sounds
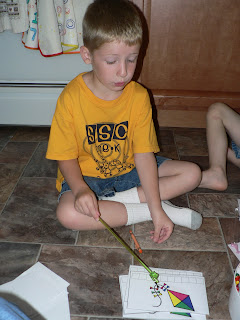
This went well and there are multiple things you could do with this simple kite mat.  As you can see in the picture, I used picture/word cards and a chip.  I purchased the cards awhile ago in the school section at Target.  I love them!  Now, they've gotten used quite a bit that a few of them are all coming apart at the perforated edges so we'll soon need to find a new use (maybe use them with our moveable letters!).  But they can fold to just show the picture and then open to check their work when we leave them all together.   Also, for younger students, consider using the mat to practice with sets of 3.  They can place a manipulative on each bow and count them, then set them aside.  You may wish to have small picture cards and do "which is different?" activity.  So maybe a banana on the first bow, a pear on the second and a dog on the third.  Encourage your child to tell you why the one they chose is different.  How about reinforcing rhyming?  Which picture doesn't rhyme?  Or which picture doesn't start with the same beginning/ending sound?  You can add bows to your string and do sequencing or patterning.  If you have time...have the children decorate their own kite.  Use your imagination...feel free to share other activities you can think of to use with this simple kite mat.

Here's one of the products I purchased from Discount School Supply this fall.  Already I love it!
Relatively durable/stable...which I could not say for others I looked at at the stores.  This one came with 10 trays.  The trays are not as durable as the previous ones I purchased but they'll do.  I decided to use it last night by arranging the materials for each activity on a separate tray from top to bottom.  That way I just took the stuff off the tray instead of it being piled on the floor or on the table/counter and so on.  And by the time we got to art we had emptied a few of the trays so I used it as a drying rack so no wet art on my counters as I'm trying to get ready for lunch.  Then instead of making umpteen trips to pile it all up to put away later...I just rolled the cart into the computer room.  :-)  I can see that it would be lovely for a homeschooling mom...especially if their child did well with a visual of when they they will be "all done". 

Today was a great start of the week....my only issue now is the doctor's office has been busy for over an hour (which this is NOT unusual...drives me bananas).  Need to make an appointment so I can get my child care renewal paperwork in.  Have a lovely week! 

Thursday, April 28, 2011

April Showers Theme

It's never too early to explore with any type of concept.  It will definitely set the foundation for future learning if they are too young to grasp the concept.  One benefit for having a mixed age group is that children listen in and explore with concepts long before they are "ready" too and if they are older but still don't grasp it...then they'll get it the next go around.  The problem comes in when we, as adults, expect the children to grasp and show understanding of a concept before they are ready.  I see that often with well-meaning parents trying to teach their children academics at two years old.  Just like we develop physically from trunk to extremities...we also learn things in an order, cognitively, and it all must build upon each other.  So, if a parent is thinking their child is "smart" and wants them to write their letters of the alphabet "because their know their abc's" that parent is actually pushing the child in a way that is going to cause frustration which can cause issues with attitude toward "school" later.  More likely than not, the 2 year old can sing the abc song.  Yes, that has it's place...but that is not the same as knowing the letters and sounds out of place.  Also, at two, they are not physically ready to write.  There needs to be so much more fine motor work done prior to expecting a child to pick up a pencil and write their name.  But it just come from the lack of knowledge of child development coupled with wanting "what's best for their child". 

Okay...not sure why I felt I needed to mention that...but maybe because one of our activities today would have been seemingly "too advanced" for my students.  We actually worked with word families today.  But that's Kindergarten work!  Well, perhaps, in a traditional school setting.  But I'm not all that traditional.  :-)  My goal is to help each student, individually, take a step forward from where they are at.  Actually, I would say that both the 4 and 5 year old are probably more advanced then what they expect of the K students upon enrollment, at least in our area.  But so be it.  Why hold them back?  Go with the flow of their development.   Anyway, after a child can hear and make their own rhymes and are also showing letter recognition, I like to take it a step further and introduce word families.  They noticed right away that the words we were working with rhyme.  Yeah!  And the oldest student noticed that the word had the same letters at the end of the word.  Yeah, again!  There in lies the key difference between word families and rhyming words.  Rhyming words use the sound at the end of the word and word families have the same sound and the same letters at the end.  For example:  bear and chair rhyme but they are not in the same word family because they have the different ending letters.  All four older children did this activity today.  Definitely exploration for the 3 and 4 year old but it's stretched the brains of the two 5 year olds, especially the one that has been with me since a baby. 

You can't really see it well but some of the raindrops have -ot word family pictures, dot, spot, cot, hot, tot, pot.  I wrote the word so that the ending sound was in a different color then the remainder of the word.  For the younger ones, they'll use the activity for rhyming reinforcement but the older ones will begin to build on what it means to have the same letters at the end of the word.  Each child did a different ending and we'll keep them all posted for a bit.  Extras:  half of a circle is a semi-circle; crayon-water color resist as an art technique; counting raindrops; noting that sometimes a handle on an umbrella is the same shape as the letter J. 

Okay...my wall is more than a drying rack (previous blog).  :-P
It's a work space also.  It's beneficial for children to work standing up and it's nice for me not to have to help each child up into the booster seat at the table each time they go to a new "work".  :-)  Activities like this work well at a wall.  There were actually two more clouds off to the left. I spread it across the whole wall to keep it less cluttered.  I taped the clouds on the wall and placed the raindrops on the wall in two columns with sticky tack.  Sticky tack works very well for activities that require moving pictures.   The children looked at the picture on the raindrop and placed it under the cloud with the same beginning sound.  This activity is a printable from www.kidssoup.com

Rainbow Painting
I did encourage stripes because I wanted them to get the effect of the project.  So that put it's down a bit on the art scale.  :-)  The younger ones tend to use every color that you provide.  The older ones tend to come up with their own idea.  That's what we want to strive for.  The craft scissors were difficult for the three year old to use and even the four year old, but she got it.  I wonder if they have child size craft scissors.  Hmmm, will have to look into that! You could do the same idea but with regular scissors.

Tomorrow is Free Friday.  I don't plan specific activities for this day.  Sometimes we finish up projects or doing baking/cooking.  We'll just see how the day goes.  Perhaps it will be really nice outside :-P and we'll spend the majority of it outdoors.  Wishful thinking, I know!  Hope you all have had a great day!