Showing posts with label ordering by size. Show all posts

Friday, April 13, 2012

Flowers

Various activities from this past week.
Flower Bead Sorting
A great "practical life" activity.
The variety of materials you can put in with the flour and sift is endless so you can make it theme related very easily!

Flower Shop
One aspect of a home-based preschool that I struggle with is that many of us are unable to do the typical 'centers' that a center-based program can do unless you have a space separate in your home or are wiling to give up the "home-like" environment.  We do not and nor are we willing to give up the home-like environment (I say "we" because home-based child care/preschool effects the whole family).  So dramatic play is often provided in a tub of thematic materials and the children seem to have no issue with making it work for them.  It's really more me that prefers the 'center approach' to preschool...specifically wishing for a designated larger area for dramatic play.  But so be it.  When we do the flower shop we have the various materials for a shop available but also incorporate the piano bench and the puppet stage.  Oh, the puppet stage gets used in so many different ways.  :-D  The kids can be pretty creative.  I guess that's one benefit to having a dramatic play tub route vs. a center is that their play becomes very imaginative and that's a plus!
Basic materials we've used...
vases/cups
flowers
seed packets
Styrofoam for arranging
small watering cans
phone/phone book
cash registers
wallets/money/checkbook
paper and pencils
dress up clothes

Calendar Wall
I took down a lot of our posters and such that we had accumulated over the past couple months.  It was getting to be a very busy wall!  So the materials we use frequently I put in a plastic dish tub nearby: month poster, counting sticks, Handwriting Without Tears Materials, and of course the weather symbols, crayons, pointers, individual calendars, etc.  So that left the visual schedule, weather mat, and calendar.  In it's place I put up flowers that focused on the vowels and a few basic word families to reinforce word families and rhyming.  Color and shapes are back up with the butterflies for T. who knows his colors but not all of his shapes.  A caterpillar that counts by 10s was added also.  A pattern sun as well.  They really got excited to see the changes.  So thought I'd just remind you again that if you are one who puts up displays and leaves them all year (or posters for your children)...consider rotating them.  I find that my kiddos often stop interacting with a display after it's been up about 3 weeks.  So about a month is a good time to switch them out and jump start that interaction again.

Blot Flowers
The process of this type of activity is awesome.  If you are T., one downfall is that it's messy...at least if you do it the way Ms. Amber/Mom shows you how to do it.  LOL  I encourage the use of a LOT of paint.  I had some leftover paper flower shapes from last year and so I simply folded them in half and reopened them and provided various colors of paint and brushes.  The children brushed paint on the flower, folded them shut and pressed...which if you have a lot of paint it squishes out the sides.  But that's fine!  They can paint anywhere on their flower, I do not encourage them to paint only one side and then press.  The results just aren't as bold and no matter where they paint, they'll get a symmetrical result.
Accordion Folded Spring Flower Collage
I was going to simply have them create a vase of flowers but this week I was inspired by Make and Takes and I cut a cereal box in half and provided a "buffet of stems" as she suggested.

Window Box Seriation
These turned out a little different than I first planned but to add the seriation from small to tall in there I had to change my plans from foam flowers and craft sticks stems to paper flowers and stems.  I initially thought that I would write the color word directly on the stem but that would have only worked if they had used a red flower for the small stem and since I gave them a choice we just wrote the word under the flower on the window box.
Simply fold a 9x12 piece of construction paper in half and trim to make your window box shape.  Provide various size paper stems and a selection of flowers.  Children glue the flowers to the end of the stem.  Open up the window box paper and glue to the top inside of the window box.  Then they add glue to the perimeter of the window box and fold and press to complete.
With this youngster, we worked on color recognition and counting to 5 instead of seriation. 
Parts of a Flower Painting
inspired by Teach Preschool
I had hot glued a small pom pom toward the bottom of the paper to represent a seed.  Then they were given brown and green paint and their choice of colors for the flower.  After they painted, they labeled the parts.  Today I chose to let them copy the word and I found that using the spiral bound index cards work quite nicely!

Dot Flowers
I picked up some colored sticky dots for dot flowers this last week. Great fine motor activity with the sticky dots and markers.
Later when my boys came home they spent a few minutes with the dots also to add to the flower shop.  :-)  Not sure if you can see it but the 6 year old created a lady bug (picture on the right) and on his flower he has black dots...which are aphids!  LOL

While on the subject, this is another way I used the dots this week.  I placed a dot on a child's right hand to help him remember which hand to use.

Encourage crossing the midline.  Note: he's turning his body vs. crossing over.
Continuing to encourage crossing the midline.   Getting use to it now after some instruction. 
 
Encouraging the use of right hand.*
 
* I do not usually emphasize one hand or another with toddlers and preschoolers. In this situation I'm choosing to.
-------------------------------------------------------------------------
Just a little info on crossing the midline and hand dominance.
When a child does not cross their midline, the child will equally use both hands. It's might be considered a great thing to be able to use both hands but what usually happens is that the child develops two mediocre hands vs. a strong dominant...specialized for writing hand. Studies have shown that these students have poor handwriting all through their schooling. So therefore, when I plan activities, I'm often incorporating the crossing the midline skill or setting up their work so that they have ample opportunities to experience that movement.

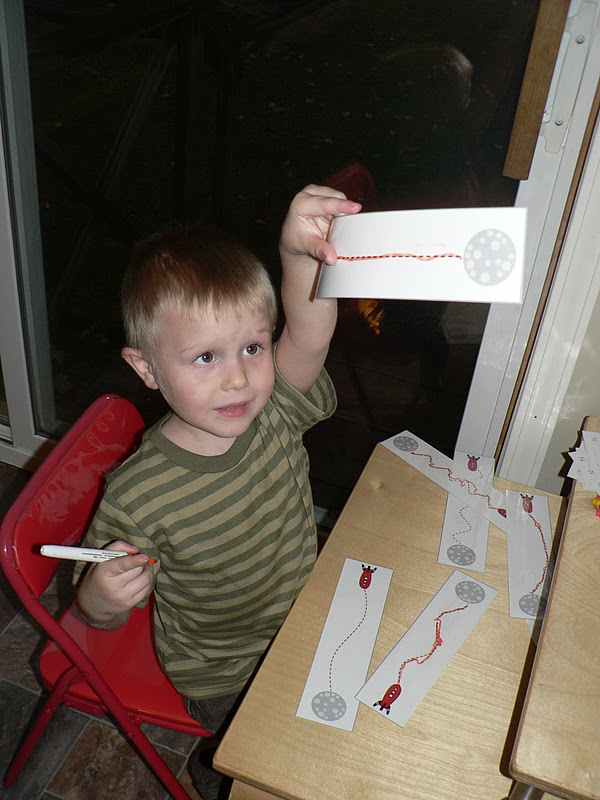
Phonological Awareness: Word Chunks/Syllables
On our flower pots I placed a piece of tape labeled with the numbers 2-3-4.  Then I pulled out some of the seed packets from the Flower Shop and we clapped out the names and tossed a bean bag into the appropriate pot as well as placing that seed packet near the pot.  They enjoyed this simple activity...anything that gets the moving is well-liked!

Flower Arranging
This is always a favorite and so I usually bring it out when it fits into our plans.  Those little glass vases are pretty durable.  I purchased them at Wal-Mart.

Clothespin Flowers
Can't say these are the prettiest flowers I ever have seen :-) but they fit the bill for what we needed.  This was mainly for T., our toddler.  The older children did seem to enjoy it and worked a bit more with patterning.  Clothespin work is always great for fine motor.  I thought I'd be able to find another set of clothespins at the dollar store so we could sort by type of clothespins but they didn't have any but the wooden ones.  Can you believe it?  For awhile they had so many different types of clothespins! 

And while we are on the topic of sorting...
This is from The Mailbox.  They have theme kits now and so when I had a certificate I purchased a couple to see what they were all about.  This particular activity was in the bugs and garden theme kit.  I put this up in our entrance way and each day before we went outside we sorted by a different characteristic.  I love that about this activity!  We can sort it by size, color, type of flower, insect and by how many leaves!  Awesome for learning that we can sort by different characteristics.  That is one thing most preschoolers seem to struggle with...coming up with more than one say to sort a set.  :-)  So the question of the week this week was..."Can you see another way we can sort these?"  In this particular picture they had sorted by bugs...bees, ants and ladybugs.

Color Matching Flowers
I'm pretty sure I posted this activity before.  But in case I haven't...this is a very simple activity that works with fine motor skills, color recognition, and in this case, color words for K.  The flower pattern came from a Mailbox publication I believe and I simply colored the flowers and added pompoms.  For  younger children, color code the words for older children, keep them black. 

Foil Flowers
Permanent markers (these were a clearance sale metallic...beautiful!) are a great writing tool for foil.   These are 12x18 pieces of construction paper with a flower cut out of one side.  They colored the foil and we taped it to the inside of the paper, glued the other half and folded over.  They looked pretty plain and K. had the idea of putting flowers on them so that's what we did.  They arranged and I hot glued.
 
And since one should not waste paper....  :-)
The children told me things about themselves to write on their flowers with those lovely metallic permanent markers.  :-)

Silent E Makes a Long Vowel
K. and I have been working a lot with vowel sounds and how that often when there is an e at the end of a word, it makes the previous vowel long.  She knows this rule but often does not look ahead in the word before she starts sounding out the word.  This was a simple but helpful activity to get her to look ahead and find out whether the vowel will be long or short.  I chose the clipart from Print Shop and on one flower typed cvc/short a sounds.  And on the other flower I put the word with the silent e to make it into a new word.  So, cap/cape, at/ate, van/vane, etc.  I simply cut off the petals and she glued them back on after reading the words.  I do have this document that can easily be shared if you wish for it.  Just leave a comment or send me a message.  Same for the next activity...

Ways to Make 6
Decomposing Numbers
 
She really enjoyed this.  It's a bit further than what I normal do with PreK students but this is an example of taking a child a step further than where they are.  She picked up the pattern that the purple was going down and the red was going up in the numbers at the third set and she thought that was very cool.  :-D  She had chose purple and red stamp pad so I found purple and red buttons to use and we used those buttons to create a hands-on component to this activity.  She made the circles with a pencil eraser and since this was our last activity of the morning and she was ready to be done I finished it up by adding simple petals to make flowers.  When doing a step for the child...just remember to ask for permission first.  It IS their work and they have the right to choose whether they want the "finishing look" or not.  :-)

Tuesday, October 25, 2011

R is for...

R is for rockets!

But before I get into that maybe I'll mention we had so many bouts of laughter today.  Such a joy!  We kind of switched things up and went with the the flow.  I feel there needs to be a pretty good routine in place but I also believe that, especially at the preschool level, we need to just let some things go in order to enjoy the process of things a little more.  It also teaches them to be flexible.  But I only suggest doing this after you have a good routine in place so that you can get right back into the routine because really, without the routine, we wouldn't get half as much done!  And the children's behavior wouldn't be all that becoming.  :-)   But anyway...had two great trainings last week.  One was an online training regarding children's imagination and the other was about laughter being the greatest medicine.  I find that most trainings that are offered, ones that I can afford and are nearby anyway, are usually just reviews and it use to "get to me".  I'm taking time out of my busy schedule to do training only to really not learn anything.  But...on the plus side...they are usually are great reviews.  I think we need that too.  And, though I really didn't learn anything new at the last two trainings, they did make me do some self-evaluation and realized that I'm getting too stuffy in my old age.  :-)  Letting personal stuff get in the way of my teaching and my ability to laugh.  So...excellent trainings!  When we can smile/laugh...it's such a stress reliever, child and adult alike!  We were in the middle of one of our biggest laughs today and we pretty much had tears coming to our eyes and one say, "Ms. Amber...I so love you."   Then the other pipes up..."I DO TOO!"  Aw, made my heart melt.  Almost brought real tears!  LOL  But the point is...we must laugh!  One thought passed on at the training was that laughter is JUST as important as fresh air and good food.  Wow!  There some food for thought!

Anyway....
R is for Rockets!
Our book for the day. 

Art:  Rocket In Universe
We definitely enjoyed the process of this project.  Often we are doing our activities separately.  The main reasons are because then I can provide more individualization and do more activities in a smaller space.  But working together has such benefits and so I try to slip that in as often as possible.  Conversations are great when they are sitting next to each other doing something similar.  Actually, today, I set up the kitchen like I normally do and as we got close to that time I decided...hmmm, let's do this all together today.  And we did most of our work on the floor!  A lot more space there. 
You can see the corner of the computer in the picture.  CMU Child Development Lab have computers available for their preschoolers but...they are used for research vs. any games the children might play.  I use mine for both.  I actually have a "children's" computer for games.  Can't get the Internet to work on that one so end up using the lap top for research.  Screen time is kept to a minimum here though.  I figure they get more than enough at home and even at school.  So today, we used our computer as a research tool.  Google images (be careful what you google and I strongly suggest that you google it first so you know what's going to pop up-even with "kid" things and if you are doing an impromptu search with them, if possible keep the screen toward you and only show it to the children when you have previewed it.   Can you tell I'm talking from experience?!)  Anyway, we searched "planets and kids".  I had already searched "universe" and wasn't pleased with the outcome so switched to something more specific.  One child pointed to Earth right away to say, "Hey, that's where we live...it looks like our globe."  We have a globe on the end table that we refer to quite a bit.  So, yeah!  That was exciting.  We talked about how they all looked like circles/spheres but were different in color and size.  Talked about stars, meteor showers and other simple thoughts about the universe.  Then I gave them oil pastels to create their planets (and Diego, for one child LOL).  They then painted over with watered down black paint.  Added their rocket.  Interesting that they put the rocket in practically the same place.  That happens more often when doing art side by side then when they are doing art on their own.  Then added stars if they wanted.  They were "gummed" stars but it didn't work well.  So we ended up gluing and in my opinion, that didn't work well either since the edges curled up for whatever the reason but they didn't mind so I kept my mouth shut.  :-D  
 
We are doing a similar project this afternoon with the school-agers.  Will try it on cardboard since the paper seems so thin.  We'll be making our rockets out of cardstock shapes also.  I'll share them when we complete the projects.  It'll be at least a 2 day project, I imagine.

Fine motor and Phonological Awareness Activities
Cute little packet.  The next few activities are from HomeSchool Creations.  Quite a few things in it that we didn't use...so check it out. Might be perfect for your kiddos or might be able to be used as a jumping board.
They put the "starburst" on the correct beginning sound of the vocabulary cards.  And I had laminated the writing cards...Rocket to the moon!...so dry erase marker works great for that.  Great prewriting skill activities!  I'm glad to see more and more of these available.  At one time I created them myself but now its a more commonplace to see/find. I wish that they used hollow lines though instead of dotted lines to trace, but that's a personal opinion!  Beggars can't be choosers and their printables make my busy life easier.  :-)

10, 9, 8, 7 6, 5, 4, 3, 2, 1 BLAST OFF!
  
The number and rocket cards were from the Astronaut Preschool Pack, mentioned above.  Her suggestion was to punch a hole at the bottom of the number cards and add links.  That's an idea.  :-)  I didn't know where my links were and really wanted to do the rocket below it (Mailbox) for a scissors skill activity.  So I used the cards this way.  First, we put them in order from 10-1.  That's hard for a lot of preschool children.  It also gave me a good idea of where they were at with number recognition.  No, this isn't the font I use but I strongly believe in using multiple fonts for various activities so that the children can recognize them interchangeably.  So after we put them in order, I had the children start cutting out their rocket and adding their astronaut.  One child drew a picture of the other child and said she was mad because "it ran out of gas".  Oooh!  That WOULD be a problem!  LOL  Then he added himself in there later.  Anyway, since they are at different skill levels for scissors, this worked out perfectly.  I put one square of paper under each number (actually wrote our number 10 and 9 on the cards so they could see how we write them) and encouraged them to write each number on their square.  This was to help me see where they were regarding numeral formation, so no help from me-unless they specifically asked for it.  Great little scissors and math activity combined!  If it looks familiar, I believe I did this during our summer program.  I had put their actual picture in the window then.
 
Math: Rocket to the Moon
Seriation/Ordering by size.  This was also in that Astronaut Preschool Pack.
This was not a scissors activity so I cut them out ahead of time.  See their moons?  We had talked about them having craters so that is why both of them chose to have spots in their circles.  :-)  One chose to do theirs from smallest to biggest and the other from biggest to smallest.  This is a skill that requires practice.   Typical preschool standards expect ordering a set of three-big, medium, small.   With practice they can't get way beyond a set of three.  Just a little FYI there.  :-P  It just requires practice.  To save paper and such you could just laminate one set and use them over and over.  But since I have a small group, I like to do it this way so the parents know what we are doing.  We counted them, talked about the biggest/smallest, first/last, even/odd and so on.

Just for Fun!
Okay, well, this was an adult made rocket.  We do very few of these.  But I just knew that they would be a hit and I was right!  They flew all over creation!  I gave them the choice of colors and they decorated it but that was about it.  But dramatic play was at a high point when they were done with them! 
Instructions were from Enchanted Learning.  Not my favorite site (and no, I will never purchase a membership there) but this one was worthwhile.  :-)   It was raining and I knew we wouldn't get outside and they were flying their rockets through the universe so I opened up the doors to the "rest" of the house and they "flew" around (which they love to do...I don't do that often so it's always "special".)  Anyway...one child has had an issue with a lingering cold and after so much physical activity she was really starting to cough and getting red in the face so I encouraged her to find something calm to do for a little while and this is what happened....
Isn't that sweet?!  She has really taken to "reading to Trent".  I love it, he loves it, she loves it! 

Lovely day!  Hope yours was too!

Wednesday, May 11, 2011

Bugs II

A side note:  I heard a child say to another "I frustrated in you".  :-)  Brought a big smile to my face.  Teaching about feelings is very important.  Most of it is done informally, through conversation, helping a child through problem solving steps that include stating feelings, and being verbal and labeling what you yourself are feeling.  But there are some "emotions" activities you can do and that would be a good future blog.  :-)  Especially when we receive our new toys from amazon that is focused on feelings.  So, stay tuned!

Yesterday I spent much of my day in Lansing and then in Bay City in the evening as the parent rep for the QRIS project.  QRIS stands for Quality Rating Improvement System that the state of MI is in the process of implementing to boost quality in child care/preschools.  It was a very profitable day...helped me see a little of where they are going and how they are working together to create a feasible system for the various types of early childhood settings.  I'm excited!  Another parent focus group is Monday the 16th at the BAISD.  Please come if you are from this area.  Contact me for more information.

---------------------------------------------------------------------------------------------
So, onto BUGS!
Day number 2.

Maybe I'll break it up like I do when I lesson plan.  Please keep in mind that so much more is done then just these activities.  But planning like this helps me make sure that the children experience a little of everything every day.  Also, I would like to remind you that there is no reason to "recreate the wheel".  There are so many ideas out there...use them! 

Literacy:  Bb is for Bees (Mailbox)


I chose five "leapfrog" consonants to review recognition, sound and capital letter review.  F, D, P, R, B.   My 3 and 4 year old understand exactly what I mean when I say a "leapfrog letter".  They know, line down from top to bottom and leapfrog back up to the top of the line.  My newer child hasn't experienced this before so I really wanted to review them. It's so hard to break a habit!  Start young teaching them the correct way!!! Another thing I teach is to not pick up their pencil/writing tool/finger if not necessary to.   Another tip for the children is to start their letters at the top and their circles should be started top, off center just a wee bit to the right, drawing the circle to the left.  As you can see here, K. definitely knows how to form an R.  Someone who doesn't know the correct formation will do a circle at the top and two lines out on angles at the bottom, all done separately.  That's because it's how they see it.  Here we can see she did the leapfrog line and closed the circle in and made her leg without picking up her finger.  Excellent!  By the time she goes to school she'll have letter formation down pat!  The three year old also does very well with letter formation because he was just beginning to explore when he came to my program and so the correct habits are already in place.  Am I picky about letter formation?  You bet!  And I'm not going to apologize for it!   :-P  Tactile letters are excellent for helping a child learn how to form their letters.  My sandpaper alphabet set came from www.amazon.com for only $11.55 for both upper and lower case letters.

Fine Motor:  Band-Aid Lightening Bugs (www.notimeforflashcards.com)
There you have it.  :-P  We wrote the number of lightening bugs (or fire flies) at the bottom of the paper.  They did as many as they wanted.  Peeling the backing off of bandages without getting them the stick on itself takes a bit of fine motor.  Meijer was out of the neon bandages (which happen to be on sale) but they had sparkle ones...so they turned out pretty cute that way too.  We used regular brown ones for the body.

Scissors:  Where are the Bees? (Mailbox)
Here is the beehive.
Where are the bees?
Hidden away, so no one sees.
Here they come creeping, out of the hive.
1, 2, 3, 4, 5
Children cut out the hive and wrote the numbers across the bottom of the fingerplay words,which they glued to their hive.  Then they taped their hive onto the white paper and added and decorated 5 yellow fingerprints to make them bees.  They enjoyed this. (The little tab of yellow is just covering a name, is all.  We respect the wishes of families who do not wish to have their children's pictures or names posted.)

Math:  Ladybug Sorting/Matching (www.childcareland.com)
These were both very easy activities for my kiddos but I wanted a quick, hands on activity that I could observe for their assessments.  So size, color, and shape.

Sensory:  Bugs in Shaving Cream (Bugs are a set from Toys R Us.  Nice details!)
Wasn't exactly what I had planned today but because of time and energy last night...I went the easy route.  Next week we'll do goop and the bugs.  :-)  That's liquid starch and liquid glue. 

Art:  Flyswatter Flower Garden (OUTDOORS!!!)
Well, maybe it didn't turn into a beautiful garden but the process was fun!  The older child here actually got the hang of slapping the flyswatter down multiple times and so she had some beautiful flower prints.  The younger ones were into the effect of having a glob of paint and splatting it.  Speckled we were when we were done.  :-)  I might try it with my summer group if time allows and see what we can do with it.  We purchased the flower and butterfly flyswatters from Dollar Tree.  I have seen basic shape swatters at www.discountschoolsupply.com

And we even got a chance to eat lunch outside before it rained!  :-)  That was neat in itself though.  Watching the change of the sky, feeling the change in the wind and temperature...and the little scientists..."Ms. Amber, it's going to rain!"  :-)  "Notices and describes changes in natural environment".  Love it!  We haven't got the rain yet but...sooner then later probably.  Too bad the garden isn't in!


Thursday, May 5, 2011

Flowers, again. Last day though :-(

I love doing flower activities...spring-y, colorful, puts us all in a good mood....and SO much to do.  So many neat ideas out there!  Might have to just include them with our bug theme this next week.  :-P

Here are some of what we did today...
Flower Pom Pom Sort
A very simple activity, to make as well as do.  Added a fine motor component by providing tweezers.  It's officially May...so starting into the final assessment of my students.  This was mainly for me to see if they could name the basic colors.  They put them out any way they wanted but as they put them back into the bowl, they stated what the color name was.  We also counted how many flowers there, which row had most, which rows had equal number of flowers.  I also watched for if they went from left to right or not.  Children who have really internalized this left to right concept tends to work from left to right when the task is organized to allow for it.  I believe I got the black and white flower pattern from www.childcareland.com, then just colored them to match the pom poms.

Playdough
Well, this activity was a cute idea but they didn't really "take" to it like I thought they would.  :-) I had provided brown playdough, fake flowers, and teracotta pots.  Of course, we added the watering can, a couple flower cutters, and a rolling pin.  The marbles were an idea from them, "for decoration" but they didn't end up using those either.  :-)  I think I'd use larger and plastic flower pots next time, if I do this again.  The little teracotta pots made it difficult to take the playdough out.  Oh well, done with another group of kids or even on another day...they might play with it differently.  That's what happens! 

Flowers: Ordering By Size
This is something I'd definitely do again. Works well 1:1.  Foam flowers with magnet strip on back.  Easy to make!  First step that all the children did was order the flowers by size.  If they couldn't do six (which is not unusual for preschoolers) then I helped them by saying, "What's the next biggest?"  Then we started with a set of 3 flowers.  If they could order the 3, we went to 4 and then to 5 and redid 6. Next step was to put number magnets from 1-6 in order above each flower.  Then we talked about where the first flower was and where the last flower was.  With the youngest, we stopped there.  Attention span and fine motor skills are not ready for the next step.  The 4 year old took it a step further and drew six flowers on a piece of paper, wrote the numeral and the number word on the paper.  She was so proud!!  The oldest took it a step further from that and we worked together with addition.  Seperating the flowers on the board and adding the magnetic numbers...then writing them on the paper.  So he wrote, 1+5, 2+4, 3+3, etc. Yes, would definitely do that again!  I think we'll pull this type of thing back out this summer with our summer Kindergarten Readiness program.

Button Flowers
Easily turns into a gift for something (like Mother's Day) :-)  The funny thing was I had planned to do the styrofoam cup idea this spring ... and one day I walked into the school to see that Aaron's 2nd grade class did this.  They were displayed on the wall.  Cute.  That's where I got the button idea.   Difference between the 2nd grade work and preschool...is the second grade was capable of making their own very unique flowers using the ripped paper technique.  Most preschoolers wouldn't have had success actually making flowers.  So do that when you wish to have an open ended art project.  I just used up scrap paper and made a much of different size petals for them to choose from.  Hot glue works best on the styrofoam cups.

A different type of mosaic.  :-)
I started them with a plate of glue and a spreader but it really does work better if they are allowed to use the bottle and make a puddle of glue.  LOL  I happen to have 3 butterflies so ...voila!  They were excited to add a butterfly to their garden.  :-)