Showing posts with label paint. Show all posts

Tuesday, May 15, 2012

Fly Swatter Painting and More Buggy Fun!

Fly Swatter Painting
We were lucky to have such lovely weather today so we spent a good portion of our morning outside with painting, lunch, and extended outdoor play.  I dripped "flies" on the paper and they had a bunch of fun swatting the flies.  :-)  Yes, it's messy, that's why we did it outside.  They didn't get as messy as I expected though!  Makes for neat painted papers.  I'm sure we'll be able to use the paper in some sort of project.  :-)

Buggy Sensory Pool
"Easter" grass in our pool.  Bugs, magnify glasses, bug containers, tweezers and whatever else the kids ended up putting in there.  :-)  I wouldn't say this is a favorite sensory material.  They tend to use it for dramatic play vs. any of the typical sensory explorations they usually do.  That's a-okay!

Stomp Boards
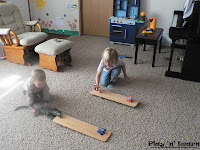
I ordered these last year and they are finally in.  Yeah! Early Childhood Connections had some connections.  :-P  They found someone willing to make these stomp boards for us for only $3.50.   You can purchase a stomp board for $25.99 at Discount School Supply.  So, yes!  I took advantage of this and purchased multiple for here and for gifts.  We started out with a couple bug bean bags and they went on to explore with other soft items such as stuffed animals, sponge balls, etc.  They got a lot of use this morning!

Sponge Bugs Basketball
This little basketball hoop is the same brand of the bean bag toss that I pulled the bug bean bags from for the stomp boards.  Soft play, perfect for toddlers and preschoolers indoor use.  Not the most durable but works okay.  :-) 

Leaf Math Mat (Grid Games)
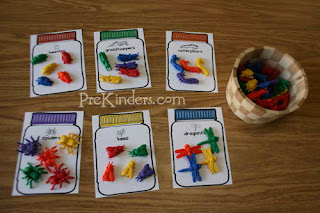
 We also call this Cover Up. The goal is to roll the dice and cover that many spaces until you've covered the whole page. PreKinders has many theme related Grid Games available.   Interesting observation I made, oldest child went from left to right and top to bottom, for the most part.  Younger preschool child just put the bugs anywhere on his board.  The youngest went from left to right but started at the bottom.  :-)  Now my husband would say...well, would probably just think..."So, what."  :-P  This reinforces where I pegged them each in their development.  T. is really taking off, he starts counting on his own but then gets off and then wants us to count with him.  Awesome!  And so proud of himself too.  He's taking his own step up.  One nice thing about having teaching my own kids during preschool is they can definitely go at their own speed all year around.   
We won't get to this as planned but PreKinders also has free Bug Jar Math Printables! Check them out, especially if you have younger preschoolers.   She has a set for sorting by type, color and counting.

Who Am I?
 I didn't do it exactly like she suggested.  I do not have the Target bugs and my Planet Earth bugs do not fit the clues so I just laminated her pictures to put on the mats. :-) Might add velcro though. Would help keep the pieces a bit more secure for the younger kiddos.  It was a perfect way for K. to practice her reading and for H. to work on listening, recall, and comprehension.  I also found that a couple just weren't clear enough...one reason being that the color she had on the clues didn't match the color of the bug in the picture.  But that's fine, I just removed those.  I can make a new clue card easily enough.  FYI, if you print these...they aren't exactly aligned so consider that if you are using your paper cutter.  :-) 

This was a song I had in my files.  As usual, the picture uploaded crystal clear and than immediately changes to this blurry image.  Can anyone help me out with this?  Obviously it's changing the quality.  So the song goes like this...

Tune:  If You Are Happy and You Know It
Oh, I wish I were an eensy weensy spider.
Yes, I wish I were an eensy weensy spider.
I'd go creepy creepy crawly down the hall and up your wall-y.
Oh, I wish I were an eensy weensy spider.

 The bugs it incorporated are spider, bee, caterpillar, ant, mosquito, and fly.  I do not know who the original author of the song is.  The kids really really liked it.  I created a little booklet so the parents would have the words also, and it allowed me to slip in cutting on a narrow straight line and tracing letters.  You can download a copy for your own personal use here, if you wish.
Today's Menu:
PB Tortilla Wedges/Yogurt
Raw Carrots
Dried Apricots
Juicy Watermelon
1% White Milk

Ah, the fountain is back in business.  :-)  They are always enthralled with the fountain the first days it's running.  If only Ms. Amber would let them put things inside of it and play with the water there.  :-P


Tuesday, May 1, 2012

Tweet Tweet!

This week our activities evolve around the concept of birds.

We enjoyed looking through the Eye Witness Books: Bird.  They were really taken up with the skeleton of the bird!  So many different views of eggs, nests, feathers and even wings.  So fun to explore a nonfiction book with the preschoolers!  Though I have a plan about what I want to be sure to touch on...our exploration of a nonfiction book is very informal.  We sit together with the book between us and flip the pages talking about this and that. 

We also enjoyed a YouTube video, watching a chick hatch from an egg.  There are quite a few of them available, varying in lengths.  Check it out!  Great, especially if you don't have the ability to hatch eggs yourselves. 

Rebus Recipe of the Week:  Birdie Trail Mix


I really had a difficult time coming up with an idea around this theme that would be something they could do on their own.  But...this ended up being something they REALLY enjoyed the preschoolers and school-agers alike!  Feel free to download a copy of the rebus recipe here.

You can also download previous rebus recipes below as well, if you wish.

Watercolor Resist
We used oil pastels as they are bolder and softer than crayons, thus much more rewarding. Oil pastels are small, as well, and they are great for working with appropiate hand grasp. They used their arm for a branch. :-) Painted over top with blue tempera cake. They are still a bit wet when I took the picture, thus the wrinkles. The last batch of white construction paper I purchased was either not the same weight or it was not as good of a quality. But it was pretty thin for this type of art technique! I'll flatten them out a bit after they are dry.
Bird Feeders
Simply hot glued tp tube to plate.  They enjoyed this very simple activity.

Simple Fine Motor-Scissors Activity
We painted one large non waxed (dollar stores) paper plate blue and the half plate we squeezed glue all over before painting brown over top.  This allowed for them to just sprinkle the crinkle paper on top.  They colored and cut out their bird (pattern from www.childcareland.com) and glued onto the blue background and we stapled the brown plate to the blue background.

Sensory Pool: Bird Seed

One of my favorite activities to observe...with all ages...SENSORY!   If there was one main thing my school-age boys missed when they entered Kindergarten it was sensory.  And to this day the 1st and 3rd grader love it when I have enough energy to leave out sensory until they get home in the afternoons, for their own explorations.  With that in mind, I plan on having sensory tubs available for the school-agers this fall. Make a great "brain break"! 


This week we are also doing a few activities taken from the Preschool and Kindergarten Bird Printable Packs so generously shared by Homeschool Creations. If you haven't check out their packs, consider it. Sometimes I print individual sheets for the children, sometimes I laminate, other times I place the sheets in page protectors.

Ended up that the sun came out (thank goodness...I didn't realize how much cloudy dreary days effect my energy level) and it was beautiful outside...so one literacy activity which I knew would take a bit more time got set aside until another day. :-) Wanted the extra 10-15 minutes added to our outside time. We all need the sunshine and fresh air! Hope you all got to take advantage of it too!


Monday, June 20, 2011

Color Mixing

I can see that this summer the postings are going to be irregular...just a heads up.  :-) 

Today we started a series of color mixing lessons, idea from Carol at www.theartgarden.info.  We plan on creating a book of our work.  So, those of you who are parents of my students, your child's artwork will be here for a bit as we work through several sessions. 

We started by reading the book Mouse Paint by Ellen Stoll Walsh.  This is a great book to introduce/review coloring mixing with preschoolers.  Of course, take a moment to talk about the parts of the book, about the author/illustrator.  Talk about how the illustrations were made and so on.  Today I started reading the book upside down as well as changing a few words as we've read the book before.  This helps them really stay tuned in to the words you are saying because they ALWAYS like to catch the teacher/adult in a "mistake".  Starting the book upside down or going from back to front is a great way to see if your young preschoolers are aware of some very basic print concepts. 
So, back to color mixing.
Terms I use frequently with preschoolers (all basic color theory):
* color names (of course :-P) I use violet/purple interchangeably to get them use to both names.
* primary colors (red, yellow, blue)
* secondary colors (colors made when mixing two primary colors-orange, green, violet)
* shade (making darker with black)
* tint (making lighter with white)
* color wheel (a chart in a shape of a wheel that can tell us how colors relate to each other)
* contrast (I often encourage them to note the contrast when they have two complementary colors next to each other.  Light/dark)

others that I use with specific children depending on development and interest.
* complementary colors (colors opposite of each other on the color wheel)
* neutral color (black, gray, white and typically the gray-brown color made when mixing two complementary colors.)
* analogous colors (three consecutive colors on the color wheel)
* intermediate or tertiary colors (colors made mixing a primary and secondary color)
* monochromatic (one color...this is often talked about with one color collages or if they create a piece of work at the easel that falls under the category).
* polychromatic (more then one color)
* warm colors (reds, yellows, oranges)
* cool colors (blues, greens, violets)
* composition (how they have arranged their work)

Children LOVE big words...use them!  Maybe they won't remember it the next time they do something similar but you are already setting the tone for noticing and describing details.  It helps them feel good/confident about their work to hear someone use a "big word" to describe it.  It's setting the foundation for excellent vocabulary, which we know is one of the greatest factors influencing the ability to be successful in reading.  Feel free to keep a list of art vocabulary posted on a wall nearby until you know them very well yourself.  :-) 

So today was a very basic introduction/refresher lesson.  We read the book and talked about the primary colors and secondary colors and which primary colors mix together to make the secondary colors.  Always wise to have a simple color wheel on hand when you are doing an art lesson.  If you don't have one already, there are many available on the Internet.  Just search "color wheel printable".  (Here's a cool one that I found and plan to incorporate with our flower theme next year!  http://aggie-horticulture.tamu.edu/floriculture/container-garden/lesson/colorwheel.html. )The children used a chunky short brush and a long skinny brush to work with the colors red and yellow.  I plan to vary the tools for each session. I chose to use a 9x11.5 piece of white card stock for the first piece of work and then provide other paper for any additional explorations they would like to make. Their task for this first page was to
1) use the entire paper (which is why I only provided a 9x11.5 page vs. a 12x18 piece of construction paper) and
2) I would like to see all three colors-red, yellow and orange.
FYI: the top right hand piece of artwork was an extra exploration piece done by one of the children that was finished before I took the picture.   There were others still working.  Reminder: on the exploration pages...no suggestions.  They do what they wish with their supplies. It's sometimes SO hard for adults to just keep quiet!  It takes some work on my part, even after 15 years in this field, to bite my tongue and let them do and find out on their own.  Children learn best by doing.  If they ask questions or are concerned after the fact, then go ahead and "explain" if you wish but don't interrupt the process!

Hope your Monday went well! 

Wednesday, April 27, 2011

April Showers Bring May Flowers III

I really had another post started for today...but it can wait. I've been doing a lot of informational blogs so we'll do another day of "what we did today" pictures.  Those are the fun ones!

Ever had a day...not that it didn't have it's normal behaviors/issues...but it left you smiling.  That was this morning for me.  To see children engaged in dramatic play.  To hear words like, "May I use that when you are done?" Or even "You're being bossy." but said in a very matter of fact tone of voice. To listen to the singing, humming, unprompted conversation all through their work.  To hear "I like this kind of work."  Playing and exploring is their "work" at this stage of life and so we want to encourage it.  What an awesome morning we had!

Here's some of the "work" we did today.  :-P 
Rhyming Rainbows
One of our literacy activities were rhyming rainbows.  I found some rainbow clip art on the Internet.  I had already glued on one picture inside a cloud and then we went through the pictures to find their rhyming matches.  They did so well!  If you find a child not being able to make rhyming word/picture pairs...I suggest you do something similar to this activity.  Then you can give them two choices...one that is obviously not the rhyming match and one that is.  It helps them "hear" the rhyming ending sounds.  I heard a snipit from LeapFrog about a rhyming song so I'm going to go searching for it.  It seemed very catching.  I'll let you know if I find it.  :-)
A note about making activities:  I had the children help me decide which picture would go on the other cloud.  Now I'll laminate them.  Do you think they are more apt to use them on their own now?  You bet!  Involve them and they are much more interested (and they respect the materials more).

 Logical Thinking Matches
One of our mathematics activity was a "filler".  I wanted to get some logical thinking in with my younger ones.  This activity was from the Mailbox publication Find the Match: Math.  These make nice little fillers, especially for 3 year olds...or 4 year olds with minimal exposure.  Personally, I prefer actual objects but I understand that we just don't have the time necessary to collect the objects...at least I don't often. So these type of activities are available for purchase as well as pretty easy to make, if you so desire.
 

Muddy Boots
These turned out cute!
 Mailbox idea again.  Can you tell I like Mailbox?  Very reasonable...and the activities are "worth it".  Usually "tried and true" from other teachers.  I just want to reiterate that this is not an art activity.  On a scale from 1 to 5 with 1 being "well, okay" and 5 being "awesome!"... I'd put this activity as a 1.  :-P  Just because it uses paint, it doesn't mean that it's true art.  There were a few decisions to be made...choices they could have so that put it at 1.  This was put under fine motor/scissors today.  Children cut out their boots, glued on the pieces using paste spreader and liquid glue, added legs in the color they wished and blobbed the "mud" on and smeared it the way the wanted.  But really, it's not open-ended at all. Now if I gave them all the materials and just let them go (hmmm...wonder how that would have turned out?  :-) Not "cute" by any adult standard.) then it would have been further up the scale.  The children also gave me a dictation sentence or two about muddy boots.  I got "Muddy boots.  It's okay they get dirty." (4 yrs) and "I like to step in mud and drive a car and get muddy tracks on it." (3 yrs). 

Stenciling
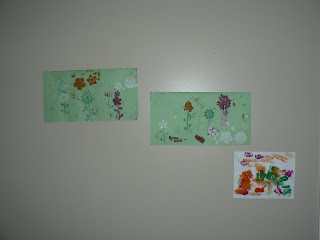
Our art today would be at a 4, in my opinion.  They pretty much had the freedom to do what they wished with it...but that stencil makes only certain flowers so it "limits" them.  Perhaps I'm harsh on myself...but so be it.  :-)  The stenciling is "new" lately.  And to see their expressions, I wished I had incorporate some of these kind of stenciling sooner.  I've used the large one object stencils but these whole sheet stencils add a different dimension.  I purchased a set of three at our dollar store.  They are a flimsy plastic...so we'll see how they hold up.  Here's an expression that's priceless!
 
One of the things that made it such a good morning was both children automatically started cleaning up their area.  The little guy sang his own little song, "Cleaning, cleaning, for the next person." (Even though he was the last person since we only had three here today.) I love that they are showing such a sense of order and respect for friends and materials. 
I purchase a box of store brand wipes that we call "art" wipes.  These are used for clean up (if it's something they can do on their own) or if they have just a wee bit on their hands so we don't have to constantly go through the livingroom to the bathroom.
Trent's version.  :-) 
He really concentrated after he got over the paint on his pinkie.  LOL  He does not like ANYTHING on him.  But my goal is to teach him it's "okay to get messy". (MOST TIMES!)

I really would love a decent drying rack.  Have had my eye on one from Discount School Supply but...really, I have no space for one.  So, my kitchen wall turns into a "drying rack" for most artwork that doesn't have a lot of drippiness to it.  Keeps it out of reach until dry and keeps my counters clear of artwork.  I could buy stock in masking tape.  One of my most used "materials". :-)  I am always securing down their work. It makes life easier on everyone if their work (especially painting) is secured to the tray or table.  Just a little FYI. 
So, I was talking about Trent.  Maybe today is a turning point.  Typically he enjoyed painting until something got on his hand...which was about the first or second stroke.  Lately, when I asked if he wished to paint he'd adamantly shake his head no and say something to that effect. But today he did so much more on his paper.  But even more important than that, after he was cleaned up he went out into the livingroom with the other kids, I stuck it up on the wall.  When he came back in for lunch...you should have heard him blibber blabber, pointing to his artwork and smiling and laughing.  Wow! Didn't have a clue what he said but sure got the point! :-P 

Sensory
April showers bring May flowers.
I took the flowers off of a lei to put in the water.  They will float...and sink as they found out!  They will also stick to the side of the container.  We had a pattern going at one point.  Awesome!  When they do a skill on their own then you know they've got it. 
He told me..."downpour...sprinkles" while he dumped the water out onto the flowers and then sprayed with the spray bottle.  We had been talking about downpours so most likely that was his connection.   Water play is always a favorite.  Lately I have been changing out our sensory material every day or every other day.  It's working out nicely.  At one point we did one sensory material for the week with different tools.  The kids are really enjoying this frequent change.  But that doesn't mean we don't want the "tried and true".  Water exploration has so many benefits and should be repeated often...even if it's only in the bathtub after a bath.  The spray bottle was the hit today and we know, from previous blog, the benefit of using a spray bottle.

Have a lovely day!