Showing posts with label word chunks. Show all posts

Thursday, March 29, 2012

Pete's a Pizza

Definitely a cute book and so much you can do with it!  Retelling this story with the actions is a lovely sensory activity for preschoolers and toddlers!  And yes...these types of activities are great for helping a child get out of a grump or frump.  :-P  Perfect for today.  They weren't grumpy but they weren't 100% today and the box of tissue and bottle of soap we went through today probably explained it pretty well.  Actually, at one point I told K., I'm going to give your brain a kiss and then we are going to let it take a break out in the living room.  In other words, we are done with trying to get you to focus and we'll do this stuff another day.  :-D

And our favorite activity for the day...
One blog post that is often getting "hit" is my rebus recipe post. Unfortunately, I was just starting the blog then and it was more basic info vs. something extremely helpful like actual rebus recipes! :-) Now that I know how to link a printable, I hope to share more rebus recipes for children. Cooking with children has so many benefits! Following a rebus recipe helps children internalize left to right and top to bottom progression when reading, following directions, and be successful in independently "cooking". It's a great confidence builder! You can go back and read the previous post if you wish here. There are a few other rebus recipe resource sites listed there.


 The recipe we used for dough is from All Recipes. I had planned just to thaw some frozen dough and have it ready for the children but alas, I went out to our extra freezer last night and...there wasn't any. Oops! I must have used what I thought I had in there. So quickly went searching for a no rise pizza dough. The dough I found is actually simple enough that the children could make it themselves. Very easy and pretty yummy too! I might consider doing this dough for our family but adding some herbs and such to the dough.
By: Gudny Bjorg Kjaerbo
"This one is a quick recipe that merely involves mixing a few basic ingredients and patting the dough into the pan. No need to wait for the dough to rise with this approach."
Ingredients
  • 3 cups all-purpose flour
  • 1 (.25 ounce) package active dry yeast
  • 2 tablespoons vegetable oil
  • 1 teaspoon salt
  • 1 tablespoon white sugar
  • 1 cup warm water (110 degrees F/45 degrees C)

Directions

  1. Combine flour, salt, sugar, and yeast in a large bowl. Mix in oil and warm water. Spread out on a large pizza pan. Top as desired.
  2. Bake at 375 degrees C (190 degrees C) for 20 to 25 minutes.
* I did make it ahead of time and so it sat and raised a bit. I separated it into 4 balls of dough to make 4 personal pizzas.
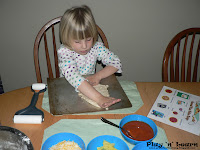
* We found that it's a lot easier to pat and press the dough out than use the rolling pin. But that could have been because I sprayed the pan with cooking spray.
* Plan 5-10 minutes of cooling time.
* Remember that if you are affiliated with a food program, most likely the children are not putting on the appropriate amounts of veggies/fruit (tomato sauce/pineapple) or protein (cheese/ham). So I add your fruit and veggie side dishes and a bit of yogurt (or something similar) with your meal of child made pizza. :-)
Download the Personal Pizza Rebus if you wish. Hope your children enjoy it as much as the kiddos here! I find that it's exceptionally fun for the kids to put a laminated rebus recipe in the kitchen area with corresponding materials.

I came across the book at Living Life Intentionally.  She has a free pizza themed learning pack that is great for toddlers and preschoolers.  I chose several from her pack to use today with the children.  Check it out!  Here's just a few activities that I used from her learning pack.

 
Pizza Vocabulary Word Chunks
(These same pictures are available using beginning sounds, as well.)
These pictures really sparked interest.  One point of interest was the garlic picture.  They really didn't know what it was, one child did guess onion though!  So I pulled out an onion and a garlic and we talked about them.  They were pretty excited when I opened up the garlic and let them pull apart the individual cloves.  Got a little math in there too.  How many cloves in this bulb, how many in that one?  Which has more? 

Making Pizza
I simply cut her pictures out and had the children think about how we make pizza and order them.  Neither children had them in the correct order on the first try.  But it was interesting to see them notice and correct it when I began pointing to their pictures and stating the step.  Fun!  Makes me realize that it's been awhile since I've had them tell dictate a recipe to me.  :-)  Maybe we'll get to creating a recipe book after Spring Break also!

 
Pizza Math
(Just a couple of the many math activities she has made available to us.)
On the left, K. was doing the pizza addition facts.  She chose a pizza and created the two sets using beads, then pushed the beads together and counted them again.  Then she placed the pizza next to the pizza cutter with the correct answer.   On the right, H. chose a pizza, stated the numeral, counted that many beads onto his mat and then buddiedLOL)

Shadow Matching
Perfect for toddlers!  He definitely enjoyed this and great for vocabulary!

And, of course, we turned the children into pizza!
He was very relaxed after I got done "kneeding and stretching" him.  And the lucky one too since he's light enough for me to pick up (without my chiro getting after me) and place on the couch to be "baked".  LOL  The children used various colored pom poms for different types of toppings (tomatoes, mushrooms, black olives, and green peppers) and yarn pieces for the cheese. 


Thursday, December 15, 2011

S is for Snowman! Day 3

Well, raining and 50 degrees out this morning on the way to school.  LOL  If the temperature dropped we would have quite a bit of snow covering the ground. :-P 

Counting Technique
I've shared this before but it's something I'm going to share again.  Preschoolers sometimes recount or forget objects when they are counting, especially if they aren't in a straight line.  Allowing them to place a small bead (or other object) on each item helps out with this, especially with numbers over ten.  If the child is counting concrete objects, encourage them to move them (to a specific area-such as the left of a piece of tape) after they have counted it.


Snowman Themed Addition
In our schools, they use linking cubes a lot with their math facts-addition, subtraction, multiplication, division.  Since this is the case, for me, it's important to introduce the use of linking cubes so they are a familiar as a "tool" as well as a toy.  So today we used them with an addition activity.  Each of the snowmen had a number on them.  I actually color coded them, but that is not necessary.  Works better for young students though.  Vocabulary we used: more/less, odd/even, add, take away/subtract, equal/how many in all, math fact.  I wrote the math facts on the dry erase board (corresponding colored markers) but you may wish to have your child write the math facts themselves if they are at that level.  I had a younger student today so chose to do it myself.  Each child turned over a snowman, stated the number on the snowman, and found that linking cube strip.  Then we put them together and counted how any in all. And I wrote the addition fact and we continued on.  This would make a nice bag center...especially for a kindergartener.  They should be able to do this activity on their own, filling in a math sheet with the math facts and answers.

Word Chunk Snowman
Used /s/ sound words and placed as many buttons as chunks in the word on the snowman.  These mat could also be used for number snowman,  or listening for beginning/middle/ending sounds as well. 

And some nice open-ended activities today:
Shaving Cream
We used this for our "snow" paint this week and thus needed (yes, I was told that) to pull it out for free exploration.  And since we were going to use the polar set with the "snow" dough...and that didn't work out due to the stickiness I pulled them out with the shaving cream.  :-P  See T. on the left there in the bottom picture.  No way was he going to even get close enough to get any of that stuff on him.  LOL  Some day...right now he just tells me he's going to watch. 

"Easel" Art
When we put our house up for sale, I moved a lot of stuff to storage and our easel was one of them.   So, used our sliding glass door as our easel.  :-)  Great conversation takes place when they are doing things side by side!  (And actually, the sliding glass door is a whole lot easier to clean than the easel.)

Music and Movement
Wanted to share that one of items we use for music and movement are holographic icicles.  You'll find those right now at the dollar stores...and everywhere else too! I bought three+ years ago during the after xmas clearance sale for .25 a piece.  :-P   I left them "as is". Cover the staple backs with tape as a safety precaution. They've lasted a long time but we don't have them out all the time either.   And so how you use your music and movement materials, the age of your children and their energy level are all going to play a part in how long they last.  The children really enjoy these "streamers". 

We had a laugh-filled morning and H. asked his dad..."Why did you come so soon?" at pick up time today.  :-P  Made my day!

Tuesday, November 8, 2011

O is for...

O is for Ocean!

Ocean Preschool Pack
This individual has really put quite a bit of work into these little packets and they are free.  We so appreciate individuals like Jolanthe who are so willing to share their work.  If you are one of these people...THANK YOU!  We used a few of the activities that were in this pack today.  I'll place and asterisk (*) next to the activities that were from this particular pack.

Line Tracing*
I was bummin' that this picture is blurry.  She was proud of her work (and should be!) and held it up to me to see.  Unfortunately, digital cameras tend to be a little slower in some regards and I couldn't really "recapture" this picture again.  These lines go beyond the basic that many sites offer.  Takes a bit more "pencil" control.  She did these lines where the younger child was only expected (though he could have chose differently) to do the basic lines due to the amount of effort it would have taken him.  Lines like this are perfect for beginner writers.  Helps to teach left to right, eye-hand coordination and helps them become comfortable with the various types of lines that we will be using as we explore with handwriting.  I laminated this set but to save money you can put the pages inside of sheet protectors and use dry erase markers.  You can use washable markers but they smear much easier, to the frustration of the children and the adults (who have to do the laundry).

O is for Ocean Letter Formation* 
 I encourage children to do "rainbow writing" vs. coloring of sheets like this.  Why?  Number one, coloring isn't something I push.  Actually, many of our activities go home uncolored because I give the option of coloring or not coloring.  Some programs do a lot of coloring sheets saying that it is "necessary for their fine motor development".  Yes, that is what they told me and I'm sure you could figure out what my response was.  Perhaps it does help to a certain extent but I've worked with too many children who find coloring frustrating/boring/tiring and there are so many other ways to strengthen and develop muscles in their hands that we do very little coloring.  With an activity like this, if they colored it, they are missing out on some lovely letter formation reinforcement.  I often place a green dot and add an arrow so they know where to start and which direction to go in.  Then I ask them to use colored writing tools to create a rainbow inside of the letter.  They must use at least three colors but they can use more if they wish. 

Tunnel Letter Formation
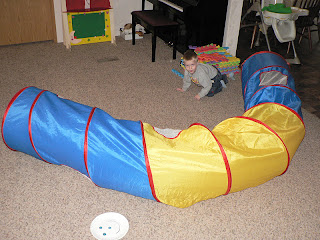
An activity that led into our letter O formation activity was our tunnel. 
Like this picture :-)
 Actually, I pulled out the tunnel for the letter C last week and though we played with the tunnel, we never used it for letter formation, for whatever reason, just ran out of time I guess.  C is for crawl, ya know! :-)  So, with Handwriting Without Tears, the materials all have a smiley face where the children start many of the letters.  However, with the magic C motion, it starts on the opposite corner.  We showed that on the HWT tools last week.  So to reinforce that idea, I created a simple paper plate smiley face for our C and O tunnel formation.  Tunnel moves a bit but it was in the right spot when we started.  :-D  We created a letter C and crawled through it and on O we started in the same spot but I "closed it up" for them to get a sense that they go right back to the beginning.  They enjoyed this, especially with me closing it up!

Water Transfer With Sponge
 I was talking about the various ways to strengthen hands besides coloring.  Here's one.  I'm sure I've mentioned this in a blog before.  I wasn't planning this activity but came across a whale sponge (you can create any shape out of a sponge) when I was looking for a different sponge this morning so quickly added it to our things to do.  :-)  They put the sponge in the bowl and squeezed the water into the measuring cup.  I added blue coloring to allow for a bit of self-correction.  If they spilled the water, they'd see it more clearly. And as you can see below, we got a little pouring practice in as well.  If you have never done an activity like this before...try it!  The children always love this type of thing and it has many benefits one being...it's very easy to set up and clean up! 

Eye Dropper Ocean
 Another water transfer activity that uses eye droppers.  To reinforce our focus letter I just cut out the center of a coffee filter.  They used blue, green, and purple watercolors to drip the colors on their O to make their ocean. When dry (I microwaved for 15 seconds and it was dry enough to glue)  it was glued onto a paper plate and they added ocean themed creature stickers.  I also provided a container so they could explore with various colors on a regular coffee filter as well.  They always do enjoy this!

Art:  Stenciling
 Check your dollar stores for these type of stencils.

Sensory:  Gel
 Just a little free exploration. I used the blue gel since we were doing ocean.  Added a couple tools and ship counters but my main goal was them to explore it with their fingers.  One "wondering" they had was if "this is what a jellyfish felt like?"  :-D

Oean Life Graphing*
 I ended up cutting apart the dice and putting the pictures in our large dice since I can never seem to make the cardstock dice work for me.  Next time I'll plan ahead and use larger pictures and add the picture labels on it as well.  The children took turns rolling the dice and we created a graph and went until one animal reached ten and then discussed it.

How Many Fish in the Ocean?*
 I decided to print this on cardstock and let them make their own and take it home to work with instead of laminating a set here.  Nice even lines perfect for scissor practice. They are narrow and a light gray so you may wish to reinforce them with marker or crayon if your child needs that.

Phonological Awareness:  Rhyming*
Just simply laminated this time since time was short.  Typically I'd cut the pictures apart and make an activity like this into a velcro board.  Always good to get some rhyming practice in there.  Don't just assume they "know it" after they get a few answers right.  On more than one occaision I've known children who could match familiar rhyming pairs (cat/hat, tree/bee, truck/duck) but give them pairs of words that are not typically used in rhyming activities (whale/pail, ocean/lotion) and they were unable to match them, thus they really hadn't mastered rhyming yet.  :-)  So slip rhyming in frequently and use unfamilar rhyming pairs also! 

Word Chunks/Letter Recognition*
The vocabulary cards are from the preschool pack. How we used them today was to find the o's in the words ("highlighted" them), if there were any and if not to reinforce that "none" is the number zero.  Then sort the cards onto the word chunk mat.  Can't see it all that clearly but the top of the columns are hand clapping clipart.

Hope you all had a lovely day.