Showing posts with label language. Show all posts

Tuesday, May 29, 2012

5 Green and Speckled Frogs!

Of course we started our frog theme out by singing 5 Green and Speckled Frogs.   It's very much a favorite and easy to learn. 
I chose to use number frogs from SparkleBox.  This was perfect for the toddler in the group, though they all enjoyed it.  Construction paper logs, laminated frogs, and blue foam pond.  (After these last few days of doing this song T. can name 3 out of 5 of the numbers and can point to all of them when asked where a specific number is.  He also has come quite a ways in ordering the 5 all on his own each time!) 
We also looked at pictures of frogs and found out that not all frogs are green and speckled!  :-)  We learned that some frogs, like the red eyed tree frog in the picture on the right has bright colors and bright colors usually means "Watch out!  I'm poisonous!"   A site to get you started on kid friendly photos and facts is Kid Zone.
We pulled out our Animal Habitats game again, the picture was when we did the farm/zoo animal venn diagram back in February.  And figured that even though there wasn't a frog on every mat, there could be.  Frogs are found all over the world, except in the Artic, Antarctica and Greenland.  And they can be found near any (actually, near every) fresh body of water.  They prefer ponds and marshes because the water doesn't move as quickly.  :-)
Children created their own frog habitat picture and frog to go with it.  We chose to just use the frog pattern that was on the same page as our life cycle (The Mailbox) to save paper.   Oil pastels and tempera water cakes were our choice of media for this project.
The following verse of a song from Songs That Teach, we sang today.
Habitat Song
A habitat is a place to live.
A habitat is a place that gives.
A habitat is a special home
to plants and animals-their very own.

Frog Life Cycle
This from a Mailbox Publication (TEC #845).  Children cut out the life cycle circle and trace that circle onto green paper and cut that out as well.  Tracing and cutting are definitely something they will do quite a bit of in most Kindergarten classrooms so I want them to experience holding a pattern and tracing it.  The flower was just made with oil pastels. Did you know that a female frog lays up to 4000 eggs at a time?  Wow!  This is also where I slipped in the fact that Frogs are amphibians.  Amphibian means "2 lives".  The frog begins as eggs/tadpoles/froglets in the water but when they are full grown they live on land.
Counting Frogs Clothespins
 
Making Learning Fun
Many of their counting strips have items that are randomly placed on the strip vs. ordered left to right and top to bottom.  :-)  This makes it a nice challenge for older children but quite difficult for younger children so I provide a dry erase marker to use on the laminated strips so they can mark off the flies as they count them.  Then they know what they have counted and what they haven't.


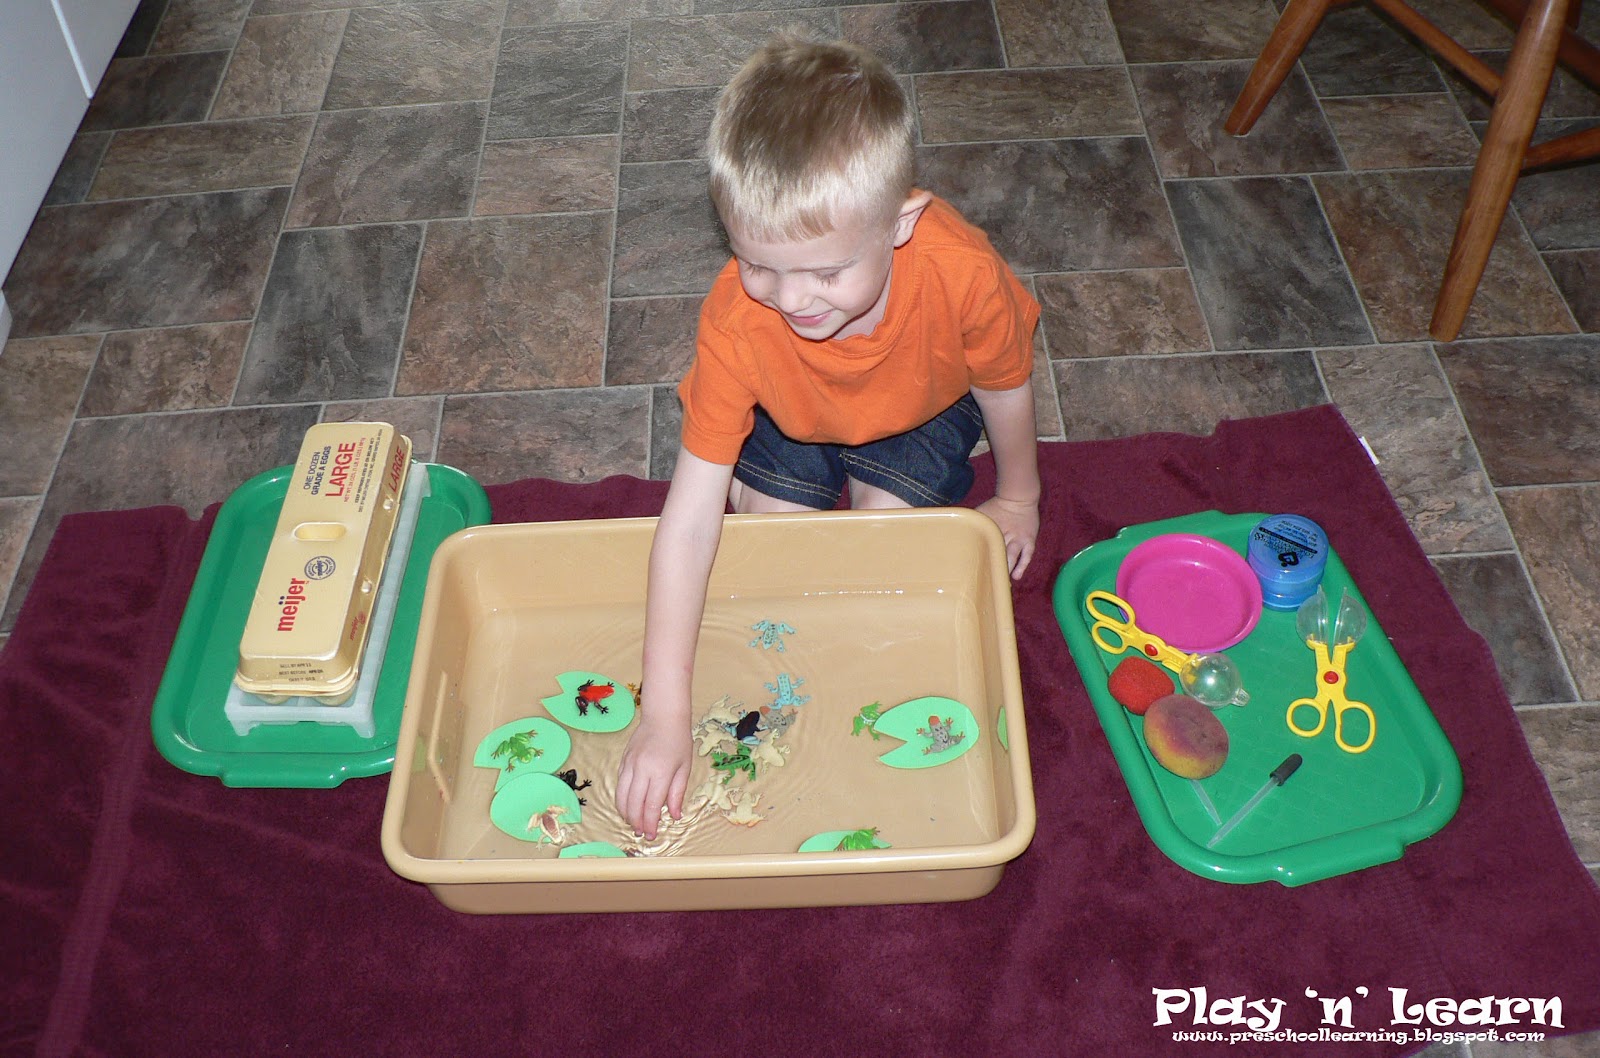
Water Play with Frogs and Lily Pads

 These frogs are from Dollar Tree. I simply created circles from green foam and snipped a triangle out of the side.
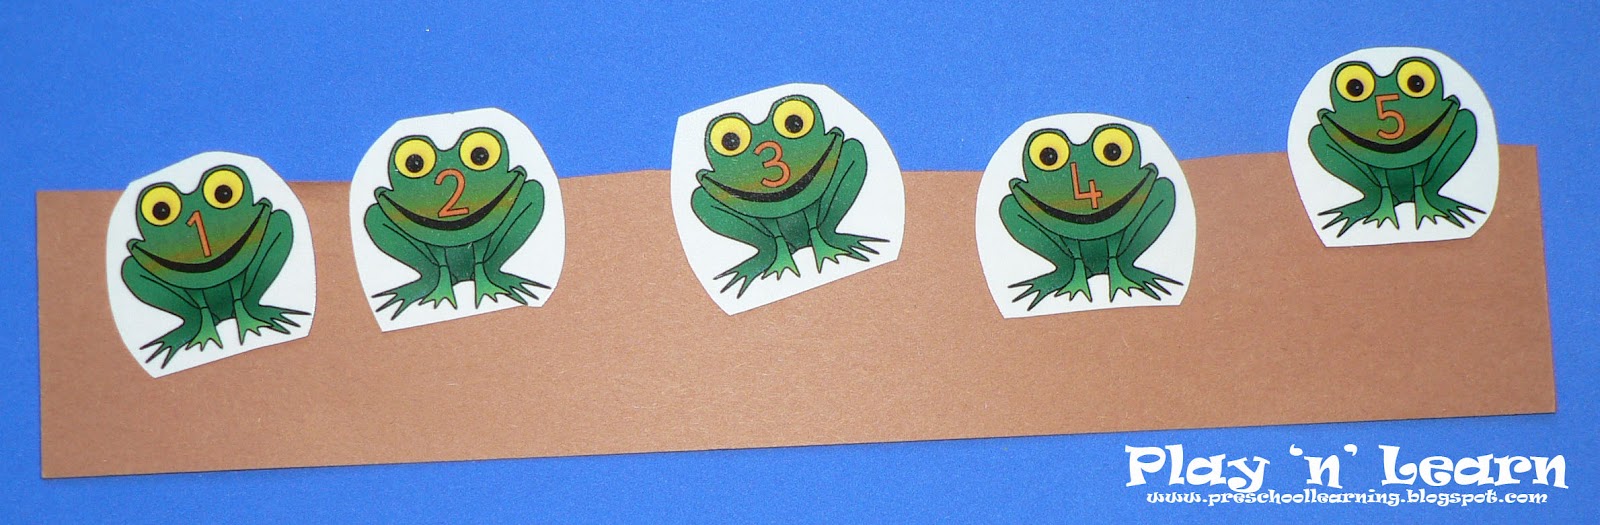

Frog Jumping
The Dollar Tree has a nice teacher's section.  Often I can find theme related bulletin board strips.  Unfortunately I don't really have bulletin board space here at home, like I did in center-based programs, but we use them for other activities.  :-)  Here the child put their frog on a number and we rolled the dice and jumped forward and backwards.  This was to reinforce the +, -, = signs. 
Blurry picture but I wanted to have on record T.'s 1:1 correspondence here during free play time.

Consider the free Frog Frolics pack from Homeschool Share!  Lots of goodies there that we are incorporating into our days.  Rhyming with Frog, Prey/Predator, Frog Maze are three we've done so far and there are quite a few more that we plan to do over the next couple of days.
Frog Maze
This time I chose to have them place mancala beads on the flowers instead of using dry erase marker.  Just tweaking it a bit to keep interest and incorporating that pinching/two finger pick up motion.  The kids always enjoy working with mancala beads.  :-)

Camouflaged Frogs
Yep, can't even see the frogs in there.  :-D A side note, I think the favorite sensory material over the last 6 years has been a dried bean mixture.  There is just something about this mixture that they don't get tired of!

Frog Egg Sensory
Deborah from Teach Preschool recently posted about water beads and they are a favorite here also.  So in that post, she mentioned using them with shaving cream.  Oh!  We hadn't done that yet so I decided to do that today and it worked out perfectly.  One child said, "Look, frog eggs!"  So our conversation went off from there.  Neat!  Wasn't even planned.   From awhile back we had rainbow water beads, however, sitting over time caused them to turn that brownish purplish color...worked out nicely for our "frog eggs".  :-P

Frog Color Words
We started out with K. reading a very old Weekly Reader about Frogs and their colors.  Perfect sight word practice for her and since it's been an odd couple of weeks and our frog activities are being spread out, it was a good review of the frog life cycle.
Then K. worked on the clothespin color word match from Making Learning Fun and H. and T. worked together with me using the other frog color match.  For whatever reason, I can't find this match in any of the logical places it would be on my computers, nor can I find it in a several of the searches I did on the internet.  So, I'll keep looking as it's a very nice activity for toddlers and young preschoolers to introduce the color words.  If you know the link to this color/frog-lily pad matching activities...please leave a comment!  For some reason I was thinking it was from a homeschooling mom. Thanks!

Froggy Painting
Every once in awhile I like to do a step by step painting/drawing project.  It brings their attention to the shapes in making a picture and helps with their idea that they "can't draw".  Below is a close up of one of them to show our "flies".  :-)  Black beans and white crayon wings.  They enjoyed this simple project. 

Tally Marks
This was very well liked.  I had one child place the foam lily pads around the living room and another child went around and put a frog on each lily pad.  Then each child was given a handful of craft sticks.  They flipped the lily pad over to see the number, stated it and then created that number with tally marks.  We use the Tally Mark Poem that goes like this...
1, 2, 3, 4
Number 5 shuts the door.
6, 7, 8, 9
Number 10 makes the line.

And to end the morning on a positive note...
A yummy lunch was set out for me...including frog soup!  :-)

Thursday, November 10, 2011

O is for...

O is for Ovals and Octopus!

Well, didn't have time to post yesterday.  'Twas quite a day.  Anyway, I'll just include two of our oval activities along with some of our octopus activities that we did today.

Quick...change the circle to an oval!
This was a very simple activity that they really got a kick out of.  I added a number component by putting a different number of beads on each pipe cleaner circle.  First we started with talking about the pipe cleaner circles and singing our circle song..."This is a circle, this is a circle, how can you tell, how can you tell?..."  And then I took one circle and quickly pulled it into an oval.  They know what an oval is so it was just reinforcement but that's needed also.

Oval Song
Tune:  Up On the Housetop
I am round, this is true.
But I just might fool you.
One way I'm thin, one way I'm tall.
If you stand me up, I'm sure to fall.
I am an oval, this is true.
I am an oval, did I fool you?
One way I'm thin, one way I'm tall.
If you stand me up, I'm sure to fall.
   Gayle Bittinger
End result, these pipecleaner ovals/circles are perfect for counting.  I will definitely use the bead/pipe cleaner task again because they can move each bead as they are counting.  Perfect!  Love this picture.  The number ten oval is the only one that I created a pattern with.  I'm always trying to slip things like that in to encourage them to look for details.

Oval Frame
Before exploring with circle/oval sponges with painting, I reinforced the shape oval by providing an oval piece of paper to lightly tape on a large rectangle.  She sponge painted around the oval edge and then covered the rest of the paper with paint in order to create a "picture frame".  When dry, K. drew a picture of her "family" inside (which ended up being Grandma, herself, a "new" brother, and a toy octopus  :-D).

Okay, now to Octopus.

5 Little Octopuses
We started out by watching this animated story from www.abctwiggles.com.  I like their animated stories, most of the time.  They do highlight the words as they are reading them.  They are often repetitive which is good also.  Simple stories.  So I printed off the booklet from their sister site (Kids Soup) for the children to cut apart for a scissors task today.

Orange Octopus Playdough Mat
Great for rolling out those "snakes"!  Reinforce the 8 legs fact.  They thought the fact that an octopus can grow back another leg if they lost one was pretty neat.  Of course, they had free exploration with playdough after this task.

Sensory:  Water Play
Well, I forgot to get my octopus from the garage this morning.  Oops.  It was neat to see them use their imagination though.  They turned a globe shaped container into an octopus and a sponge as well.  So turned out well.  Love to see their creative thinking.  Another child used both hands together to be an octopus and wiggled their fingers in the water to make waves.   I think this came from the fact we created a handprint octopus today.  Love to watch them explore!

Handprint Octopus
This is how ours turned out.  I provided oil pastels for them to use for seaweed.  Stickers for the fish.   We had used a sponge to add the blue...oops, it was purple LOL..."texture" to represent water on the paper.  O is for orange so we chose orange paint to print with.  They wanted googly eyes, which they ask for whenever they get a chance.  :-P  Cute.    

We did free exploration on colored fingerpaint paper today as our true art project.  :-)  Actually, I usually use black fingerpaint with this paper because it has more of an effect than other colors.  But!  This was exciting for me...H. is working with the black fingerpaint and said, "Ink! Look this octopus sprayed ink!"  :-D   I hadn't even thought of that!  Yeah!  And of course I wore cream today.  Why, why, why?  Obviously I don't plan my wardrobe around our activities because I could safely say that everytime the kids use black fingerpaint I'm wearing cream or white.  Blah!  LOL

The giant orange octopus.

What's Different Strips
These are so easy to create yourself with clip art.  I love them because it's an easy way to reinforce first/last in a line as well as encourage descriptive language.  I find that many times the children can point out which item is different but when I asked them to tell me why...they have a hard time describing/telling me the reason.  It comes with practice.  Last year K. couldn't tell me the reasons but after a few "what's different strips" this year, she is quick to tell me why they are different.  Making you own allows you to be progressive in the difficulty.  Not sure if you can see it here but the first strip I did had a completely different (including color) octopus.  The second strip was a different octopus but still orange.  The third strip was an upside down octopus.  The fourth strip was a smaller octopus and the fifth strip was a flipped octopus and that one was hard for them.  It was just a very small change...they had to notice the bubbles or the eyes.

Perhaps I'll stop here for now.  Hope you all have/had a lovely day!  We enjoyed watching the short lived snow!  Half day for the boys today...they were bummed that the snow was done by the time they left the school.  But I see more clouds rolling in, they may be in luck.

Friday, September 9, 2011

Sight Words

My oldest student is ready for a bit more of a challenge and so in the afternoon I have some activity trays set aside for her that focus on print concepts/vocabulary, sight words, and reading concepts.  No, this is not typical for most preschoolers.  I do not normally do much more than generally introduce the idea of sight words and really, most are not ready to learn to read until at least the last part of the school year or even until they get into Kindergarten.  But we'll have to remember that she has been with me since a newborn and here full time during her main preschool years.  Makes a difference!  It'll be exciting to see this part of her development. 

Today I'll just share three sight word activities we did focusing on the words one, two, three and red, yellow, blue.  I chose these words first as I often place the words under the colors and numbers in our activities so they are somewhat familiar.  As an introduction we did a little crayon/water color resist.  This is not a new activity for us...we do them quite frequently but the idea of "magic words" always adds the excitement.
I had wrote the simple sentences on white cardstock, with white crayon.  She painted over the cardstock with watercolor and then we read the sentences together.  One of my goals was to see where she was at with simple sentence comprehension.  I had placed the corresponding colored markers and stencils on a tray for her and after we read the sentence she chose the color of marker we needed and the stencil and traced the stencil that many times.  I chose to color the shapes in myself, for various reasons. 

The next day we did some simple sight word puzzles.
I just used a different cut for each rectangle to make them into puzzles.  I can always do more in the same format and use them for games and that will allow for review in the future.

Then another day we played Memory. 
Eventually we'll have to move to just the words as many sight words do not have a picture to correspond with them.  But we can create more in the same format and make a larger memory board.

The really nice thing is that I have her every day, all year, so we can go as slowly or quickly as we wish.  Next week we'll be adding "look" and "a" but also using these same sight words until she really gets them.

Please share any of your sight word activities...I sometimes get in a rut with sight word activities, especially, and so am always looking for reminders and fresh ideas! 

Saturday, June 11, 2011

Language/Literacy and a bit more.

Literacy has so many components.  As mentioned in the past, many of them can be reinforced informally.  However, I do like to plan activities specifically for the different components as well, to make sure that I'm covering a bit of everything. 
 One activity we are doing first thing, during our summer program, is a journal.  This journal topic is only one word and is related to the story or book that will be used that morning.  Makes it a very easy way to transition to the next activity.  I use a one word topic to allow for a wide variety of responses.  Children are invited to share their journal but if they don't wish to, that is fine also.  There are many types of paper available on the Internet.  For fives and younger, I do recommend just blank paper with no lines at first.  After they are more confident with their writing, then move onto only one line at the bottom of the paper.  Our Kindergarten teacher also starts with blank or one line depending on the development of the child.  Then she moves onto lined penmanship paper.  http://www.printablepaper.net has SO many different types of paper templates, free to print.  That is where I printed off the penmanship paper with the lower line highlighted blue. 

I recommend a journal time that allows for the child to take as long as they want.  Unfortunately, it's not working that way this summer.  My older kids need more time but the younger one needs to move on as he's not quite as detailed as the other ones.  And though I have suggested they keep working, they prefer to do the activities with me so my kids end up finishing their's later.  But if you can, allow for them to work as long as they wish.  C. usually writes a sentence like I love the orange cat and the tiger and draws accordingly.  A. is eight and writes a paragraph and draws accordingly.  My youngest student draws a picture and is encouraged to write at least one word.  I provide an alphabet chart for them to refer to as they wish.  http://teachers.net/gazette/NOV02/printable.html (down the page a bit. pdf file called letterchart.)

So then we moved onto a story.  I wanted to do The Little Red Hen.  But my copy must have grew legs and walked off.  So the older kids all took turns reading Across the Stream.  This book's main character was a hen.  Oh, our journal topic was "farm".  So, of course, it led into the book about a hen and her chicks.  Watching and listening to older children reading a book is very beneficial to a younger child.  Then we sorted the capital letters of the alphabet by sticks and curves.  I really work on children noticing details in all things but it's especially helpful for them to notice how a letter is made.  In a previous post, I mentioned about sticks and curves.  In the past I have the children create the letter and then sort the letter into the correct column/basket.  But the children here have all experienced that and we wanted to move quickly through the activity as we were running a bit behind as a child arrived later then starting time so only used the sticks and curves with the ones they were unsure about. 
The hens get used for much more then what they were made for.  I have a whole set that I usually use for a number activity/display and I have smaller eggs that we place inside of the nest, the number of eggs corresponding with the number on the hen.  Anyway, they are laminated so I just drew sticks on the first nest, curves on the last nest, and both sticks and curves on the middle nest and we were set.  :-)  Thanks A. for writing all the letters for me!  He's 8 and has loved being a "teacher assistant" so far!

Then we move onto moveable letters.  The moveable letters is more for the child going into Kindergarten.  In this picture you can see I'm using letter tiles.  Over the next few weeks you'll see me change.  Actually, Monday I'll be doing something a little different since our focus short vowel is the same as it was in this picture...and he's already getting the idea so we'll challenge him!

The older two off to the left are writing the word on chalkboards. Then they'd all check each other's work.  A. is taking this time to learn to write in cursive. :-)  They haven't started yet but will in 3rd grade.  His cursive alphabet chart is from www.hwtears.com.

So after they have done their high frequency word booklet, calendar, story/activity and moveable letters, it is so time to get up and move!  So I plan an activity (typically math but it won't be that always) that involved some large motor.   The kids LOVED this very easy activity.  Hard to get a picture but here's one. :-)
The way our little house is we can open the doors from the living room to the master bedroom, and the master bath doors and it leads into the utility room, kitchen and back into the living room.  So we often use that "circle" for our large motor.  So for this activity, I had number/answer cards up on a door.  The four purple cards corresponded with the four types of farm animals available.  The child takes a purple card, reads the word (or looks inside for a clue) and all the children follow that child around the circle moving and sounding like that particular animal.  Then the child takes a subtraction card (upside down on a tray) and works the problem with the corresponding animal cards.  Does that make sense?  So if they chose cow, they moved and moo'd around the circle and then the child came back and chose a subtraction problem and worked it out with cows.  Then they told me the answer and we stuck it under the correct number on the door.  This leads into number families also.  I encouraged the older students to also work out the problem with the cards, even if they could do it in their head so that the younger students are able to see what is being done.  We did this for quite awhile.  Always read your child/group, if they are becoming disinterested, stop and do something else.

The other week we did the parachute, during large motor.  First we counted by ones, flapping the parachute, to 30.  Then I asked what other ways we could count to 30.  And we counted by 2s, 5s, and 10s, labeling it skip counting.  Then I placed 30 cats (labeled with a number and the number word) on the parachute and we tried to keep them on as long as possible.  When they were all out, they each were given a specific number of cats to pick up and we worked together to put them in order.  I created the cats to make a simple ABAB pattern as well.  This helps them self-correct a bit.
Sorry, didn't get a good picture but this gives you an idea about the cats.  This was the day we did Scat the Cat also, and was working with the short a sound.

Looking forward to Monday.  This is turning out to be a fun adventure! 

Friday, May 6, 2011

Puzzles

Trent enjoys puzzles...he's left handed...oh, what does that have to do with anything?  LOL  Hmmm....another blog!  L. tends to think he "can't" do puzzles over 12 pieces.  :-P  But with a little encouragement...voila!  All by himself.  He was so proud of himself!  Now onto a 24 piece!  K. is retelling Little Red Riding Hood! I don't think she even knew I took a picture.  It was completely all on her own! LOVE IT!!!

 
I'll start by sharing a little blurb from another's blog.  You can read the whole article at
http://hubpages.com/hub/Educational-Toys-for-Kids-The-Benefits-of-Puzzles

Here are some of the skills that are enhanced by playing with puzzles:
  1. Cognitive skills: Puzzles improve a child's problem solving and reasoning skills. It helps them to see whole-part relationships, increases their visual spacial awareness and depending on the subject matter can teach them a variety of topics like the Alphabet, Numbers, Color recognition, shape recognition, categories like pets or transportation vehicles, and more.
  2. Fine motor skills: Puzzles are fun way to improve fine motor skills. From the time a baby can start eating solid food parents give their children cheerios to help a child with their pincher grasp. Fine motor manipulation is key for writing but but children start learning this skill long before they can hold a crayon or a pencil. Various types of puzzles like peg puzzles and chunky can help teach little ones to pick up and grasp pieces and they aid in the development of the pincher grasp.
  3. Hand-eye coordination: As a child places each piece in the puzzle they are manipulating it so see if it fits. Their hand eye coordination is enhanced through this trial and error process.
  4. Social skills: Puzzles can be done alone but are also a great tool for fostering cooperative play. As kids ask for a piece to be passed to them, or discuss where a piece should go they are sharing the task and learning to cooperate. It can also help a child learn how to handle frustration when a piece does not fit.
------------------------------------------------------------------------------------------------------------------------------------

I agree with what this individual has posted.  It's good to think about the reasons why certain toys/manipulatives are beneficial.   There are so many different types of puzzles.  They vary in number pieces, material it's made out of, peg/no peg, large/small peg, jigsaw etc.  What I have on the assessment I use is that a child, at the end of their preschool years, is able to complete a 12 piece jigsaw puzzle.  That is actually "harder" then what many preschool assessments state.  Usually I see a 6-8 piece puzzle.  But, like with anything, when a child works with something and has been taught how to do it...they advance.  I find that my students often leave with the ability to do up to a 24 piece puzzle.  My own boys did 63-100 piece before Kindergarten.  Part of it has to do with their personality and natural ability for logical thinking but most of all it's experience. 

The logical thinking that is working in the background as they try to do a puzzle will eventually help them be able to think about larger problems and solve them.  We definitely want that.  Also, I find that many children just don't notice details and so I find that puzzle activities helps them in this regard.  Noticing details will help them with writing letters/numbers, drawing, patterning and more!

The small pegs are great for encouraging the tripod grasp. 
The complete article might be beneficial for you.

Well, what do you do if your child is past these peg puzzles but still could use the fine motor experience of them?  That's very often the case, I find.  They consider the peg puzzles "baby puzzles".  Well, breathe some new life into them.  :-)

*  If you are missing pieces...use the others for stamping.  Most are a basic shape and will print nicely on a paper.
*  Remove the puzzle pieces and place them into a sensory tub of rice, lentils, or other "clean" sensory.  Then they can find them and put them back in the board.
*  Hide them around the room...better yet, have them hide them for you and you bring them back for the child to put back in the board.
*  And my favorite...use them for creating or retelling stories.  Peg puzzles can be great story starters.  And often you can find classic story puzzles at the dollar store that work GREAT for retelling/sequencing.


This past school year I found that puzzles got put on "the back shelf".  I very seldom noticed the children getting out the puzzles.  Hmmm.  Not good, at least from my perspective.  :-)  Part of it is interest...I hadn't really worked on creating an interest with them.  Part of it was that we had to move our main shelf and though the puzzles were kept under the shelf, just like the old one...however, they weren't as noticeable.  So, I started putting one puzzle out on one of the desks in the kitchen. That really helped!  It was like ..."oh yeah, Ms. Amber always puts out puzzles."  Now I see them pulling them out more frequently.  I rotate my puzzles every 1-2 weeks and provide a variety of types.  Large floor puzzles are perfect for getting the children to work together!  I also find that putting an older child with a younger child is great too.  In those cases I observe the older child pointing out and verbalizing about the details.   My favorite was when a child was doing one of our 12 piece alphabet puzzle and another was watching and the child was trying to put a non edge piece on the edge.  The observer said, "No, that's not right. See the perimeter is pink. There's no pink on yours."   Wouldn't that put a smile on your face?  It did mine.  Yes, I think the word "perimeter" is brought up in conversation almost every day....we use it with gluing, in math, with puzzles, during large motor and so on.  So when they hit 2nd grade and they are starting to learn about perimeter (like the work my son brought home from school yesterday)...it will be easy for them.  :-P

I'd like to have a set puzzle time and I may just work it in one of these days.  :-)  There is just not enough time in the day!!!  Be sure to encourage your child to pull out a puzzle today!  :-P