Showing posts with label bubbles. Show all posts

Sunday, March 3, 2013

Preschool fun!

One Schooling at Home struggle, is that my very academic preschooler really doesn't get the 1:1 I like to provide at this age...especially with reading.  But, really, he's probably more advanced than either of my other two were...mainly because preschoolers are like sponges and he is just absorbing so much that happens around the kitchen table!  But I do thank our 3rd grader who takes him under her wing often and does things like read a book to him!  :-)  So sweet! 
 
  Oh yeah!  Lite Brite.  We were so excited to get some new patterns for our very old Lite Brite.  He took his time sorting out pegs (this helped reinforced which color when with each letter) and then painstakingly put each peg where it needs to be only to find out there wasn't enough whites!  Ugh!  I so don't like it when things like that happen.  And do you think we can just purchase pegs by themselves?  No, I can only find small packs with the new cube Lite Brite patterns.  :-(  So, anyone have any Lite Brite pegs they want to get rid of?!!  :-D
 
3rd grader brought in a craft she created at home with T. in mind.  How sweet!  He enjoyed the alphabet board and matched foamie letters to it.  He's starting in with sounds of the letters now...how fun! 
 
File Folder Games...an ol' time favorite.  Unfortunately I do not have time to make them...but glad that our local library has a few we can check out!  T. loves them!  Rhyming, goes together, letter sounds, size, shapes, colors, etc. 
 
T.  loves to do things similar to what the other kiddos do.  (One day I gave him a few "worksheets" to do...I'm not big on them but he loves them.  When he finished them I said, "You can put them in the basket now."  Oh, it was hilarious!  "Really?!  Put it in the kids' basket?"   Yes, T.  :-)  That made his day!  Anyway, 1st grader is working on counting money so T. was sorting coins on a mat. :-)
 
This is what T. often chooses to do during our minute test in the mornings.  I like to see how his drawings change over the course of time. :-)
 
He cut the lion out all by himself! 
 
Then he added a pattern mane, flipped it over and wrote his name.  :-)  Then he wanted to write the word lion.  :-)  Love those little moments.  When I asked him to spell it he told me "lion, /l/, L".  Today I overheard him talking to someone about how to spell his name.  Then he said, dad, a in the middle and 2 D's.  Fun!
 
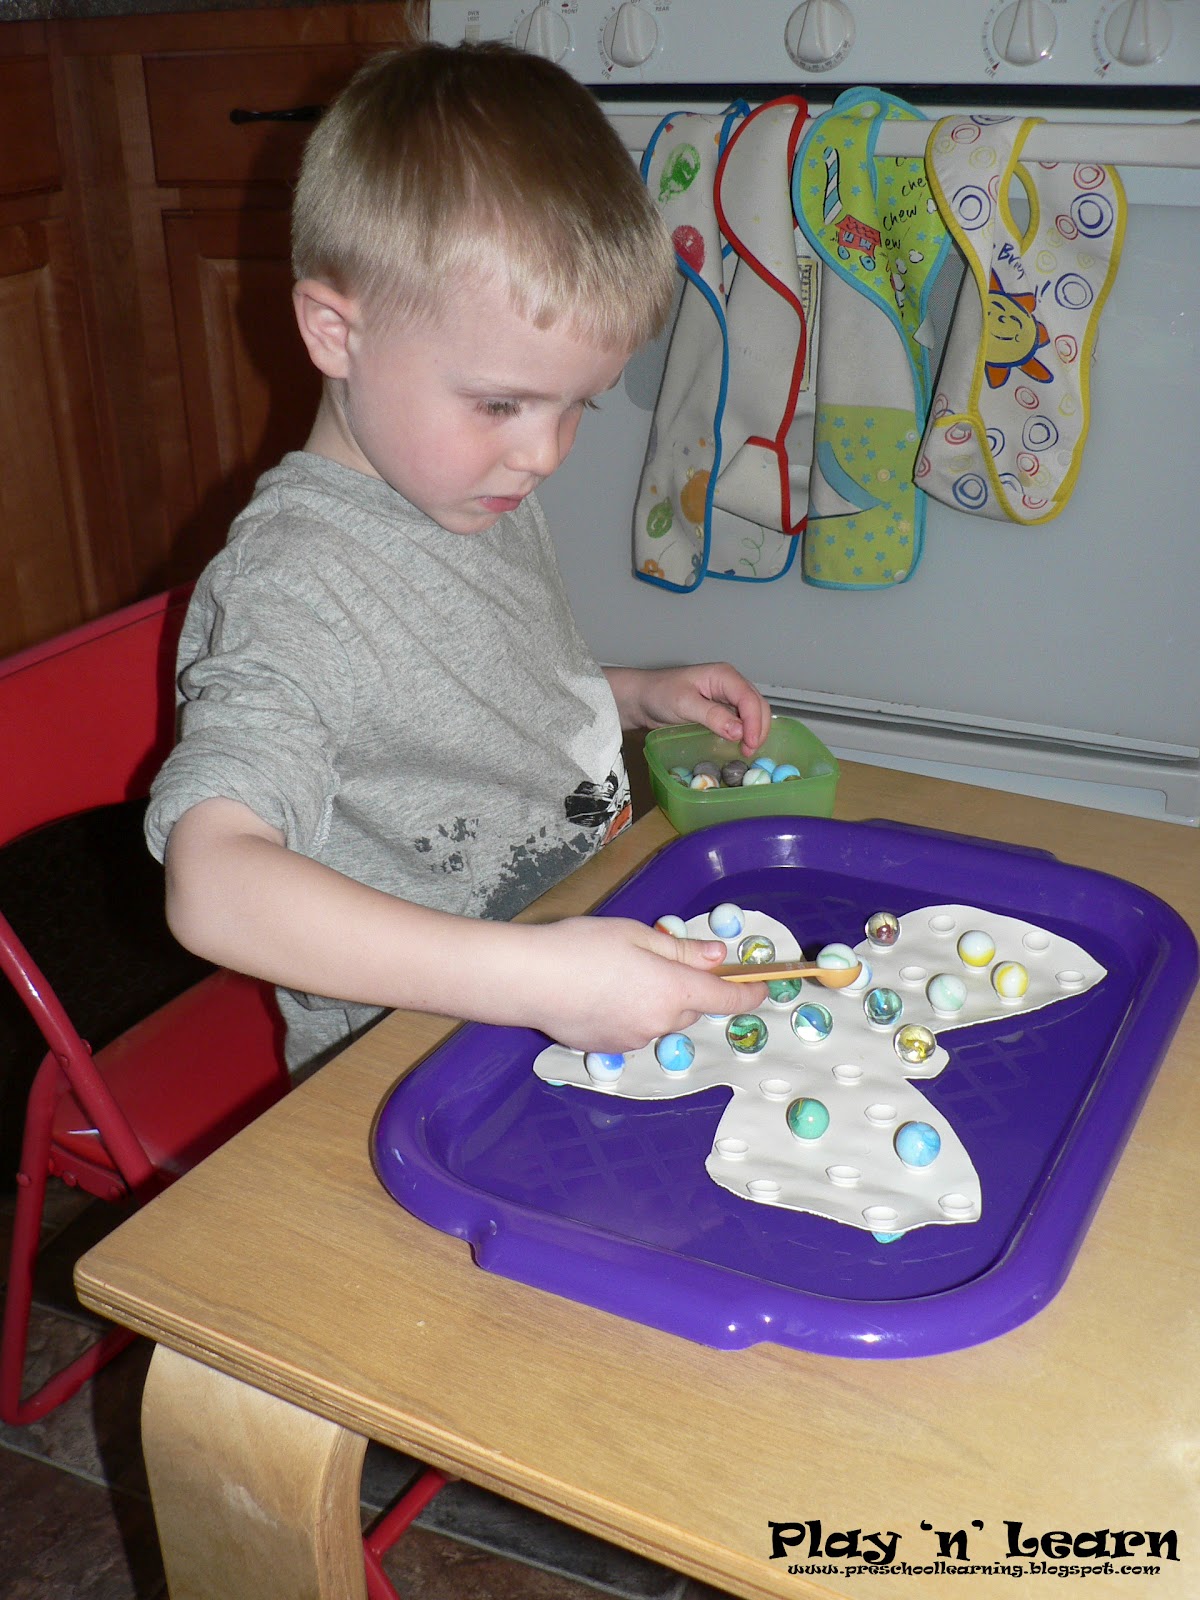
Child Care Land idea called "scrunch and glue".  All it is a page with random dots.  He uses liquid glue (perfect for glue control!) on the dots and then scrunches a piece of tissue paper and sticks it on top of the glue dot.  GREAT fine motor!  Good for reinforcing colors as well.  He enjoyed this very simple activity.  Side note, this is the first year I actually purchased precut tissue paper squares....in like 15 years.  I always was that penny pincher and just cut my own tissue paper.  How silly.  I recommend you just spend the few extra pennies and buy the precut ones.  LOL
 
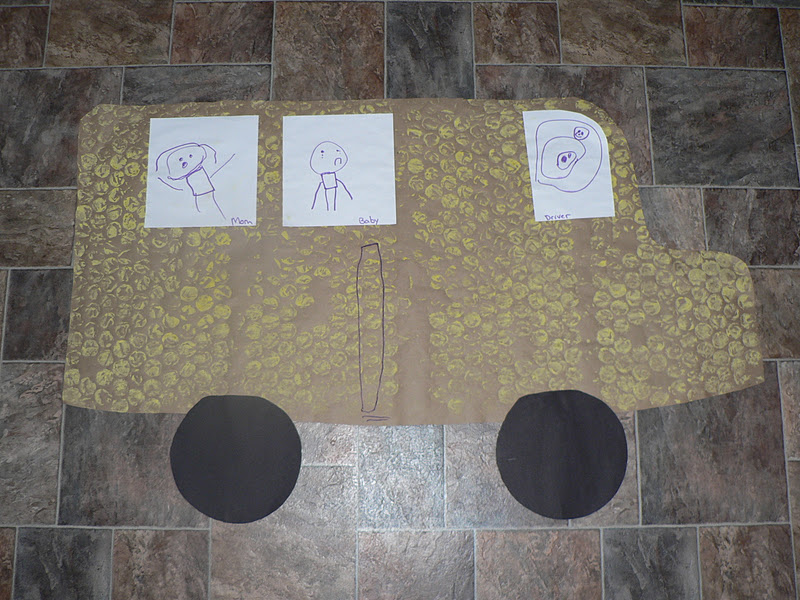
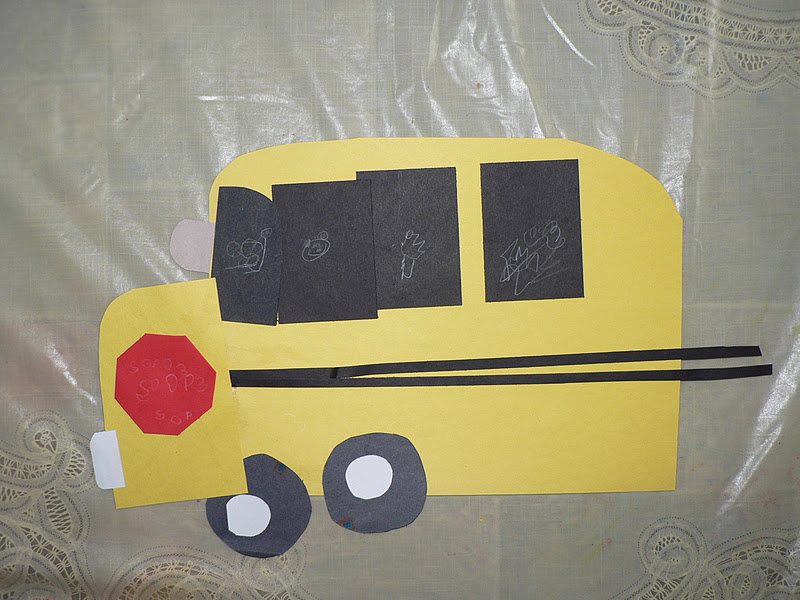
There's that 3rd grader with T. again.  :-)  She has such mothering tendencies.  A sweetheart.  They organized the pool for water play.  :-)
 
 
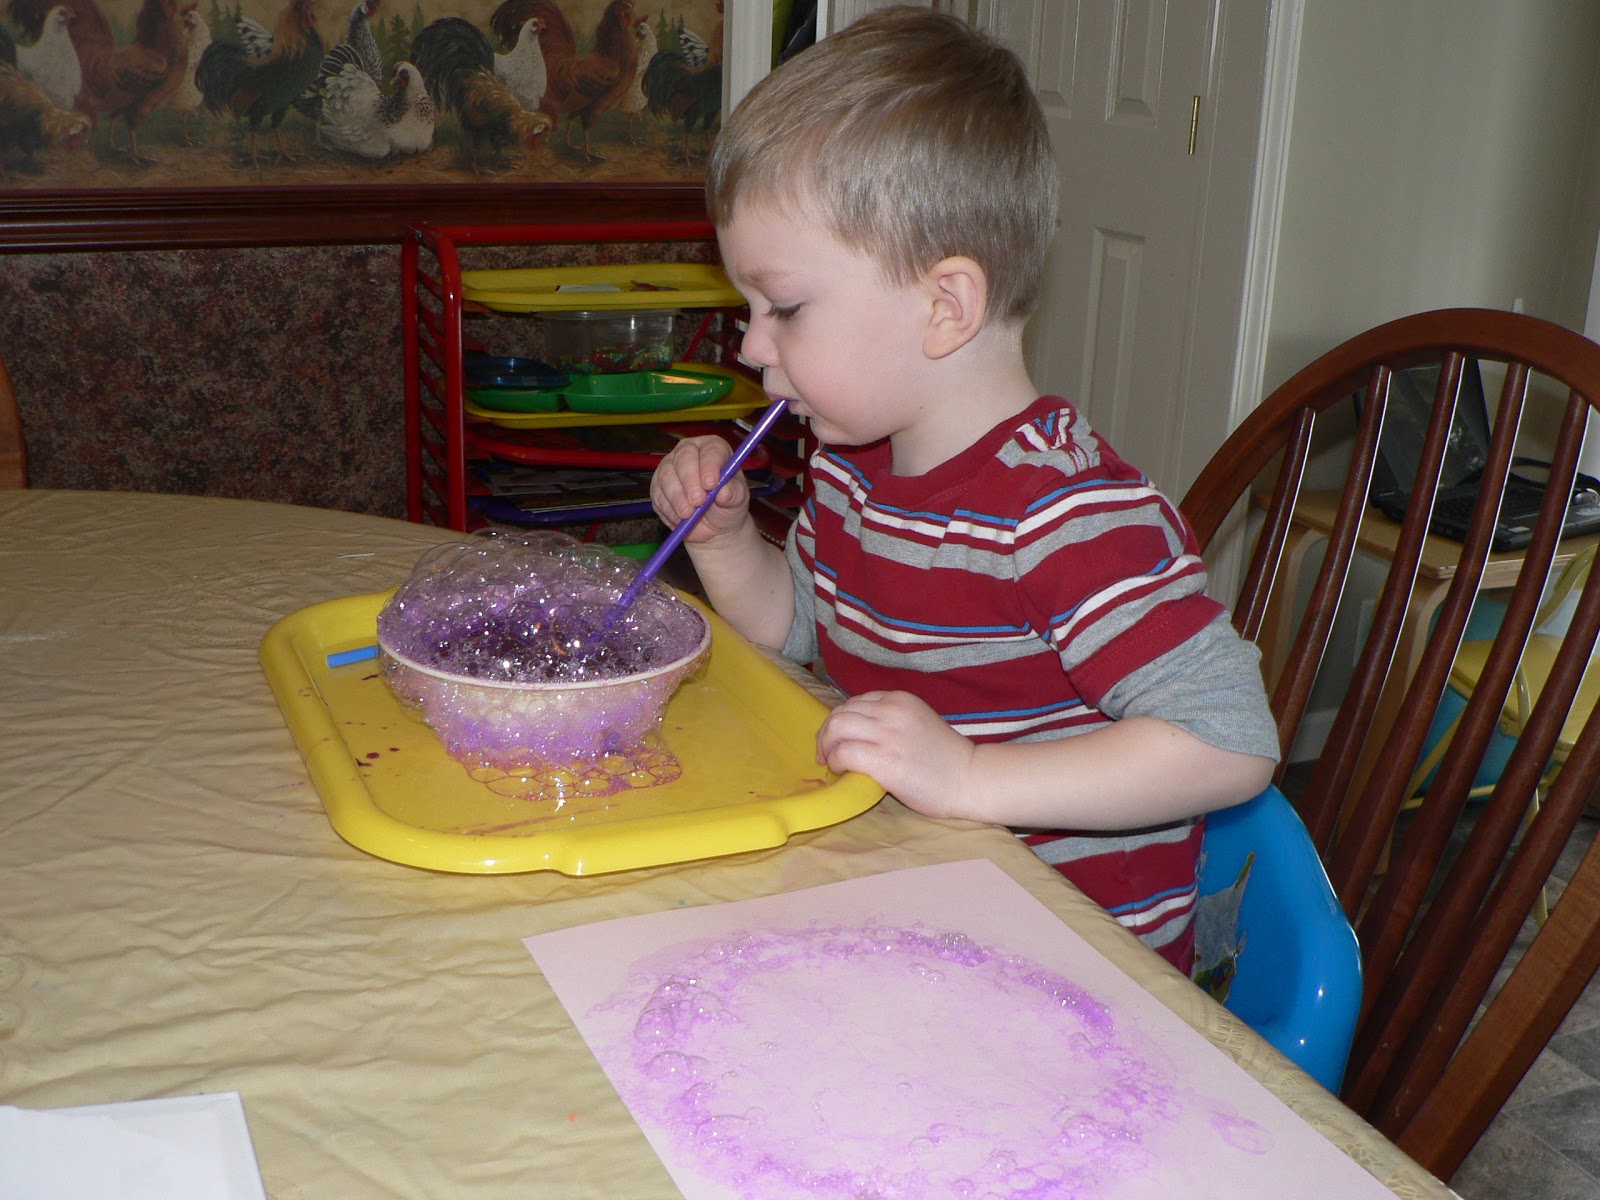
This is always a favorite!  A bit messy, but so fun for the kids.  Practice blowing in the straw first!  Soapy water is a little gross!  :-)  I used liquid watercolors and dish soap.  And of course the other kids in the kitchen didn't get anything else done during that time.  :-P  We ended up doing it as a whole group activity during our Free Friday activities.  They had such fun!
 

And, a weekend activity.  T. LOVES to help in the kitchen.  He does quite a bit with me.  Please allow your preschoolers to help as much as possible...great for learning responsibility, helping with their self-confidence, and is awesome for fine motor development!  Here he is making us some sugar cookies.  :-)  He felt very important using the hand mixer!

Tuesday, April 24, 2012

Beautiful Butterflies

A few of our beautiful butterflies from today!  It was a lovely day...how can it not be with doing activity after activity with butterflies as the focus?!  We even got to chase them all around the yard today!
Foot Print Butterflies
An oldie but a good one! They made awesome prints this year!  I often do this 1:1 during free play, first thing in the morning.  It's a great way to start our morning...giggle, giggle, giggle!
Butterfly Dictation
A very simple activity that encourages children to really think about a topic.  Writing the words for the child allows for me to reinforce left to right progression, beginning sounds (or for older children-middle or ending sounds/blends), and spaghetti spaces vs. meatball spaces.  We also take the time to talk about tall, small, and monkey tail letters and notice how many letters in each word.  They chose tissue paper to accordion fold into their butterfly and pipe cleaner for the body.  Obviously T. was into yellow today.   They also used butterfly stamps to embellish their poem.   :-)
Butterfly Symmetry/Visual Discrimination
Love that these are similar so they really need to pay attention to detail.  This activity fit into my time constraint but I would like to create one using real life pictures such as what we can find at Mama Jenn's site.
Butterfly Counting
We actually did this as a group.  T. chose a number card, H. put that many butterflies on the mat (with us all counting), and K. found the word card.   Our morning was pretty full this morning so this was a way to make this particular activity go a bit quicker and touch on a skill that each child is working on.  T: number recognition; H: counting w/ meaning; K: recognizing number words.

I was a bit concerned that there would be too much wait time for T.  I shouldn't have been concerned...entertained himself quite well!  LOL
This activity was printed from Kids Soup.  A lovely resource for preschool teachers!  The one website I actually pay a membership fee.  We glued pom poms, as was suggested, to the butterflies.  Made it much easier to move the butterflies around.
Butterfly Bubble Wrap Prints
We LOVE bubble wrap, especially for sensory activities.  It use to be that I would get plenty of bubble wrap in my packages from various places and was able to recycle/reuse.  However, they've changed to air bags.  :-(  So now I have to purchase a roll at the store.  But, it's worth it!  Before we started this activity we folded a piece of construction paper in half and they drew and cut out a basic butterfly shape to use as a print paper. 
We may add details after they dry, if the children wish.

On the left, if you look really closely, you can see bubbles.  I always squirt a good amount of dish soap with the paint (even if it's labeled washable paint/fingerpaint).  This is twofold: One, it helps the paint wash out a bit better but the main reason is because we can add just a wee bit of water and get some sudsy bubbles!  On the right, well, obviously this activity wasn't working for Mr. T.  He wanted to paint but he had just got done with blot painting and he threw a conniption every time he got paint on his hands from off the qtips.  So I knew he would not handle the finger paint so I exchanged it for lotion vs. paint.  Well, he didn't care for that either...but the other kids enjoyed the lotion.  :-P 
And, of course!  We must have some clean bubble wrap to explore with after the fact.  :-)  They were jumping on their pieces also and having so much fun that, even with the headache that decided to visit on today of all days, I had to smile along with them.  
 
Here's this week's rebus recipe.  :-)  Rebus recipes are definitely a favorite. 
My boys and I tried doing Celery Butterflies with pretzel wings but, well, it was very frustrating to say the least and I decided that if we were getting frustrated it wasn't worth doing it with the preschoolers.  So, next best...a practical skill of making and cutting a sandwich.  We made it and ate it lunch.  Cutting the sandwich was the most difficult part, as you can imagine, but it's the skill that they'd benefit most from practicing.  :-)
Butterfly Marble Transfer
Love, love, love marble transfers for toddlers and preschoolers.  And my school-agers...they still like it also.  Remember that marbles are choking hazards...so supervise.  :-)  1/4 teaspoon is about a perfect size for our marbles.  I simply cut the butterfly out of a bath mat.

Butterfly Blot Collage
Inspired by Ellie and Abbie
(Their process was a LOT different so check it out!)

Patterns were from www.childcareland.com.
Children were provided small precut butterflies to paint a design on and press.  Yes, we did something like this not too long ago, but decided we'd do it again since they always love this cause and effect activity.  Can't really see it in the picture but we only glued the center of the butterfly so the wings are up off the paper.

And a favorite picture for today...
She was even telling him, "Look, see this (period).  This is how you know it's the end of the sentence."  T. does very well for his age in many areas of development and it really is because he's been around these older kiddos.  Heaven help his kindergarten teacher!  Oh, wait, that just might be me!  :-P 

Tuesday, October 18, 2011

B is for...

B is for bus!
We did several bus related activities today.  One of the first things we did was "switch up" story time.  I have already used the felt board multiple times to tell stories and so today I put up felt board "Wheels on the Bus" kit (www.discountschoolsupply.com) and at story time said, "Today, you tell me a story."  Of course, since preschool children are still relatively concrete thinkers and look around, and then make up their story with whatever they see right in front of them...the story was about the bus.  :-)  'Twas fun and when they get stuck on what to say next there are always lovely open ended questions to help extend it.

B is for Bubble Wrap!
Who doesn't love bubble wrap?  I love it!  Found 2 long pieces in my sensory tub clean out last week and thought...hmmm!  B is for bubbles!  So...one strip we put out in the living room for stomping and running on.  The other we added yellow-lemony smelling dish soap and yellow paint for a sensory/art activity.
Adding soap to the paint (even if it is washable) makes it a little more bubbly and easier to smooth over the bubblewrap...it smelled good too!  We painted the whole strip and then laid a big piece of paper across.  She enjoyed the patting the paper process since it was soft/padded and then you could see the circles that the bubble wrap made on the back of the paper.  We then worked together to put it up on the wall to dry.  Didn't take long...nice thing about bubble wrap printing.  I trimmed around to make a simple bus shape and she added wheels, windows and door!  Ta-Da... B is for bubble bus!  :-)

Highway Shapes
Cute little shapes made like a road.  They also have the alphabet and numbers!  I can see these being used frequently in the near future.  I know I've often used cars with letters and have them make car noises (letter sounds) as they drove on that particular letter.

School Bus and Students Rhyming
A nice variety of rhyming pairs...some familiar, many not!  Usually K. will just randomly pick a picture and randomly try to pick its match from the selection and often keep trying the same picture repeatedly but missing others (which usually ends up being the rhyming pair!) So today we learned how to go about it in an organzied way.  Laying out the buses, leaving spaces, laying out the students in a row.  She then chose a student and said it's object word, then started from the left top hand bus working her way down the column and then from left to right until she found it's pair.  She completed the task a lot quicker that way!  Just a little bit of individualization as she has a pretty decent grasp on rhyming and is much more successful in tasks when they are organized.  Teaching good organizational habits now will help when a child starts formal education.  That's one thing I really like about Montessori.  Very much into order and organization!

Paper Shape Exploration
I had cut the shapes in accordance the a directional art activity from
I tend to do these a little differently than most teachers that are doing directional art.   I think activities like this do have their place every once in awhile...but I definitely don't consider it 'art'!  :-)  We always do something in addition to activities like these that are more open-ended.  These are great fine motor activities, especially if you have tracers and scissors involved!  How I do these is I'll make one together with the children...encouraging them to talk me through it...so it looks relatively like the what the "realistic" end product would be.  Then, I put mine away.  I do not hang it up or show it to them again.  I put it away so they can't see it and then I give them the same shapes I had, usually with extras and let them create with them as they would like.  They never end up the same!  Love that!  With this particular bus...I loved that sop (repeatedly) on the stop sign!  Not sure if you can see that in the picture.  And there are people in the windows!

Probability!
Yes, we introduced the word but I don't expect preschool children to tell me what it truly is.  But we do explore with this kind of thing because then the foundation is being set and brain connections are being made and when they touch on it at school, they'll have an easier time grasping the concept.
Don't you love her expression...obviously she was asking a question! 
I had purchased lima beans for an alphabet activity, which unsurprisingly I hadn't gotten to yet.  Then I thought...hmmm, why can't I turn them into little people for our bus!  So, here is what we ended up with.  Six lima beans with a curly haired person on one side and a straight haired person on the other.  She first put the numbers 0-6 in a line, numerical order.  This is so that she had a visual for writing her numerals.  She shook the beans and dumped them out.  Then put the curly haired ones in the first windows and the straight haired ones in the last windows.  Then she counted them, putting the appropriate number above them and then decided whether they were equal of if she needed to use the alligator mouth to eat the ones with the most (more/less).  Then she recorded her information.  She did get duplicates!   This would be great for working with the number 6 and addition fact family!  She wanted to take this activity home so we packed it up.  I can make another one pretty easily.  The pattern was just a bus I had from a Mailbox publication.  Simple enough to create on your own and you can add as many windows as you want!

All for now.  The next few weeks will be relatively busy so...blogging might be sporatic.  Though on the other hand, it's a stress reliever so...maybe not!  LOL

Tuesday, September 6, 2011

And we're off....

What a lovely day.  :-)  My boys went back to school and my preschool students came back with smiles and excitement.  Just a reminder to our preschool families (and school-age children), please ensure that your child gets proper rest so that they can learn and develop to their greatest potential! 

I'm not even going to try to share EVERYTHING we do in a day.  Just not possible.  So I'll try to share a couple activities each day.  Today I'd like to share our art and math activity.

Bubble Art
I colored our bubbles with liquid watercolor and chose to pour just a little into bowls so that we didn't have a bubble bottle incident.  They tend to be easily knocked over!  Also, the watercolors I used were not really all that washable so I didn't want them to stick their fingers into the bottle each time they dropped the wand inside.  We started with our paper on the sliding glass door and ended up placing our paper down on the floor.  We found that the bubbles would just 'float off' when we tried to blow them at the paper.  :-)  However, the children had more success at blowing bubbles downward toward the paper.  The interest point was popping the bubbles.  If you are able to get a bubble to land on the paper and stay for a few seconds it made a circle.  I found that they were more excited about it when they worked with someone else so I suggest that this be a group activity or if you are homeschooling your little one then ask if they'd like to work with you or vice versa.  This can be done outside for less mess worries (though it really wasn't much of a mess this morning) as well on smaller or larger sheets of paper.  Consider having your child cut out a circle first and bubble paint onto a circle to reinforce scissor practice and the shape circle.

In the Montessori circles you'll hear about "crumbing a table".  I used that idea as a jumping board to our math activity we did today. The children love to help but it isn't always a "help" so why not really teach them the right way to do it so they can be a true help...and in the process, reinforce shapes, number recognition and counting with meaning. 

As you can see, the tray allows for the material to be contained.  I created a square with masking tape in the center of the tray.  This is where they swept the foam shapes too.   The goal of that is to encourage them to create a pile and sweep it into the dustpan in one or two sweeps.  I created cards that had the numeral, numeral word and a corresponding number of shapes.  The children flipped a card over, told me what the number and shape was, if they could.  If they didn't recognize the number we counted the shapes together.  Then they put that many foam shapes onto their tray, swept them into the square and then together into the dust pan and dumped it in the "trash".  FYI:  I made sure there was enough of the shapes for each child to do it without sorting through the "trash".  Eventually I'll move the square onto the table cloth with we do projects like sand pouring or have a lot of snips from cutting.  Then we'll move the masking tape square to the floor and practice with the broom.

Hope your "week" started with a smile!