Showing posts with label rebus recipe. Show all posts

Tuesday, May 1, 2012

Tweet Tweet!

This week our activities evolve around the concept of birds.

We enjoyed looking through the Eye Witness Books: Bird.  They were really taken up with the skeleton of the bird!  So many different views of eggs, nests, feathers and even wings.  So fun to explore a nonfiction book with the preschoolers!  Though I have a plan about what I want to be sure to touch on...our exploration of a nonfiction book is very informal.  We sit together with the book between us and flip the pages talking about this and that. 

We also enjoyed a YouTube video, watching a chick hatch from an egg.  There are quite a few of them available, varying in lengths.  Check it out!  Great, especially if you don't have the ability to hatch eggs yourselves. 

Rebus Recipe of the Week:  Birdie Trail Mix


I really had a difficult time coming up with an idea around this theme that would be something they could do on their own.  But...this ended up being something they REALLY enjoyed the preschoolers and school-agers alike!  Feel free to download a copy of the rebus recipe here.

You can also download previous rebus recipes below as well, if you wish.

Watercolor Resist
We used oil pastels as they are bolder and softer than crayons, thus much more rewarding. Oil pastels are small, as well, and they are great for working with appropiate hand grasp. They used their arm for a branch. :-) Painted over top with blue tempera cake. They are still a bit wet when I took the picture, thus the wrinkles. The last batch of white construction paper I purchased was either not the same weight or it was not as good of a quality. But it was pretty thin for this type of art technique! I'll flatten them out a bit after they are dry.
Bird Feeders
Simply hot glued tp tube to plate.  They enjoyed this very simple activity.

Simple Fine Motor-Scissors Activity
We painted one large non waxed (dollar stores) paper plate blue and the half plate we squeezed glue all over before painting brown over top.  This allowed for them to just sprinkle the crinkle paper on top.  They colored and cut out their bird (pattern from www.childcareland.com) and glued onto the blue background and we stapled the brown plate to the blue background.

Sensory Pool: Bird Seed

One of my favorite activities to observe...with all ages...SENSORY!   If there was one main thing my school-age boys missed when they entered Kindergarten it was sensory.  And to this day the 1st and 3rd grader love it when I have enough energy to leave out sensory until they get home in the afternoons, for their own explorations.  With that in mind, I plan on having sensory tubs available for the school-agers this fall. Make a great "brain break"! 


This week we are also doing a few activities taken from the Preschool and Kindergarten Bird Printable Packs so generously shared by Homeschool Creations. If you haven't check out their packs, consider it. Sometimes I print individual sheets for the children, sometimes I laminate, other times I place the sheets in page protectors.

Ended up that the sun came out (thank goodness...I didn't realize how much cloudy dreary days effect my energy level) and it was beautiful outside...so one literacy activity which I knew would take a bit more time got set aside until another day. :-) Wanted the extra 10-15 minutes added to our outside time. We all need the sunshine and fresh air! Hope you all got to take advantage of it too!


Tuesday, April 24, 2012

Beautiful Butterflies

A few of our beautiful butterflies from today!  It was a lovely day...how can it not be with doing activity after activity with butterflies as the focus?!  We even got to chase them all around the yard today!
Foot Print Butterflies
An oldie but a good one! They made awesome prints this year!  I often do this 1:1 during free play, first thing in the morning.  It's a great way to start our morning...giggle, giggle, giggle!
Butterfly Dictation
A very simple activity that encourages children to really think about a topic.  Writing the words for the child allows for me to reinforce left to right progression, beginning sounds (or for older children-middle or ending sounds/blends), and spaghetti spaces vs. meatball spaces.  We also take the time to talk about tall, small, and monkey tail letters and notice how many letters in each word.  They chose tissue paper to accordion fold into their butterfly and pipe cleaner for the body.  Obviously T. was into yellow today.   They also used butterfly stamps to embellish their poem.   :-)
Butterfly Symmetry/Visual Discrimination
Love that these are similar so they really need to pay attention to detail.  This activity fit into my time constraint but I would like to create one using real life pictures such as what we can find at Mama Jenn's site.
Butterfly Counting
We actually did this as a group.  T. chose a number card, H. put that many butterflies on the mat (with us all counting), and K. found the word card.   Our morning was pretty full this morning so this was a way to make this particular activity go a bit quicker and touch on a skill that each child is working on.  T: number recognition; H: counting w/ meaning; K: recognizing number words.

I was a bit concerned that there would be too much wait time for T.  I shouldn't have been concerned...entertained himself quite well!  LOL
This activity was printed from Kids Soup.  A lovely resource for preschool teachers!  The one website I actually pay a membership fee.  We glued pom poms, as was suggested, to the butterflies.  Made it much easier to move the butterflies around.
Butterfly Bubble Wrap Prints
We LOVE bubble wrap, especially for sensory activities.  It use to be that I would get plenty of bubble wrap in my packages from various places and was able to recycle/reuse.  However, they've changed to air bags.  :-(  So now I have to purchase a roll at the store.  But, it's worth it!  Before we started this activity we folded a piece of construction paper in half and they drew and cut out a basic butterfly shape to use as a print paper. 
We may add details after they dry, if the children wish.

On the left, if you look really closely, you can see bubbles.  I always squirt a good amount of dish soap with the paint (even if it's labeled washable paint/fingerpaint).  This is twofold: One, it helps the paint wash out a bit better but the main reason is because we can add just a wee bit of water and get some sudsy bubbles!  On the right, well, obviously this activity wasn't working for Mr. T.  He wanted to paint but he had just got done with blot painting and he threw a conniption every time he got paint on his hands from off the qtips.  So I knew he would not handle the finger paint so I exchanged it for lotion vs. paint.  Well, he didn't care for that either...but the other kids enjoyed the lotion.  :-P 
And, of course!  We must have some clean bubble wrap to explore with after the fact.  :-)  They were jumping on their pieces also and having so much fun that, even with the headache that decided to visit on today of all days, I had to smile along with them.  
 
Here's this week's rebus recipe.  :-)  Rebus recipes are definitely a favorite. 
My boys and I tried doing Celery Butterflies with pretzel wings but, well, it was very frustrating to say the least and I decided that if we were getting frustrated it wasn't worth doing it with the preschoolers.  So, next best...a practical skill of making and cutting a sandwich.  We made it and ate it lunch.  Cutting the sandwich was the most difficult part, as you can imagine, but it's the skill that they'd benefit most from practicing.  :-)
Butterfly Marble Transfer
Love, love, love marble transfers for toddlers and preschoolers.  And my school-agers...they still like it also.  Remember that marbles are choking hazards...so supervise.  :-)  1/4 teaspoon is about a perfect size for our marbles.  I simply cut the butterfly out of a bath mat.

Butterfly Blot Collage
Inspired by Ellie and Abbie
(Their process was a LOT different so check it out!)

Patterns were from www.childcareland.com.
Children were provided small precut butterflies to paint a design on and press.  Yes, we did something like this not too long ago, but decided we'd do it again since they always love this cause and effect activity.  Can't really see it in the picture but we only glued the center of the butterfly so the wings are up off the paper.

And a favorite picture for today...
She was even telling him, "Look, see this (period).  This is how you know it's the end of the sentence."  T. does very well for his age in many areas of development and it really is because he's been around these older kiddos.  Heaven help his kindergarten teacher!  Oh, wait, that just might be me!  :-P 

Thursday, April 19, 2012

Rainbows

Rainbow
Tune: I'm a Little Teapot
I'm a little rain cloud in the sky.
I can help make a rainbow if I try.
With a little rain and bright sunshine.
Out pops a rainbow oh so fine!
This is the little "puppet" that I have used for years with this song.  I'm pretty sure it was a Mailbox idea/printable. 

Q-tip Rainbows
ROY G. BIV
Our version of the ROY G. BIV guy that floats around the Internet.  :-)  The one that was most appealing to me really didn't seem like it used many skills so I created a miniature that incorporated color word recognition, noticing details in a face and drawing, and scissors.  With my older student, I gave her a complete box of crayons and encouraged her to find the color word that was the same on the hair.  This was a bit of a challenge but she was successful. This particular crayon box didn't have "indigo" though so we used blue-violet. 
You can download this simple pattern here if you wish.  Another variation you can do is use the precut construction paper rectangles like the others use but have the child practice writing the color words onto the strip.

We've used our ROY G. BIV guy is a visual all throughout the week.  Here's one activity we referred to him for.

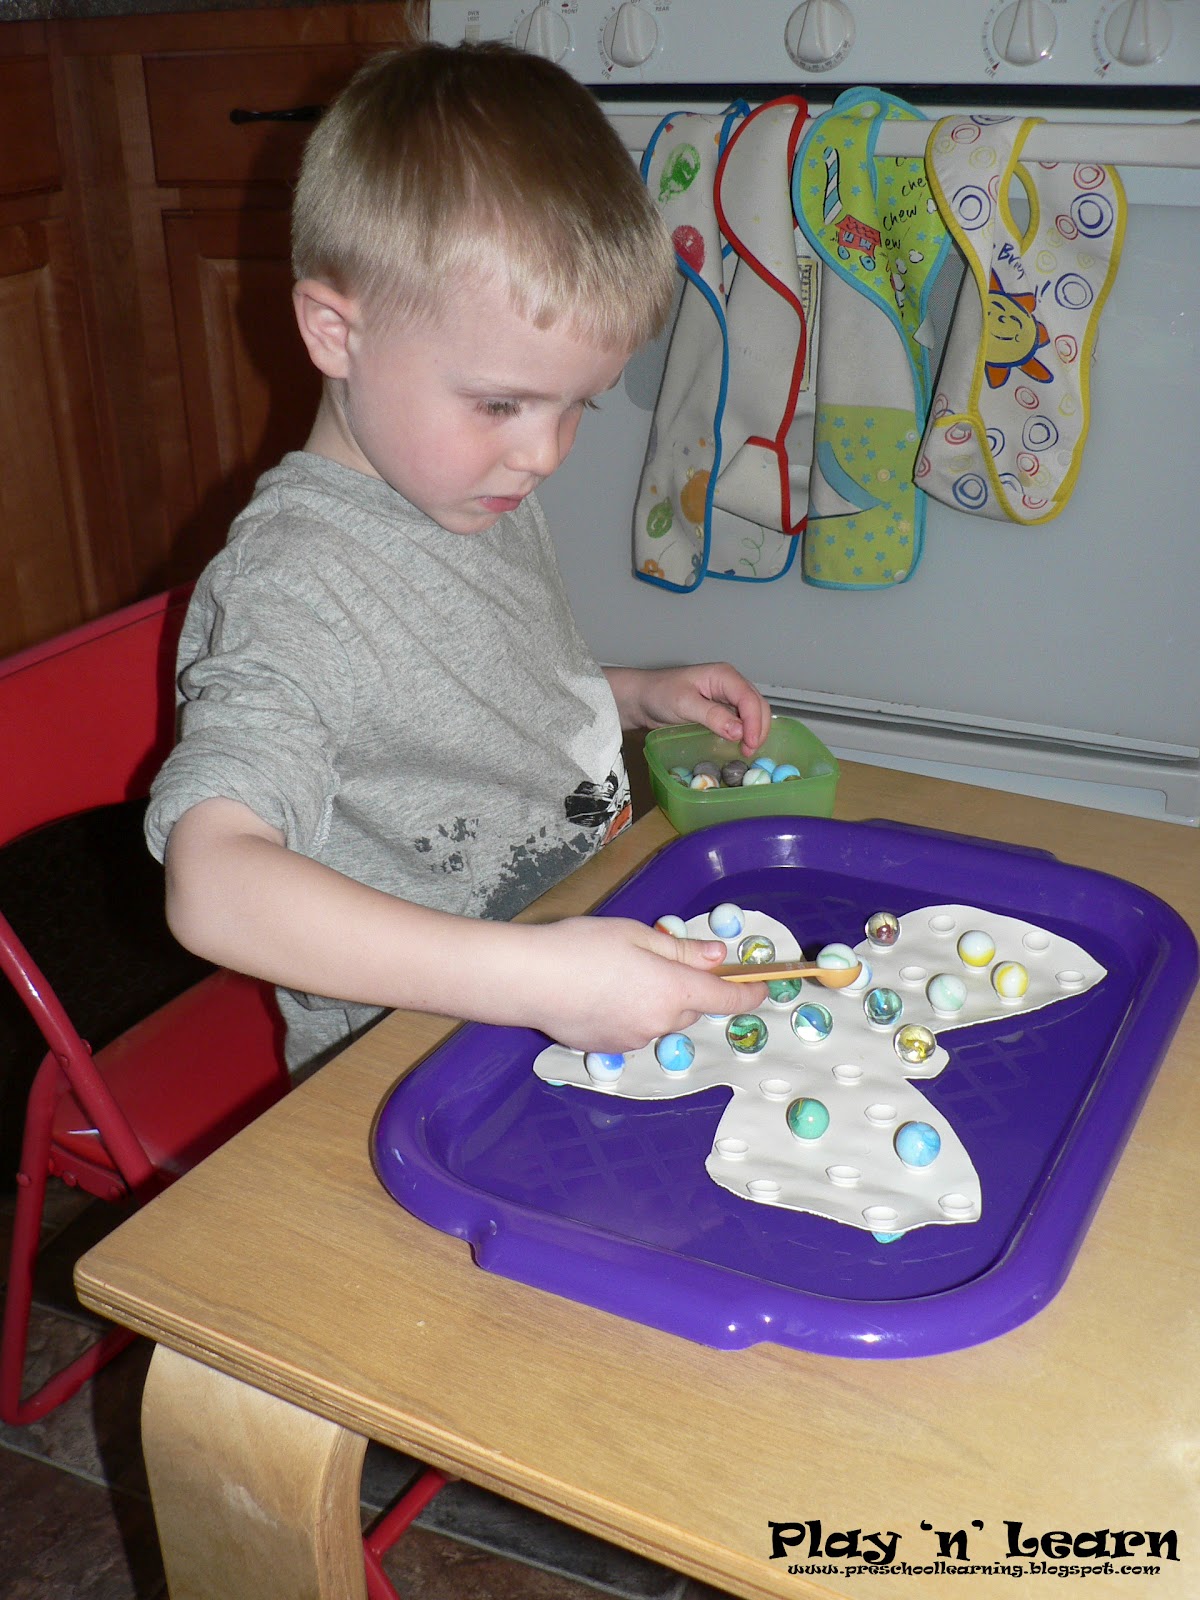
They enjoyed seeing these on the windowsill with the light shining through.  But these were for more than just for visual appreciation.  K. used her ROY G. BIV guy to decide which colors she needed to use to make each other.She first measured a 1/2 C. of gems into each glass. Then she poured water to the top of the gems and added 4 drops of coloring. So if she wanted orange she put 2 drops of red and 2 drops of yellow. We cheated on indigo and used purple food coloring but to make purple she did the blue and the red. Gave them a stir and within 10 minutes they were a nice color.  We did leave them in their glasses until later afternoon though.
This 16 oz container of clear Water Gems were from Meijer for $2.99.  Since then they've begun to carry 8oz containers at our local Dollar Tree for $1.00.    Then we used them for sensory exploration.
Well, what was difficult to see in the glass was the difference between violet and blue-violet.  But in the picture...obviously I mixed the two up.  LOL  Oh well, the children don't care and especially since we ended up dumping them into a pool.  Now they LOVED that...bouncing balls everywhere (contained in the pool).
Tip:  Water gems expand in size.  When these particular gems get too full they squish and break apart making a jelly substance.  So I've learned to keep watch for extra large ones and remove them from water to dry out a bit.  Also, since these gems take on what color the water is...that means they'll also turn the water whatever color the gems are after a long period of time.  (It immediately looks like make the water colored...but in reality, the water is clear for quite a bit if you check it out.)  So if you allow the children to play with these beads all together in any sort of water...expect the water to eventually turn brown and if you leave the gems in the brown water...well, they will turn brown too after quite a period of time.  You can turn these gems back clear.  It's quite a process but it's doable!  I soak them in clear water, changing the water frequently and checking for large gems that will turn to mush and removing them.  Takes awhile though!

Rainbow Ice
These didn't turn out exactly as I imagined.  But we can see the layers. I found that even when I added a lot of food coloring into the water, the coloring tended to pool to the center of the cube when it froze.  I'm sure there is some scientific reasoning there.  :-)  And of course, you are going to get the brown water when they start to melt.  The children do not mind at all and it's a good concept for them to understand!
 
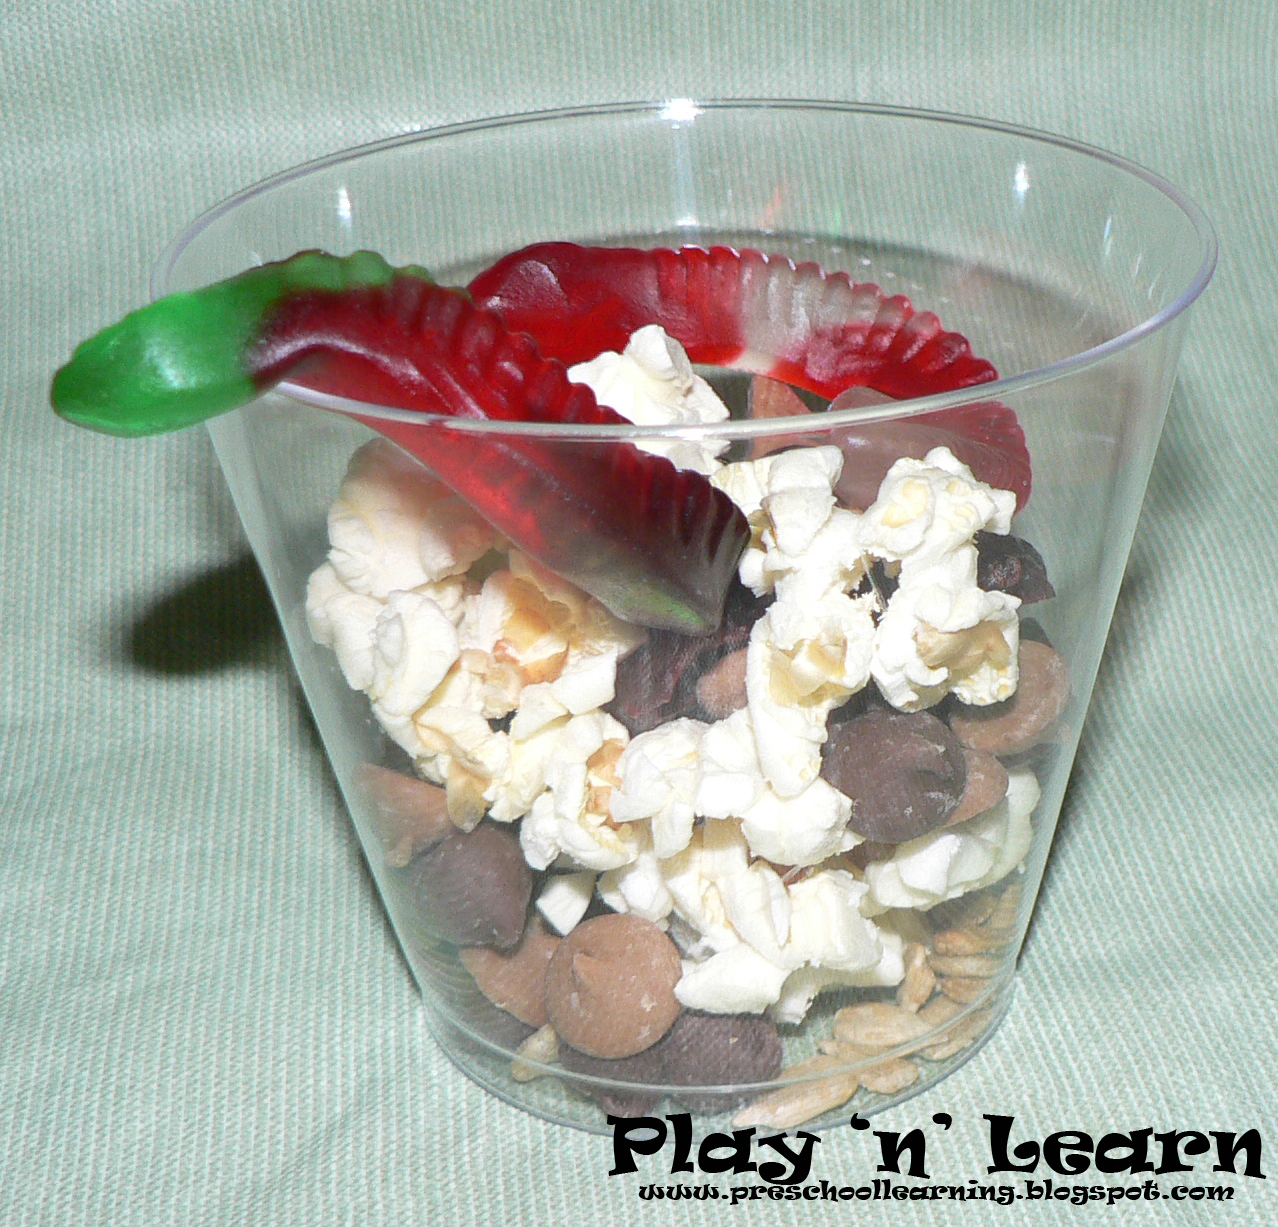
Rainbow Pudding Cups Rebus Recipe
I used the binder approach this time and yes, I like this idea.  I'm going to just collect my rebus recipes in a binder and then I can flip to the one I would like.  You can see how I set the binder up in the picture.
This week's rebus recipe definitely brought excitement!  I went back and another page to the document so that one of the recipes didn't use of the word "pudding" in the case I wanted to use something a bit more healthier...like plain or vanilla yogurt, next time.  I also took the tray off the 2nd step as our bowls were too big and it was easier to sanitize the table cloth and do it directly on the table.  Download your copy here.
They definitely aren't as "pretty" as some of the pics I've seen on the Internet but I'm going to guess that they were adult made for the sake of the picture.  :-P  Expect that they'll turn purplish brown as they just can't resist stirring.  LOL  One kiddos said, "It looks like chocolate pudding now!" And though pudding is not a favorite snack around here, it was definitely worth the process.

Rainbow Sponge Painting
Inspired by Teach Preschool.
What a neat concept.  Didn't work out exactly as I thought it would but I would definitely do this again with a few tweaks.  One issue we had was that the sponges (I ended up getting several different types out for the kiddos to explore with) just wouldn't rub smoothly across the paper.  Perhaps they just didn't have enough paint on their sponge.  But boy!  I sure would have loved to have had a large piece of pexiglass for this project.  It would have been so cool to do this outside on a standup transparent easel!  We might try the sliding glass door sometimes when I work up my courage.  :-)  But if they get enough paint on their sponge and close enough together they can see how the colors mix.  :-P

Finger Painting
We love this finger paint paper!  You can get it from Amazon.com.  It's called Scratch-Art Multicolor Finger Paint Paper.  I'm pretty sure I got mine from Discount School Supply but that was awhile ago and it doen't look like they sell it there anymore.  The rainbow was done at the very end of their exploration, when they were all done painting.  I had a binder up with the word in upper and lowercase for them to refer too.

Pasta Rainbows

How to Make a Liquid Rainbow by Lori Shores
This book gives step by step instructions on how to make the rainbow.  I wouldn't say that my preschoolers were all that interested but my school-age boys were!
Ha!  I have more pictures and things to share but this is ending up to be a very long post!  Maybe I'll just share one more literacy activity.

Rainbow Rhyming
These were old rhyming rainbows I found in a tub.  How I know they are old?  Obviously it was before the day of a scanner here in this household since the clip art was cut and pasted onto the rainbow before they were laminated.  And I also know because now I would have left one cloud empty so they could put the rhyming answer on the other cloud.  :-)  But this is how I used these cards with my oldest student who does well with rhyming.  She's doing more spelling/writing now and so together we worked with spelling one of the words.  During this process we could informally talk about how vowels and blends make their different sounds.  Then she pushed the beginning sound of one word and added the beginning sound of the rhyming word.  This was a great visual for her about what rhyming is.  I only used my rhyming word sets that were in the same word family though.  Otherwise it would defeat the purpose of helping her understand that it's the beginning part of the word that changes, not the ending.  :-)