Showing posts with label numeral formation. Show all posts

Monday, January 16, 2012

M is for Magnets!

A fun morning full of magnet-ificent activities!   :-)
Using words from our reading lessons....
I printed sight words plus a few others that we've learned in our lessons from the book Teach Your Child To Read in 100 Easy Lessons by Siegfried Englemann onto paper and cut out using the word configuration concept.  K. chose one, read the word (this is a great review because she is seeing the word how it looks in reality vs. having the sound dots and other visuals to give her a clue on how to sound out the word), created it with Magnetix and read it again.  We are going to do a couple each afternoon this week.  Building things out of manipulatives is not something she naturally chooses during free play and etc so this is very good practice for her. 


Magnetic Marble Painting
Well, this was on our plans but we'll do it tomorrow afternoon as we had an hour out of our afternoon due to realtors here and then K.'s ride came about 50 minutes early.  So didn't get to the magnetic marble painting.  But...marble painting is always a hit around here with all ages.  An "oldie" that is always a favorite.  So we'll just vary it a little and use our magentic marbles and a magnetic wand to move it around on the tray.  :-)


Magnetic Number Memory

This was nice for T. (2.5yrs) also.  (Excuse the backwards three...we did notice it and corrected it!)  We talked about the magnetic numerals as we put them on the tray.  Then I removed one and K. guess which one was missing.  We also reviewed our numeral formation verse with each number writing the numeral in our sand tray before moving on and we also manipulated the numerals to make larger numbers 10-20. 

Found a Letter!
This was such a simple activity but she told me it was her favorite of the morning activities.  :-)  Anytime I add a song...it's a point of interest.

I placed magnetic letters inside of our sensory tub and encouraged K. to find them and put them in alphabetical order.  I did have the alphabet tray for her to use as a clue when she needed it.  The little song that we sang reviewed the letters sound also and went like...
Tune:  The Farmer in the Dell
You found the letter (B), you found the letter (B)
/b/ /b/ the letter (B)
You found the letter (B).
Obviously a very simple to remember song that they learn very quickly.  I like to reinforce the letter sound in that second verse.  After we sang the ABC and ABC sound song and reviewed our vowels. 

Magnadoodle:
Another simple way to reinforce number formation and counting.

Magnetic Foam Tower
I've had strips of foam that I purchased quite awhile ago and beyond using them for scissor snipping and collages I really hadn't used them for anything else.  Well, they are a perfect size for my magnetic strips so I simple created a set of strips for the children to explore with.  (Seriation, counting, patterning, etc)

Another way to make a tower.  Those two colors together appealed to her.  :-)

We also created a little book out of Mailbox publication, I Can Make It, I Can Read It: Science titled Margie Magnet.  Booklets make great scissors activities and a booklet like this helps conversation lead to the workings of the material you are working with...so in this case...magnets!
The little black rectangles are magnet strips so the hands can "attract".
We did a series of "tests" about what attracted and what didn't.
All in all...a profitable morning.  :-)

(Sometimes I wonder about this blog...I get it to how I want it and click on post...because I can't preview first for whatever the reason...and pictures and text are moved and spacing and font is different.  Weird.  Anyone else have this issue?)


Friday, October 28, 2011

R is for...

R is for Rainbow!

Well, we didn't get to everything this week due to illness but...that's the way it goes.  Glad it landed in our "R" week since R is a familiar letter. 

Rainbow Bottles
All age groups love this type of activity.  One year my bro-in-law had a large trash bag full of transparent bottles and I took them into my school-age program and they loved them!  Those bottles didn't have lids so we stuck clay on the top and turned them into creatures.  Such fun!  Today we simply created rainbow bottles.  It was a RoseArt kit.  But you don't have to buy a kit.  Use recycled containers and if you don't want to purchase colored sand, you can always color salt.  Great fine motor! 

Rainbow R
This ended up being a two day project.  The initial gluing on of strips allowed for us to talk about the actual colors of the rainbow and introduce/reinforce ROY G. BIV.  This was just a fun tidbit...not something I expect them to remember and as you can see, she chose not to put the color strips in order and that's okay also.  Actually, I see a pattern and I'm betting she probably would have completed that pattern if there were more of those colors.  :-)  We let it dry completely and then traced the letter R on the back for her to cut out.  A little harder than we expected, having to go through the second layer of paper but she did it!

Alphabet Rainbow
Came across that cute alphabet rainbow at Sparklebox and decided to use it with a sensory tub activity.  Hid colorful magnetic letters in a tub of sand.  She found them and as she did trace that upper case letter.  She then put it on the magnetic dry-erase board where she thought the letter would go, using her alphabet rainbow as a guide.  I did not plan to use lower case letters as Sparklebox's font isn't what I teach so...she's welcome to trace those at home (and I encouraged her to look for those letters at home) but I didn't include that in our activity.  I chose to use this as an informal evaluation of how she was forming the letters.  I was glad to see that the letters that we have "taught" were formed just as I taught them.  The others weren't, but that's fine.  We'll get there! 

Rainbow Numeral Formation:
Not exactly what I had initially thought to do, but it worked out just fine.  I added other colors in there besides just ROY G BIV as I wanted to review those also.  She placed the numeral cards in order 0-9 and then used mancala beads to make that number on the felt.

Exploring with Rocks
Not really a "rainbow" activity but something I wanted to do this week.  I did add rainbow colored magnets to be used with weighing rocks and a rainbow tablet with a rainbow set of markers for documentation if they wished.  Anyway, these rocks we picked up at Lake Huron.  My eldest chose most of them.  I encouraged them to pick them out of the lake instead of off the shore because then we could see how colorful or what cool design was on the rock when we used water during our exploration.  Found some neat ones!

While on the rock topic...Story Rocks
An idea I've seen many places but the most recently was at TeachPreschool.
I actually created these myself placing the modgepodge on like my kiddos would just to see what would happen.  I plan for them to create their own in the near future.  For this set I used all /r/ beginning sound words.  Great stories came from it! Simply glob some modgepodge onto the rock, place the picture on top and modgepodge over top of that again.  Simple.  FYI:  these were polished rocks from a dollar store.

Sewing R
Plastic canvas is perfect for beginner sewers.  I use yarn needles and tie the thread at the eye.  This does not work with yarn (makes it too thick to pull through) but is perfect for embroidery thread.  Then we have less of an issue of the needle coming off the end.  I made three bundles of thread to start with... ROY     G       BIV.  Looked neat.  Then she'll be welcome to use any colors she wants when those are done.  This is an activity we keep out for awhile and work on it as interest lasts.


Tuesday, October 25, 2011

R is for...

R is for rockets!

But before I get into that maybe I'll mention we had so many bouts of laughter today.  Such a joy!  We kind of switched things up and went with the the flow.  I feel there needs to be a pretty good routine in place but I also believe that, especially at the preschool level, we need to just let some things go in order to enjoy the process of things a little more.  It also teaches them to be flexible.  But I only suggest doing this after you have a good routine in place so that you can get right back into the routine because really, without the routine, we wouldn't get half as much done!  And the children's behavior wouldn't be all that becoming.  :-)   But anyway...had two great trainings last week.  One was an online training regarding children's imagination and the other was about laughter being the greatest medicine.  I find that most trainings that are offered, ones that I can afford and are nearby anyway, are usually just reviews and it use to "get to me".  I'm taking time out of my busy schedule to do training only to really not learn anything.  But...on the plus side...they are usually are great reviews.  I think we need that too.  And, though I really didn't learn anything new at the last two trainings, they did make me do some self-evaluation and realized that I'm getting too stuffy in my old age.  :-)  Letting personal stuff get in the way of my teaching and my ability to laugh.  So...excellent trainings!  When we can smile/laugh...it's such a stress reliever, child and adult alike!  We were in the middle of one of our biggest laughs today and we pretty much had tears coming to our eyes and one say, "Ms. Amber...I so love you."   Then the other pipes up..."I DO TOO!"  Aw, made my heart melt.  Almost brought real tears!  LOL  But the point is...we must laugh!  One thought passed on at the training was that laughter is JUST as important as fresh air and good food.  Wow!  There some food for thought!

Anyway....
R is for Rockets!
Our book for the day. 

Art:  Rocket In Universe
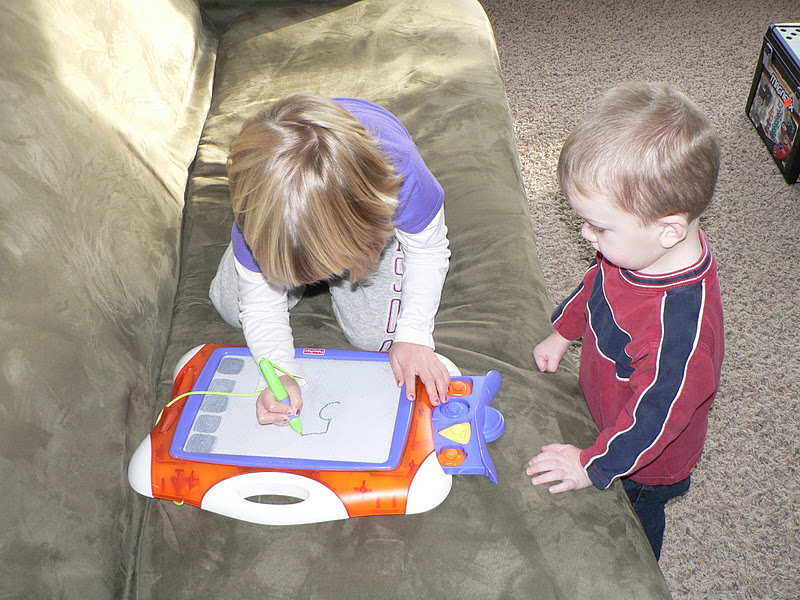
We definitely enjoyed the process of this project.  Often we are doing our activities separately.  The main reasons are because then I can provide more individualization and do more activities in a smaller space.  But working together has such benefits and so I try to slip that in as often as possible.  Conversations are great when they are sitting next to each other doing something similar.  Actually, today, I set up the kitchen like I normally do and as we got close to that time I decided...hmmm, let's do this all together today.  And we did most of our work on the floor!  A lot more space there. 
You can see the corner of the computer in the picture.  CMU Child Development Lab have computers available for their preschoolers but...they are used for research vs. any games the children might play.  I use mine for both.  I actually have a "children's" computer for games.  Can't get the Internet to work on that one so end up using the lap top for research.  Screen time is kept to a minimum here though.  I figure they get more than enough at home and even at school.  So today, we used our computer as a research tool.  Google images (be careful what you google and I strongly suggest that you google it first so you know what's going to pop up-even with "kid" things and if you are doing an impromptu search with them, if possible keep the screen toward you and only show it to the children when you have previewed it.   Can you tell I'm talking from experience?!)  Anyway, we searched "planets and kids".  I had already searched "universe" and wasn't pleased with the outcome so switched to something more specific.  One child pointed to Earth right away to say, "Hey, that's where we live...it looks like our globe."  We have a globe on the end table that we refer to quite a bit.  So, yeah!  That was exciting.  We talked about how they all looked like circles/spheres but were different in color and size.  Talked about stars, meteor showers and other simple thoughts about the universe.  Then I gave them oil pastels to create their planets (and Diego, for one child LOL).  They then painted over with watered down black paint.  Added their rocket.  Interesting that they put the rocket in practically the same place.  That happens more often when doing art side by side then when they are doing art on their own.  Then added stars if they wanted.  They were "gummed" stars but it didn't work well.  So we ended up gluing and in my opinion, that didn't work well either since the edges curled up for whatever the reason but they didn't mind so I kept my mouth shut.  :-D  
 
We are doing a similar project this afternoon with the school-agers.  Will try it on cardboard since the paper seems so thin.  We'll be making our rockets out of cardstock shapes also.  I'll share them when we complete the projects.  It'll be at least a 2 day project, I imagine.

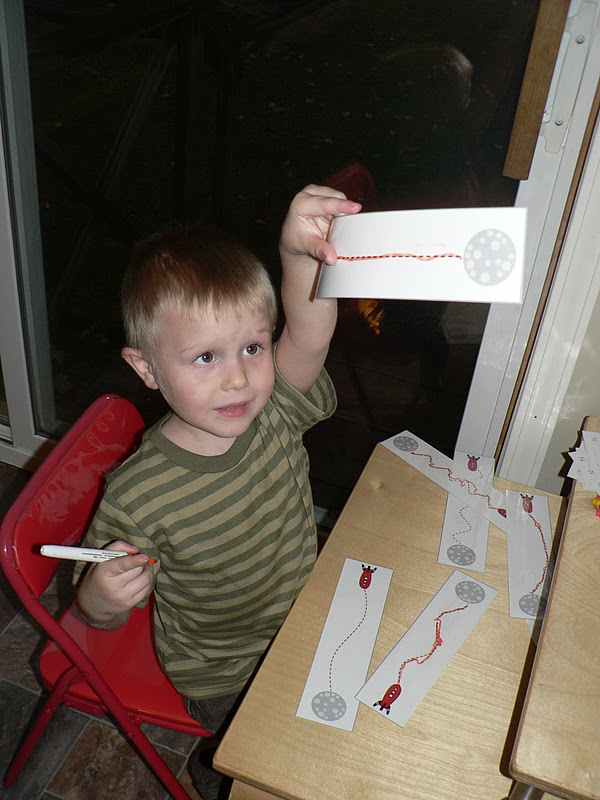
Fine motor and Phonological Awareness Activities
Cute little packet.  The next few activities are from HomeSchool Creations.  Quite a few things in it that we didn't use...so check it out. Might be perfect for your kiddos or might be able to be used as a jumping board.
They put the "starburst" on the correct beginning sound of the vocabulary cards.  And I had laminated the writing cards...Rocket to the moon!...so dry erase marker works great for that.  Great prewriting skill activities!  I'm glad to see more and more of these available.  At one time I created them myself but now its a more commonplace to see/find. I wish that they used hollow lines though instead of dotted lines to trace, but that's a personal opinion!  Beggars can't be choosers and their printables make my busy life easier.  :-)

10, 9, 8, 7 6, 5, 4, 3, 2, 1 BLAST OFF!
  
The number and rocket cards were from the Astronaut Preschool Pack, mentioned above.  Her suggestion was to punch a hole at the bottom of the number cards and add links.  That's an idea.  :-)  I didn't know where my links were and really wanted to do the rocket below it (Mailbox) for a scissors skill activity.  So I used the cards this way.  First, we put them in order from 10-1.  That's hard for a lot of preschool children.  It also gave me a good idea of where they were at with number recognition.  No, this isn't the font I use but I strongly believe in using multiple fonts for various activities so that the children can recognize them interchangeably.  So after we put them in order, I had the children start cutting out their rocket and adding their astronaut.  One child drew a picture of the other child and said she was mad because "it ran out of gas".  Oooh!  That WOULD be a problem!  LOL  Then he added himself in there later.  Anyway, since they are at different skill levels for scissors, this worked out perfectly.  I put one square of paper under each number (actually wrote our number 10 and 9 on the cards so they could see how we write them) and encouraged them to write each number on their square.  This was to help me see where they were regarding numeral formation, so no help from me-unless they specifically asked for it.  Great little scissors and math activity combined!  If it looks familiar, I believe I did this during our summer program.  I had put their actual picture in the window then.
 
Math: Rocket to the Moon
Seriation/Ordering by size.  This was also in that Astronaut Preschool Pack.
This was not a scissors activity so I cut them out ahead of time.  See their moons?  We had talked about them having craters so that is why both of them chose to have spots in their circles.  :-)  One chose to do theirs from smallest to biggest and the other from biggest to smallest.  This is a skill that requires practice.   Typical preschool standards expect ordering a set of three-big, medium, small.   With practice they can't get way beyond a set of three.  Just a little FYI there.  :-P  It just requires practice.  To save paper and such you could just laminate one set and use them over and over.  But since I have a small group, I like to do it this way so the parents know what we are doing.  We counted them, talked about the biggest/smallest, first/last, even/odd and so on.

Just for Fun!
Okay, well, this was an adult made rocket.  We do very few of these.  But I just knew that they would be a hit and I was right!  They flew all over creation!  I gave them the choice of colors and they decorated it but that was about it.  But dramatic play was at a high point when they were done with them! 
Instructions were from Enchanted Learning.  Not my favorite site (and no, I will never purchase a membership there) but this one was worthwhile.  :-)   It was raining and I knew we wouldn't get outside and they were flying their rockets through the universe so I opened up the doors to the "rest" of the house and they "flew" around (which they love to do...I don't do that often so it's always "special".)  Anyway...one child has had an issue with a lingering cold and after so much physical activity she was really starting to cough and getting red in the face so I encouraged her to find something calm to do for a little while and this is what happened....
Isn't that sweet?!  She has really taken to "reading to Trent".  I love it, he loves it, she loves it! 

Lovely day!  Hope yours was too!

Thursday, October 20, 2011

B is for...

B is for Butterfly!
(amongst other things)
Each Thurday we do an ABC Twiggles letter craft for the focus letter.  Thus, I usually use the paper craft as our theme for that day.  Never have I done butterflies this late in the year but you know what...it was a perfect cheery thing to do on this very dreary, rainy day!  :-) 

Some of the other planned activities that we did today....

Butterfly Numeral Formation
 Numeral recognition, counting and numeral formation.

Butterfly Mat w/ Playdough
One of the children in attendance today was sick when we did the playdough with the golf tees so I pulled those back out for him.   The pattern was a reproducible from The Mailbox.  I love this picture of T.!  So much learning takes place through observation and he's definitely watching the older child here.  :-)  Often, when I see this type of observation take place, it won't be long before T.'s back at whatever the other child was doing and trying it out, even if he had been there already.  Love it!  One benefit of a mixed age group.

Sensory: Bird Seed
I gave them a choice of /b/ sound sensory materials today and this is what they chose.  It's a nice material to work with and will go through funnels too (though they chose to use the paper towel tubes instead).

Melissa & Doug 
I chose the /b/ sound words to use today.  Only 4, just about perfect for timing and interest.  Loved hearing about the letters recognized and the realization that the words all started with b!

Roller Painting Butterflies
The process...
cut                                                        paint
                     fold and pat                     open and exclaim!  :-)
Repeat as often as desired!           
A little different process for toddlers.  We'll cut it into a butterfly shape after it's dry, if he wants too.

Oh, and this last one is just seasonal...I was going through the closet and seen that I had completely forgotten about having this wooden jack-o-lantern matching set, purchased from Oriental Trading.    This is a very large set so I only choose 10 pairs to work with.  Easy enough for the older child.  Really need just 3-5 for toddlers.  Before I put something like this on the shelf for free play, I like to "introduce" it first.

Monday, August 15, 2011

We Like Kites

Kites are such a fun theme to do with the kids.  There are so many different things to do.  If it's a nice day/week...going outside and flying kites (even as simple as plastic grocery bags with a yarn string) is such a fun way to get the kids moving. 

I decided to have C. read the book for the other children today.  This can be a great benefit for the younger children because then they realize it's not that far away when they'll be reading too!  Anyway, my only issue was that C. tends to talk talk talk and it tends to interfere with the flow of the book for the other children.  So I don't have him read aloud too many times for the other kids.  :-)

 I chose this book as we've been introducing/reviewing the silent e and of course kite was a good example.  For our "moveable letters activity"...we seem to be moving beyond just moving alphabet manipulatives lately but this type of activity can be done with "adding e" manipulative...we used some silent e word cards that I came across. 
I chose a few to use, being sure to include a, i, o, and u vowels and that the words actually were common enough that the children would understand.  Great CVC sounding out practice initially and then adding the e to reinforce the long vowel sound.  These would be relatively easy to make on your own with your own words and font, if you desired.

For a bit of movement today, one of the children asked if we could do the parachute again.  Together, before the final child arrived, we put alphabet kites up on the wall in alphabetical order. FYI: I often encourage the children to start near the end of their sequence to figure out the next letter instead of all the way at the beginning.  By the end of preschool/beginning of Kindergarten they should be able to do this and it's a time saver!  I do the same with counting.  Start at 10 to get to 15 instead of starting at 1 each time. 
 So we got the parachute out and I placed on several kite bows that had pictures on them.  This printable came from www.makinglearningfun.com.  They tried to keep them on the parachute as long as they could.  Then I instructed them to choose a certain amount of bows from the floor.  (We did 3 bows a piece at first-I had created bundles of bows to make the activity go smoothly).  Then they told me what letter the picture/word started with and placed it on the corresponding kite string.  After they got the idea we did two bundles and they picked six a piece.  Had a little fun with the tape.  :-)

For our numeral formation activity, we did the Kite Graphing Book found at www.confessionsofahomeschooler.blogspot.com.  I actually purchased the Letter of the Week "curriculum" from her as it took so long to download the items individually and she has some very nice printables to share.  Just want to take a moment to reiterate that one must be careful of the term "curriculum".  Many of the printable available should be labeled as curriculum support vs. leading people to believe that it's an actual curriculum.  My opinion, of course!  Her Letter of the Week Curriculum is really just the printables she used for her lesson planning for the specific letter they were focusing on. 
 I provided pointers because it makes counting a little more interesting and the bows were small enough that the pointers made it easier to count also.  I encouraged the children to x out the boxes...mainly to save time but also because the two younger ones needed practice forming x's.  That's not an easy letter to write...though it looks easy.  That crossing midline and backwards diagonal.

Art:  We talked about the different kites we have seen and the fact that not all are diamonds.  So, they made a kite collage, including white oil pastel clouds and washed with blue water color. 
 

Scissor/Word Family Activity. 
I printed a set for each child and on cardstock with the hope that they'll read and sort the cards at home for further practice.  However, you may wish to make one set and laminate.  You can do something similar as we did with the parachute.  Or you can hide the bows around the room.  Or put a paperclip on the bow and create a dowel/magnet "fishing" pole.  If you were planning on making/laminating one set, I would suggest you take the time to cut the bows out as well.  It would be more appealing to the eyes.  However, I knew that my students wouldn't have the time or the interest in cutting out all those bows!  So rectangles it was.  FYI:  on the website, they have many word families available for this activity.

Phonological Awareness: Beginning, middle, ending sounds
This went well and there are multiple things you could do with this simple kite mat.  As you can see in the picture, I used picture/word cards and a chip.  I purchased the cards awhile ago in the school section at Target.  I love them!  Now, they've gotten used quite a bit that a few of them are all coming apart at the perforated edges so we'll soon need to find a new use (maybe use them with our moveable letters!).  But they can fold to just show the picture and then open to check their work when we leave them all together.   Also, for younger students, consider using the mat to practice with sets of 3.  They can place a manipulative on each bow and count them, then set them aside.  You may wish to have small picture cards and do "which is different?" activity.  So maybe a banana on the first bow, a pear on the second and a dog on the third.  Encourage your child to tell you why the one they chose is different.  How about reinforcing rhyming?  Which picture doesn't rhyme?  Or which picture doesn't start with the same beginning/ending sound?  You can add bows to your string and do sequencing or patterning.  If you have time...have the children decorate their own kite.  Use your imagination...feel free to share other activities you can think of to use with this simple kite mat.

Here's one of the products I purchased from Discount School Supply this fall.  Already I love it!
Relatively durable/stable...which I could not say for others I looked at at the stores.  This one came with 10 trays.  The trays are not as durable as the previous ones I purchased but they'll do.  I decided to use it last night by arranging the materials for each activity on a separate tray from top to bottom.  That way I just took the stuff off the tray instead of it being piled on the floor or on the table/counter and so on.  And by the time we got to art we had emptied a few of the trays so I used it as a drying rack so no wet art on my counters as I'm trying to get ready for lunch.  Then instead of making umpteen trips to pile it all up to put away later...I just rolled the cart into the computer room.  :-)  I can see that it would be lovely for a homeschooling mom...especially if their child did well with a visual of when they they will be "all done". 

Today was a great start of the week....my only issue now is the doctor's office has been busy for over an hour (which this is NOT unusual...drives me bananas).  Need to make an appointment so I can get my child care renewal paperwork in.  Have a lovely week!