Thursday, May 19, 2011

Bugs: Butterflies II

So, finishing up our caterpillar/butterfly week.  Here are some of the things we did today.

Marbleized Butterflies
1.  Child cut out the butterfly.  Reinforcing the term symmetrical.
2.  Child spread shaving cream onto tray.  I chose to review basic shapes, letters, and numbers as I was put the shaving cream on the tray.
3.  Child used straws (and one ended up with eyedropper) in liquid watercolor to dribble onto the shaving cream.
4.  Child swirled the paint into the shaving cream with craft sticks.
5.  We gently pressed the butterfly paper onto the top of the shaving cream.
6.  I scraped off the remaining shaving cream and then wiped clean with paper towel.
BEAUTIFUL!  They repeated to make prints on paper.  We haven't decided quite what we'll do with them yet.  They dried very quickly :-) but they'll need to be put under something heavy (ie: books) to flatten out the curled up edges before we work with them.  Next time I might try cardstock.
Side notes: 
*  This was messy!  Well, we live and learn.  We found out that really, eyedroppers/straws don't work well when your fingers are covered in shaving cream so we ended up with the instruction that they were welcome to explore the shaving cream with their fingers AFTER they were done printing.  I'll definitely do it again though!  Though messy...it cleans up relatively easy.
*  Straws work for children with great fine motor skills.  For those that do not have great fine motor skills, use eye droppers.  I couldn't find all my eye droppers, for some reason, so decided on the straws thinking they could do it but the one child could not do it without much frustration so I gave him the one eye dropper I could find and said it didn't matter if he mixed the colors.  He definitely had an interesting gray brown when he was done.  :-)

Oh, by the way, I have a bowlful of shaving cream in my fridge.  :-P  One child suggested it and went on to predict (even saying "I predict...") what he thought would happen if we left it in the fridge for a certain amount of time.  So we did, and really, there wasn't much change :-) so it's still in there.  We'll check it after nap again.  Please encourage their curiosity!

Butterfly Sewing Card
This particular pattern was from www.kidssoup.com but they can easily be made without a pattern.  Remember that old greeting cards work well for "sewing".  Use cardstock or cardboard as construction paper can rip easily.  Today I encouraged them to go from hole to hole in order.  There have been times where I'll write the numerals on the back of the pattern just to reinforce number recognition, counting, and numerical order. 

Clothespin Word Spelling
I chose only three of the bugs from the set or they'd be there all day and become uninterested.  I chose a small, medium, and large word and we sorted by size and word chunks first.  I placed all the clothespins, in random order, with letters up in a single layer on the tray.  I heard sounds and names of the letters as they were working here.  Actually it looks like I snapped this picture at the right time.  If I remember correctly she had found the letter p and was saying /p/ /p/.  The 4 year old put the letters on randomly the 5 year old went from left to right finding each letter in a row.  Shows where they are in their development.  Clothespin activities are great for fine motor!  Slip them in when you can!

Butterfly Counting Cards
I placed the cards in our dollar store butterfly napkin holder.  They randomly chose eight cards to work with.  This is a good way to introduce something and then if possible, leave it out so they can work on the rest of them if they desire.  I believe the little butterfly erasers that they used to mark the answer were another dollar store find.  I used this more for number recognition.  Best to do that type of activity randomly as otherwise they are just orally counting and guessing what the number is.  I also included higher numbers as a bit of a challenge for the older ones.  My 3 year old student was sick today.  :-(  But I would have only put numbers 1-5 plus three larger numbers as he's still working with those particular numbers.

Skip Counting "Extra" for the 5 year old
We've been skip counting by 10s with him to help him get the counting patterns.  Really, making charts 1-10 is really just redundant for him and not interesting so I thought I'd give him a little challenge.  :-)  I had set it up for up to 20 but took it back apart as it was still a bit too much for him to get.  Sometimes we do these charts as a hands-on...like yesterday's bow tie pasta number chart.  He asked me, "I get to take this home, right?"  :-)  So I'm going to take this as a positive...that he enjoyed this little bit of a challenge.  This activity was from a Mailbox publication.

What's this have to do with caterpillars/butterflies/bugs?  Nothing.  Other then one was using the magnetic balls and said, "Look!  I made a caterpillar...no, it's a snake."  :-)  But this child asked specifically for the magnets today.  One thing that is hard for me, with being home-based, in my main living area, with mixed age groups is that I can't leave a lot of the stuff out.  My personal belief is that children should have interest centers and many types of materials should be available for them to explore on their own.  But we really can't do that here.  Maybe someday I'll have a program where I WILL be able to do it that way.  :-) So in the meantime, I encourage them to tell me what they'd like to do and when they do I try my best to allow for it, if not on that day, then as soon as possible.

Wednesday, May 18, 2011

Bugs: Butterflies

Small group today...wasn't quite sure how to handle myself.  :-)  Only 2 preschool students and 1 child younger then preschool age.  It sure was fun though!  It was drizzly out and they wanted to start kitchen time early so we did and spent a LONG time with our work. Was so interesting to observe them and listen to their conversations!  If you don't take the time to do that regularily, please do.  I know it's not always the most natural thing to do but listening to them will tell you a lot about their development, interests and even the things that might be bothering them.  

So, I wore cream top and cream colored skirt today because we weren't "really" painting.  LOL  I should have known better.  I was splattered and smeared with paint by the time the morning was over.  They really got into this project...one I've done variations of many times a year.  They never tire of it!  Here's some of them.  My only limit was, "when the paint gone, it's gone."  They didn't use it all up but most of it.  So then I filled them back up for the next kiddo. 
Butterfly Blots
Aren't they cool?!
We used "nancy bottles" which you can get from http://www.discountschoolsupply.com/.  These are a nice size for little hands.  Squeezing the paint out of them is a great hand strengthener also.  We used primary colors plus white. The difference between the 3 and 4 year old's exploration was that the 3 year old put paint everywhere on the paper in random spots and designs.  The 4 year old planned what she was doing.  The 3 year old also enjoyed the pressing down of the paper...."It's squishy!".  The 4 year old wasn't too sure about it and wanted me to do it.  Though I always encourage them to do it because it's "their work" so she did until it squished out the sides of the paper.  :-) 


Here's a little song we've been singing.  I had a couple copies of the booklet in my tub but they aren't all that clear and I wonder if they've been copied over and over.  I was thinking I got it off of Dr. Jean's website but I didn't see it on there.  So if anyone knows where I can find a little booklet that goes with this song, I'd love to have the original.   


The Butterfly
Tune:  Up on the Housetop
First comes the butterfly who lays an egg.
Out comes a caterpillar with many legs.
Oh, see the caterpillar spin and spin.
A little chrysalis to sleep in.
Oh! Oh! Oh!
Look and see!
Oh! Oh! Oh!
Look and see!
Out of the chrysalis, my, oh my!
Out comes a beautiful butterfly!

Clothespin Butterflies
Awhle ago I put out a request for scrap material and a couple people in the area supplied me with lovely material.  We use it for various projects.  This is a great fine motor/sensory activity we've done with the materials.  I had cut rectangles and squares out of the material to provide a large variety of color, design and texture.  Then they squish the material together in the center and added clothespins.  K. wanted to put them up on the wall (she must have remembered from a couple years ago!)  So she designed our butterfly wall art!  We've two of them now.
Butterfly and Caterpillar Sound Mats
These can be found at http://www.kidssoup.com/.  This is one site I actually pay a membership to.  It is very worth my while.  (Thanks, Lorrie, for introducing me to this site.)  Typically I would use this type of activity as "file folder" activities.  Laminate it and use them here during our program but I like to send these type of things home on occasion because if a parent doesn't see the types of things we do then they don't know we are doing them.  It also makes it easier for them to reinforce the concepts we are teaching.  Can be costly if you are printing them off for each child.  Perhaps they have a black and white version...they typically do!


Split Pin Butterfly
We did the caterpillar earlier in the week.  
The butterfly takes a little more effort and time...especially for the 4 year old who is very conscious of how her cutting looks.  It's exciting though to see my students become so capable with their cutting skills!  This little guy didn't really know how to hold a pair of scissors correctly, and was at the snip/fringe cutting stage.  Now?  He cut the wings out all by himself with minimal help (getting started is the hardest) and reminders of how to hold the scissors.  Daily scissors activities pay off, definitely!

Butterfly Number Chart
I love to use black paper as a background.  Makes the colors so bold looking.  The butterflies are just dyed bow tie pasta.  I use rubbing alcohol and food coloring in a resealable bag.  The longer you leave the pasta inside the bag the bolder the colors...just don't leave it so long that it gets gooey and sticks together.

Here's another simple visual discrimination activity.
 
Another one that's been around here for quite awhile.  I put Trent up to the table this morning and he just looked at it like, what on earth?!  So I picked one up and matched and then walked away to see what he'd do.  He picked up another and moved it from one to another saying "uttfly" but the butterfly never landed.  :-P  A little young yet but sometimes he does things that surprise me and so I was just curious of what he would do.  If it was just 3 butterflies he could probably have handled it but I think it was way to stimulating and, in turn, overwhelming for him.  Back to preschool students:  It's definitely beneficial to enourage them to describe the butterflies.  If they are unable to describe the butterflies then ask them questions like "where are the butterflies with stripes?"  This helps them notice and label patterns.  Boost that vocabulary! 

Tuesday, May 17, 2011

Bugs: Caterpillars II

Well, not quite sure how the "One Last Bug Activity" post got reposted for yesterday...but I must have clicked something.  :-)  Oh well, live and learn.  Yesterday's post was actually Bugs: Caterpillars.

I wanted to get in some syllable explorations again. http://www.kidssoup.com/ have word wall strips with a simple word and picture all within a theme.  They have a caterpillar/butterfly theme which I was going to use this morning but ended up using our bug vocabulary cards I made last year.  We'll do the word wall strips another time.  :-)  Just not enough time in a morning/week to get everything I'd like to do accomplished!  So, sorted by number of chunks.  This time we used our bug rhythm instruments instead of just clapping, definitely gets the excitement going for the activities that are repeated often.
The instruments were from Target's dollar section.  They have some really neat things but really aren't made for a lot of use like they get in our program.  We have higher quality rhythm instruments, made to last, but these themed ones definitely are enjoyed while they are here! The plastic tactile numbers are used in so many activities.  I love them!

Check out their faces!  Concentration on the left and ICK! on the right.  :-P
We created a texture caterpillar.  Children traced a cup to create circles and then spread glue inside and chose what materials to place on each circle.  Then they added details as they wished.  Tracing around cups make a great fine motor activity and requires them to have a bit of coordination.  :-)  I ended up helping the 3 year old.  The 4 year old wanted help with the first tracing but felt like she could do it on her own, and she did, and the 5 year old asked for no help at all. 

For math, I've seen this activity on various websites.  I was going to create my own mats but decided to use the ones available. They had rows with a number on the left and the children created a caterpillar with that many circles. So http://www.lessonsense.com/ and http://www.kidssoup.com/ are the two sites from which I got the printables from.  Children stated what the numeral was and used corks and stamp pads to create a caterpillar that had a corresponding number of body parts.  I did provide various size corks in order for the children to review size and have a bit of choice in the matter.  :-)  Site note:  My students haven't gotten to where they are by "just exploring", though that is a big portion of our program.  There has been instruction and there has been "have to's".  Some people might feel differently about having "have to's" in preschool.  I've been in programs who have had the attitude that they'll learn what they need just by exploring with the materials.  I've also been in programs who have a very nice "happy medium" going on.  That's what I strive for.  One thing I do to counteract the "have to's" is to provide extra materials so they can explore to their heart's content afterwards.  This type of activity especially.  The three year old is definitely more in the exploration stage so I had extra paper available and after I worked with him on his caterpillars, he printed with the corks on another paper to his heart's content.  He even verbally labeled it "Camel Prints"!  That was exciting...he's just starting to label his work on his own.  Anyway...I did remove the yellow and orange stamp pads.  Why?  Well, I know some who have the funding to replace stamp pads and etc as often as necessary, but I don't...so I'm a stickler about mixing the colors on a stamp pad.  My oldest student and my own boys know to wipe off their printing tools or stamps before switching to a new color (another function for the store brand "art" wipes.)  But at 3 and even some 4s, I can't really expect that.  So I remove the light colors so it's less noticeable when they "mix".  :-P
 
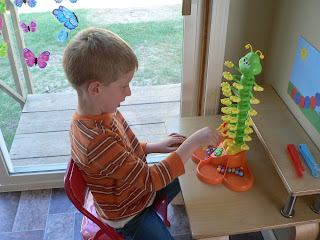
We also played Scatterpillar Scramble today.  We use it as a one person activity during our kitchen time.  They enjoy playing together also, but with the younger students, it works best to cut that competition piece right out.  It also encourages them to sort by color.   I encourage them to try to do it while it's wiggling but it's okay to stop it and work with it still also.  When we first got it, I even had a hard time getting them all on when it was wiggling! By the time they are 4.5+ they are getting pretty good, depending on past fine motor skill exposure.  Of course this game lets off a very contagious laugh at the beginning.  Makes for a very light hearted morning, that's for sure!

Daily scissors:  Children cut a leaf from construction paper and created a ...well, the suggestion was a caterpillar.  :-)  Side note:  I decided against "doing" The Very Hungry Caterpillar this year since I've done it every year for the past 6.  Taking a break...but it's an EXCELLENT book!  Great for sequencing, counting sets, days of the week, healthy/unhealthy foods, caterpillar to butterfly cycles and so on.  But it wouldn't be a caterpillar/butterfly week without at least reading Eric Carle's The Very Hungry Caterpillar.  Anyway, we brought that book back out to check out the leaves and how the caterpillar ate "right through".  Then then they tried to punched the leaf with a hole punch to make it look like their caterpillar was eating right through it.  It wasn't easy for them.  One child ended up using scissors because the hole puncher wasn't working just the way he wanted.  If you know of a brand of hole punches that actually work with preschoolers, I'd love to hear about them!  They had a choice of fingerprints, buttons, foamies, or pom poms to create their caterpillars.  One child had a really LONG caterpillar which went a few times around his leaf.  :-)  Another turned his buttons into a cocoon.  Love that they know that "it's their work" and I respect that.  Please encourage them to be creative and think on their own.  If you put them in public school, unfortunately...especially around here...they aren't going to get much experience/tolerance for that freedom.

Well, better stop for now and gather materials for tomorrow...we will be moving more into the focus of butterflies.  :-)  Oh yes, wanted to mention yesterday that we got on the conversation of bugs that are symmetrical. Butterflies are perfect insects to introduce/reinforce this concept.  Remember, never too early to introduce a topic! 


Monday, May 16, 2011

One last bug activity...

Time is short these next couple of days so I'll share one last bug activity we did today that turned out nicely.  I did this 1:1, and to get the most out of the activity, I suggest you do the same. 


And a close up of one of them...

*  Children chose the numbers they wanted instead of me choosing which numbers to use.  Mainly because all the numbers, with the exception of numeral one, need practice.
*  Equal, more, and less are math terms we use daily.  The older ones obviously grasp the concept, the 4 year old understood more but was challenged with coming up with a number less than.  Which, not surprisingly...she understands adding sets but has more difficulty with subtracting from a set.  Tends to go hand in hand.  :-)  The three year old needed help in both more and less but once we added in our fingers as manipulatives he was successful.    We kept it short and sweet for him and did only two numbers.  We did three numbers with the 4 year old and four numbers with the 5 year olds. 
*  Stickers easily make an activity theme related and adds a nice fine motor component.  You could have your child use stamps as a variation if you desired.  I know stickers can add some expense! 
*  When children are forming the numbers, encourage proper formation.  Either write the number on a scrap paper to show them or use tactile numbers to trace.  I always sing part of the number formation song as we write it.  Hand over hand is quite appropriate if need be. 
*  I did not suggest they do 1 more or 1 less.  Any number they gave me that was more/less was acceptable.  Allows for a little more "choice" in the activity.  If you are introducing or working with a number line you may wish to do just one more or one less.
* Reinforce that "none" equals zero.  At first I was disappointed when they chose the number one but it turned out well because we were able to reinforce the number zero.  The kiddos who haven't been with me as long as the others needed that reinforcement.
*  I did use the symbols for equal, more, and less.  Do I expect them to remember the more/less symbols?  Not really...but it helps with future learning.  It'll look familiar to them when they enter grade school and they begin to see those symbols.  The equal sign they all tend to remember because we use it so frequently and that will help with math facts and so on.
*  Something I may change in the future:  I may use a larger sheet so that there is room to write each  numeral in the boxes, especially for the older ones.  Get more number formation practice in. 
*  Something I'd keep the same:  I had folded the paper and then traced on the folds with crayon to easily mark each box.  That worked very well as a visual.


Bugs: Caterpillars

So this week we'll be focusing on caterpillars and butterflies.  Have some activities we didn't get to last week so will slip them in when we can. 


We started out working with our C number caterpillar, to reinforce the letter C (magic c line that is used in letter formation) as well as reinforce number recognition and order.  Then I made it clear that this was an activity they can use on their own.  (Laminated and used velcro dots.)
I made this when Aaron was about 2.5 years (he's 8 now) it's held up well. 


We also used the butterfly cycle from http://www.kidssoup.com/.  Actually, what was really neat was one child remembered another cycle (water cycle) and so we were singing our water cycle song too!  :-)  We also reinforce the shape oval today since the cycle was in an oval shape and so was our caterpillar pieces.
So the caterpillars are what we did during scissors today. They only cut the 4 oval body parts out as the antenna and legs would be a bit frustrating for all of them.  The printable is at http://www.sparklebox.co.uk/2481-2485/sb2485.html.
They call them split-pin minibeast characters and there is more then just the caterpillar.
Last week we did the 5 senses study about honey.  You can do this with most anything and it's a great way to review the five senses, take dictation, reinforce chart making and etc.

Pattern caterpillars
Though the patterns on the Kindergarten report card are ABAB, ABB, ABC and etc...anything that came home from school pretty much was encouraging an ABAB pattern. And that is what the old report cards were focusing on, ABAB.  Caleb did bring 1 or 2 items home that I could tell he had freedom to make his own because it wasn't ABAB.  :-)  He was past ABAB patterns at 3 years old...and that is what I find.  3 year olds, with experience, can grasp what an ABAB pattern is.  First you start out with physical patterning (clap, slap, clap, slap) then you move on to copying a pattern, then extending, then creating their own.  So my 3 year old today did that ABAB pattern (middle).  The 4 year old did an AABB pattern on her own (bottom) and the 5 year old did an ABCC pattern after I told her she could NOT do an ABAB pattern.  :-P  I love to hear my preschoolers tell me what kind of pattern it is!  Yes, they use ABAB or ABB terms.  :-P
I purchased a bunch of these chip and dip containers on clearance after halloween one year.  They are perfect for sorting activities but also for helping to instill an appreciation for organization.  I slipped in a little literacy by writing the color words, in corresponding colors, on tabs and sticking them on the plate where each of the colors were.   Knowing color words is not something they typically learn in preschool but they do fall under 'sight words' in Kindergarten so introduce it now!  It also helps reinforce that every word is made up with individual letters.  I often slip in chunking (syllable clapping) and beginning sounds with color words.

Art
Well, I changed my plans for today because my computer/work room was a disaster and could I find my lids for squish caterpillars, no way.  So, since we hadn't done free painting with brushes lately, I decided this was a good day to do that and wow!  Check out those butterflies and caterpillars! This is what happens when we do a theme...I really don't have to suggest anything.  The top is from the 5 year old, left bottom is a 4 year old and right bottom is the 3 year old who was exploring with color mixing (right on for his age).  I did have a fork available and I mentioned that forks make neat grass prints if they were interested...but left it at that since this was THEIR work.  Children should have many opportunities for "free painting".  :-)

We also pulled out the pattern blocks today to use with caterpillar and butterfly mats.  I have a set of pattern cards that I have purchased but PreKinders have free pattern block printables.  I print double sided, b/w on one side and colored on the other.  The colored side is much easier for the littler ones.  Remember to introduce/reinforce those nontraditional shapes, trapazoid, hexagon and diamond. 

Wednesday, May 11, 2011

Bugs II

A side note:  I heard a child say to another "I frustrated in you".  :-)  Brought a big smile to my face.  Teaching about feelings is very important.  Most of it is done informally, through conversation, helping a child through problem solving steps that include stating feelings, and being verbal and labeling what you yourself are feeling.  But there are some "emotions" activities you can do and that would be a good future blog.  :-)  Especially when we receive our new toys from amazon that is focused on feelings.  So, stay tuned!

Yesterday I spent much of my day in Lansing and then in Bay City in the evening as the parent rep for the QRIS project.  QRIS stands for Quality Rating Improvement System that the state of MI is in the process of implementing to boost quality in child care/preschools.  It was a very profitable day...helped me see a little of where they are going and how they are working together to create a feasible system for the various types of early childhood settings.  I'm excited!  Another parent focus group is Monday the 16th at the BAISD.  Please come if you are from this area.  Contact me for more information.

---------------------------------------------------------------------------------------------
So, onto BUGS!
Day number 2.

Maybe I'll break it up like I do when I lesson plan.  Please keep in mind that so much more is done then just these activities.  But planning like this helps me make sure that the children experience a little of everything every day.  Also, I would like to remind you that there is no reason to "recreate the wheel".  There are so many ideas out there...use them! 

Literacy:  Bb is for Bees (Mailbox)


I chose five "leapfrog" consonants to review recognition, sound and capital letter review.  F, D, P, R, B.   My 3 and 4 year old understand exactly what I mean when I say a "leapfrog letter".  They know, line down from top to bottom and leapfrog back up to the top of the line.  My newer child hasn't experienced this before so I really wanted to review them. It's so hard to break a habit!  Start young teaching them the correct way!!! Another thing I teach is to not pick up their pencil/writing tool/finger if not necessary to.   Another tip for the children is to start their letters at the top and their circles should be started top, off center just a wee bit to the right, drawing the circle to the left.  As you can see here, K. definitely knows how to form an R.  Someone who doesn't know the correct formation will do a circle at the top and two lines out on angles at the bottom, all done separately.  That's because it's how they see it.  Here we can see she did the leapfrog line and closed the circle in and made her leg without picking up her finger.  Excellent!  By the time she goes to school she'll have letter formation down pat!  The three year old also does very well with letter formation because he was just beginning to explore when he came to my program and so the correct habits are already in place.  Am I picky about letter formation?  You bet!  And I'm not going to apologize for it!   :-P  Tactile letters are excellent for helping a child learn how to form their letters.  My sandpaper alphabet set came from www.amazon.com for only $11.55 for both upper and lower case letters.

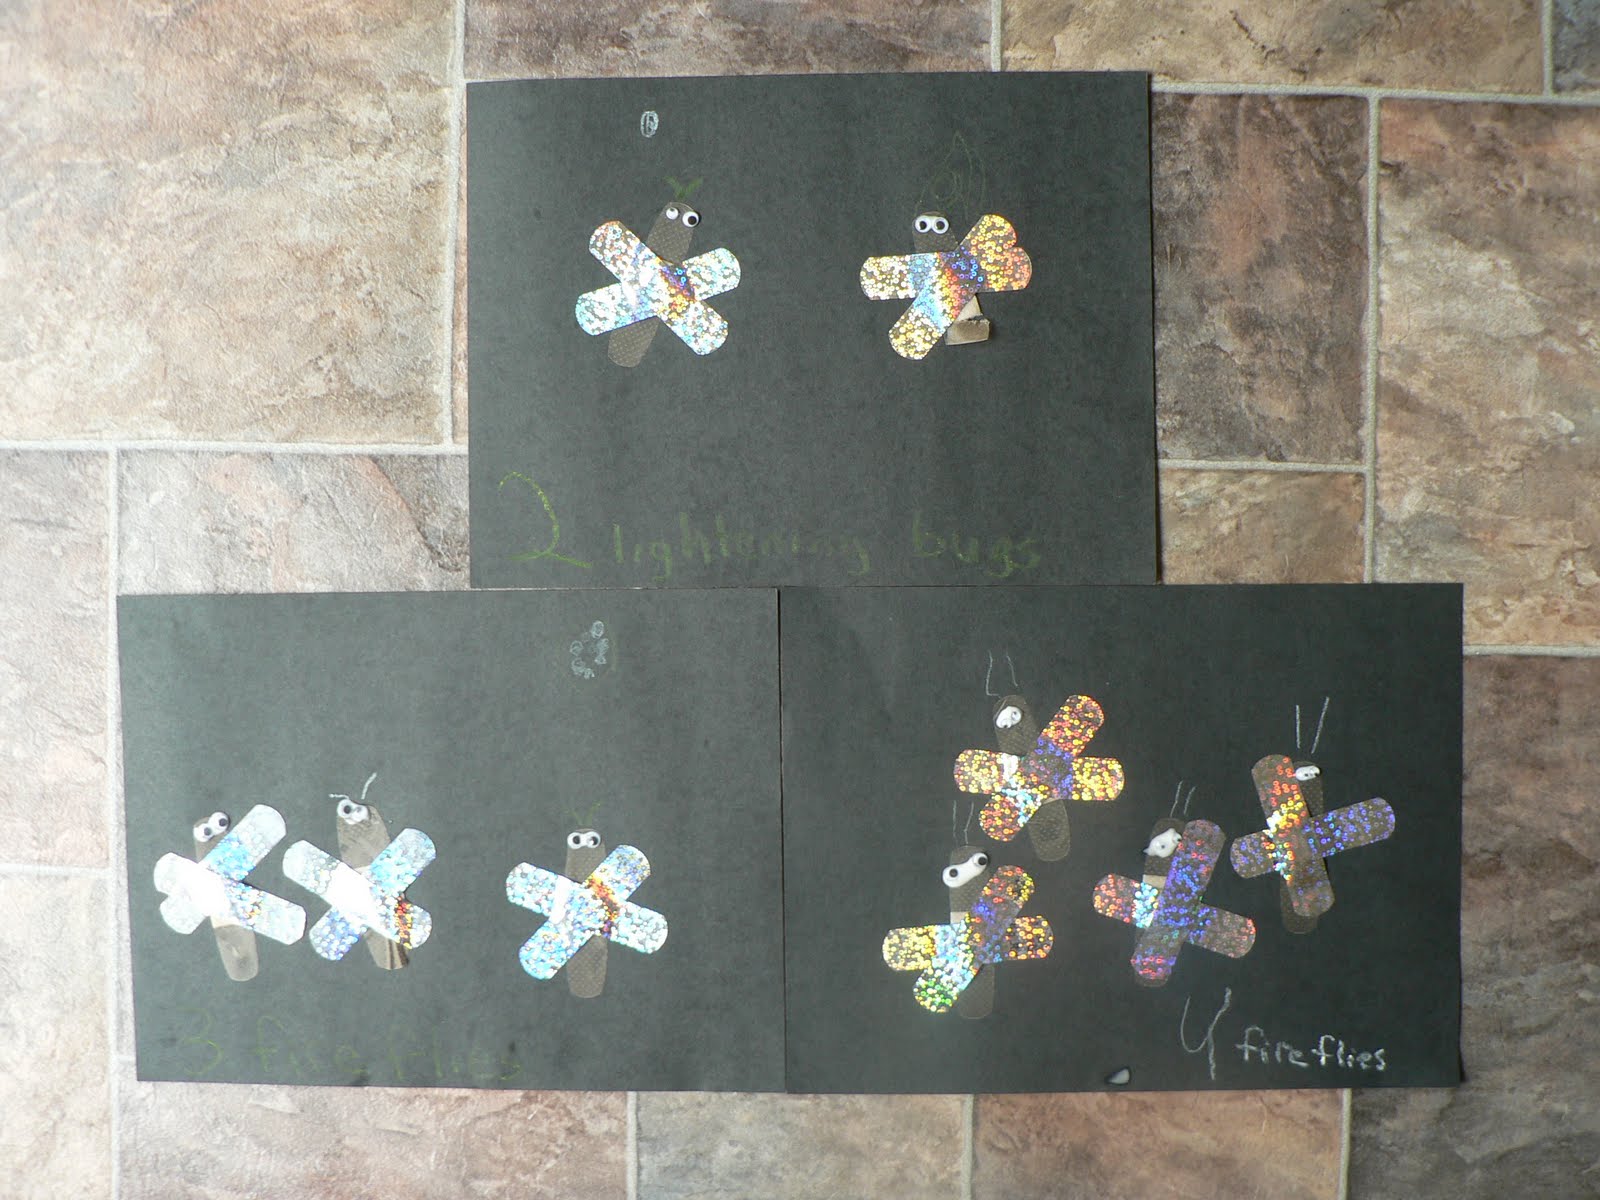
Fine Motor:  Band-Aid Lightening Bugs (www.notimeforflashcards.com)
There you have it.  :-P  We wrote the number of lightening bugs (or fire flies) at the bottom of the paper.  They did as many as they wanted.  Peeling the backing off of bandages without getting them the stick on itself takes a bit of fine motor.  Meijer was out of the neon bandages (which happen to be on sale) but they had sparkle ones...so they turned out pretty cute that way too.  We used regular brown ones for the body.

Scissors:  Where are the Bees? (Mailbox)
Here is the beehive.
Where are the bees?
Hidden away, so no one sees.
Here they come creeping, out of the hive.
1, 2, 3, 4, 5
Children cut out the hive and wrote the numbers across the bottom of the fingerplay words,which they glued to their hive.  Then they taped their hive onto the white paper and added and decorated 5 yellow fingerprints to make them bees.  They enjoyed this. (The little tab of yellow is just covering a name, is all.  We respect the wishes of families who do not wish to have their children's pictures or names posted.)

Math:  Ladybug Sorting/Matching (www.childcareland.com)
These were both very easy activities for my kiddos but I wanted a quick, hands on activity that I could observe for their assessments.  So size, color, and shape.

Sensory:  Bugs in Shaving Cream (Bugs are a set from Toys R Us.  Nice details!)
Wasn't exactly what I had planned today but because of time and energy last night...I went the easy route.  Next week we'll do goop and the bugs.  :-)  That's liquid starch and liquid glue. 

Art:  Flyswatter Flower Garden (OUTDOORS!!!)
Well, maybe it didn't turn into a beautiful garden but the process was fun!  The older child here actually got the hang of slapping the flyswatter down multiple times and so she had some beautiful flower prints.  The younger ones were into the effect of having a glob of paint and splatting it.  Speckled we were when we were done.  :-)  I might try it with my summer group if time allows and see what we can do with it.  We purchased the flower and butterfly flyswatters from Dollar Tree.  I have seen basic shape swatters at www.discountschoolsupply.com

And we even got a chance to eat lunch outside before it rained!  :-)  That was neat in itself though.  Watching the change of the sky, feeling the change in the wind and temperature...and the little scientists..."Ms. Amber, it's going to rain!"  :-)  "Notices and describes changes in natural environment".  Love it!  We haven't got the rain yet but...sooner then later probably.  Too bad the garden isn't in!


Monday, May 9, 2011

Bugs! :-P

For Mother's Day I received a color laser printer!!!!  THANK YOU DONNIE!  :-P  Now we won't have to worry about smearing our ink as much.  I'm so excited!!!


Oh, we had fun this morning.  :-)  They really got into the the "dramatics" of finding bugs   We had all sorts of squeals going on.  Makes for a fun sorting activity! 
I'm big on verbal language and really try to get children to describe, predict, "analyze" what they do.  One of our goals on our assessment is to be able to sort by at least one characteristic and then describe why they sorted that way.  The easiest characteristic to sort by is color and most of them can do that on their own but sometimes can't label that they are sorting by color.  After they are able to sort by one characteristic easily, we take it a step further.  These bugs from the Target dollar section are perfect for taking it a step further.   We can easily sort by color but then we can sort by type of bug within that color.  So we'll be doing that this week also.  (These are stretchy bugs...and though I can't put them in a wet sensory like I wanted to...they add their own sensory component.)

Buzzin' to the Beat
This was an idea from a Mailbox publication...and the patterns were from there also.  You could easily adapt any animal/theme.  I placed a large sheet of paper vertical on the wall for each child.  It went above their heads to the floor.  Just add a little variation to our typical horizontal, cooperative work.  They didn't spend a lot of time here but they sure got into it.  I'll be leaving it up throughout the day so if they want to go back to it they can.  I used a CD I created that had all fast classical music.  We got complete different reactions to the music.  It's so neat to see!

Bugs in the Flower Garden
This is a VERY simple activity but they really took to it!
  I was going to glue googly eyes on the pom poms but decided against it.  I thought they'd grab at the edge of the bug container...so we left them plain.  I used the dollar store plate as the "flower garden" and the children "caught" all the bugs.  Then as they put them back in the "garden" for the next child we counted them, talked about their color and size (big, medium, and small).  I'm sure this is one that will get left out also as they enjoyed it.  Wish I had space to leave activities out more often but...oh well, we work with what we have!

Since I blogged about puzzles recently, maybe I'll share one that we did together as a group.  This was an "inherited" puzzle set.  Not sure who I got it from but it's so nice.  Will need to look and see if they have something similar to it on Amazon or elsewhere.  I haven't seen anything like it lately.  If you are aware where I could purchase a set like this, please let me know!
Color review, logical thinking, and  turn taking.  The spinner added a nice component also.  Interesting to see who could actually "flick" the spinner.  We actually played this "game" after reading The Color Bugs reader from http://prekinders.com/bugs-theme/ (free printable).
When we read this book, we went from child to child and they told us what color the bug was and where the color word was in the sentence.  The 3-5 year olds repeated the color emphasizing the beginning sound for most of the words, all on their own.  One child had a black bug but the wings were a little blue.  So she said "blue" and I said, "Let's look at this word again."  She sounded it out!!!  Black!  Wow...what a big smile that caused for me and the child.  I laminated these pages and we used dry erase marker to underline the color word...if you choose to use this book you may wish to have your child underline the color with a corresponding crayon.  Provide a pointer and this book is perfect for a preschooler to practice "reading".  They are only 3 words and they are very predictable.  A color bug.  Having them "read" these books build confidence as well as reinforces some important literacy concepts such as left to write, letters make a word, words make sentences, etc.